Pages are a great way of boosting SEO on your site, helping people see you more easily when searching for words relating to your business. Use them to show off Blogs, Galleries, Products, Services and more, to engage visitors of your site.
Within this doc, you can find helpful information covering Pages, such as:
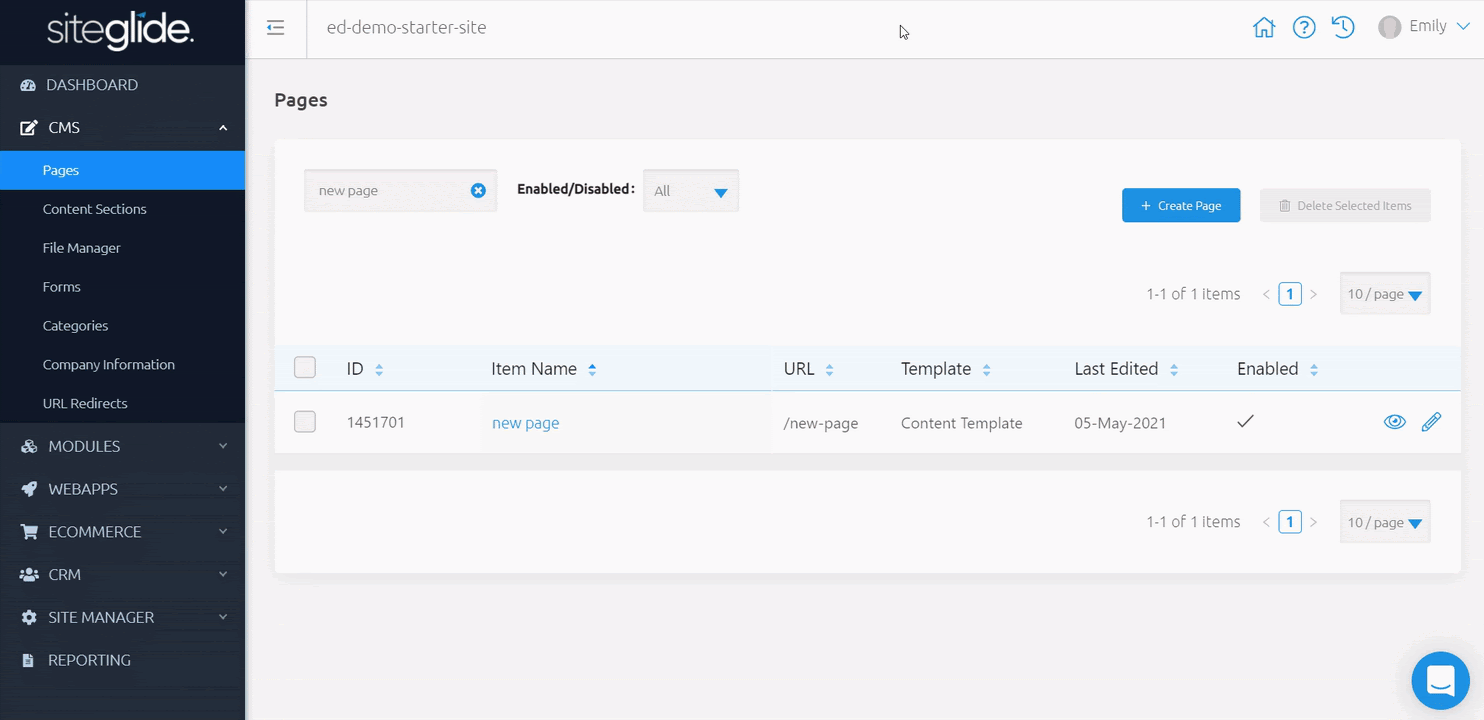
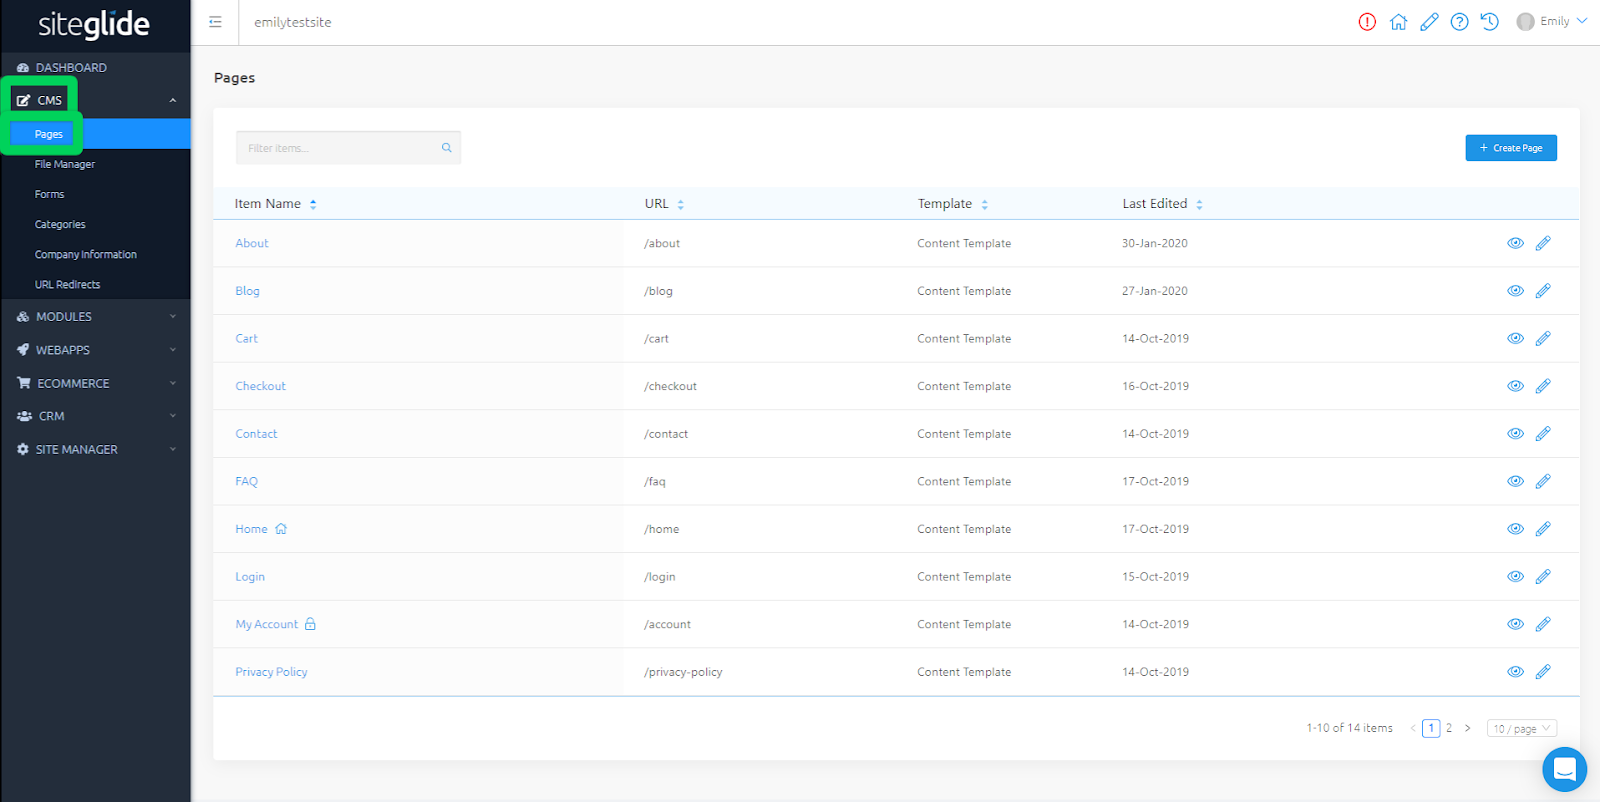
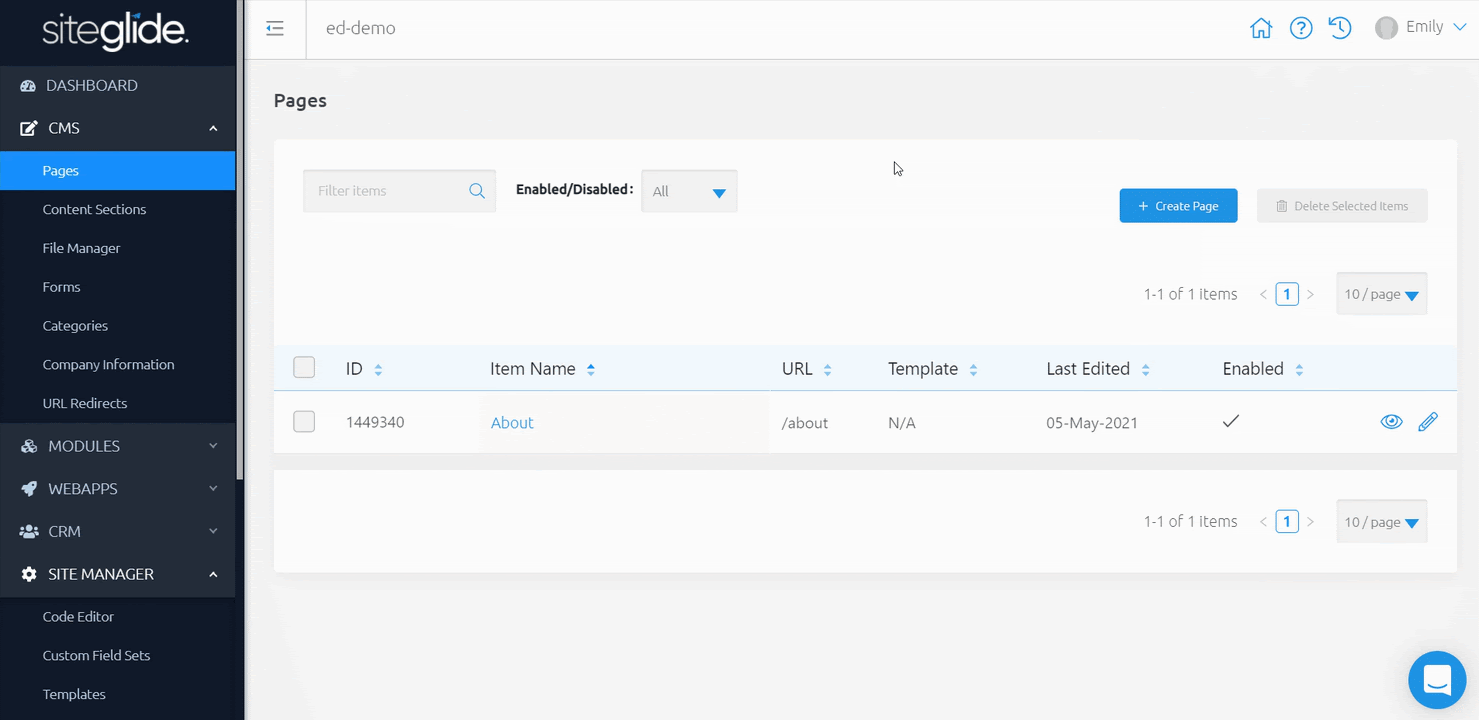
Finding Pages
While viewing your Site Admin, use the left-hand menu to click "CMS" and expand the sub-menu. Next click on "Pages" to view a list of Pages on your site.
Creating A Page
Create pages to separate all of the different content you’re adding to your site. Pages can be used to display anything from products and blogs to client company information and contact forms to name just a few!
On the right-hand side above your list of Pages, click “Create Page” to be re-directed to 'Details’. Checkout the Details section below for more information.
Enter the details of your page into the fields, click save. Once you are done editing, click the "Pages" button in the left hand menu to return to the list of pages.
You can edit Pages later by clicking the name of the Page, or edit icon on the right-hand side.
Best Practise
We recommend working with best practices in mind to future-proof the pages you build and deliver best functionality/performance.
Following best practices you should create a Header, Footer and Page Template to apply to your page. Doing this will ensure you don't need to re-write the same code on multiple pages who share the same header/footer content wrapping the page.
Building pages this way ensures standardised content while saving time while editing later.
Copy Page
Copying Pages enables you to easily and quickly replicate similar Pages across your Site and begin editing content right away without needing to code it again.
You can copy a Page as many times as you would like as long as you enter a unique URL for each.
Copy a Page now, by clicking the ‘Copy Page’ button at the bottom of any Page.
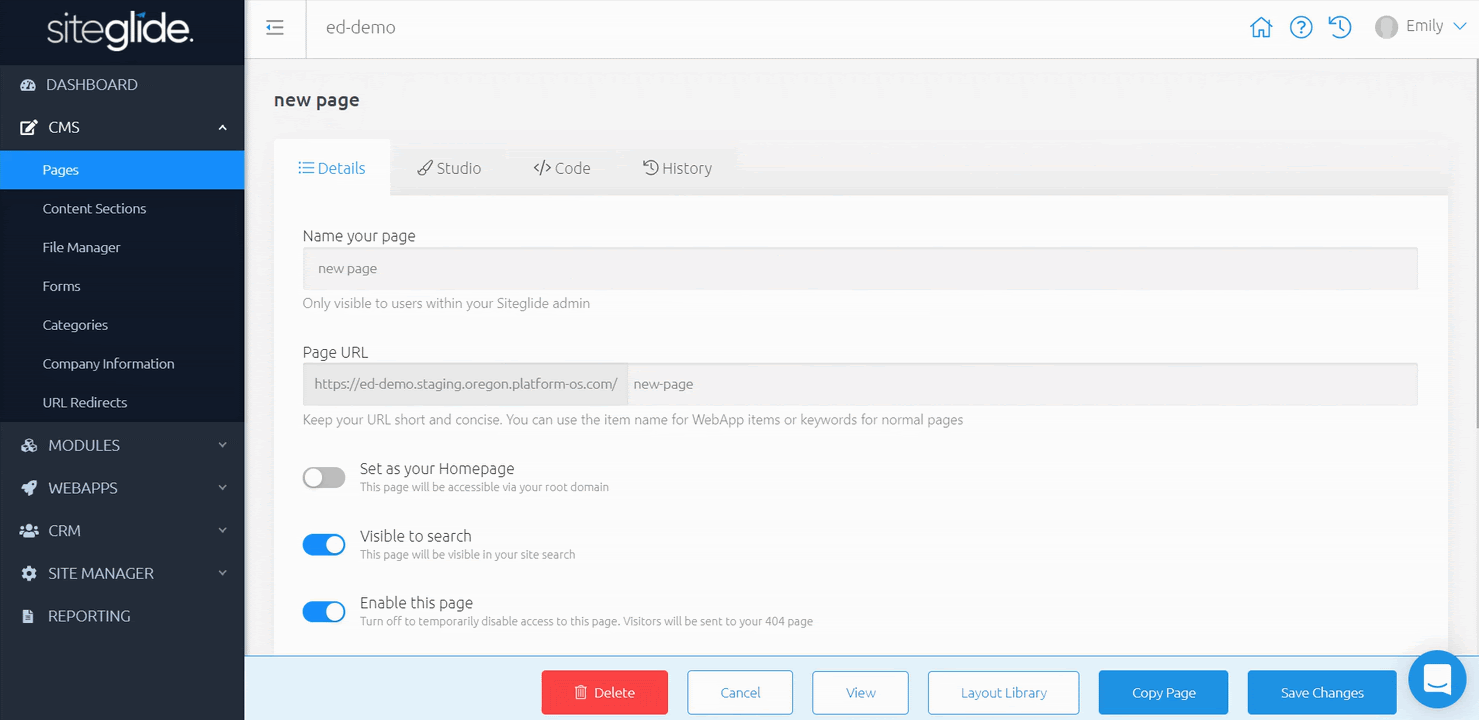
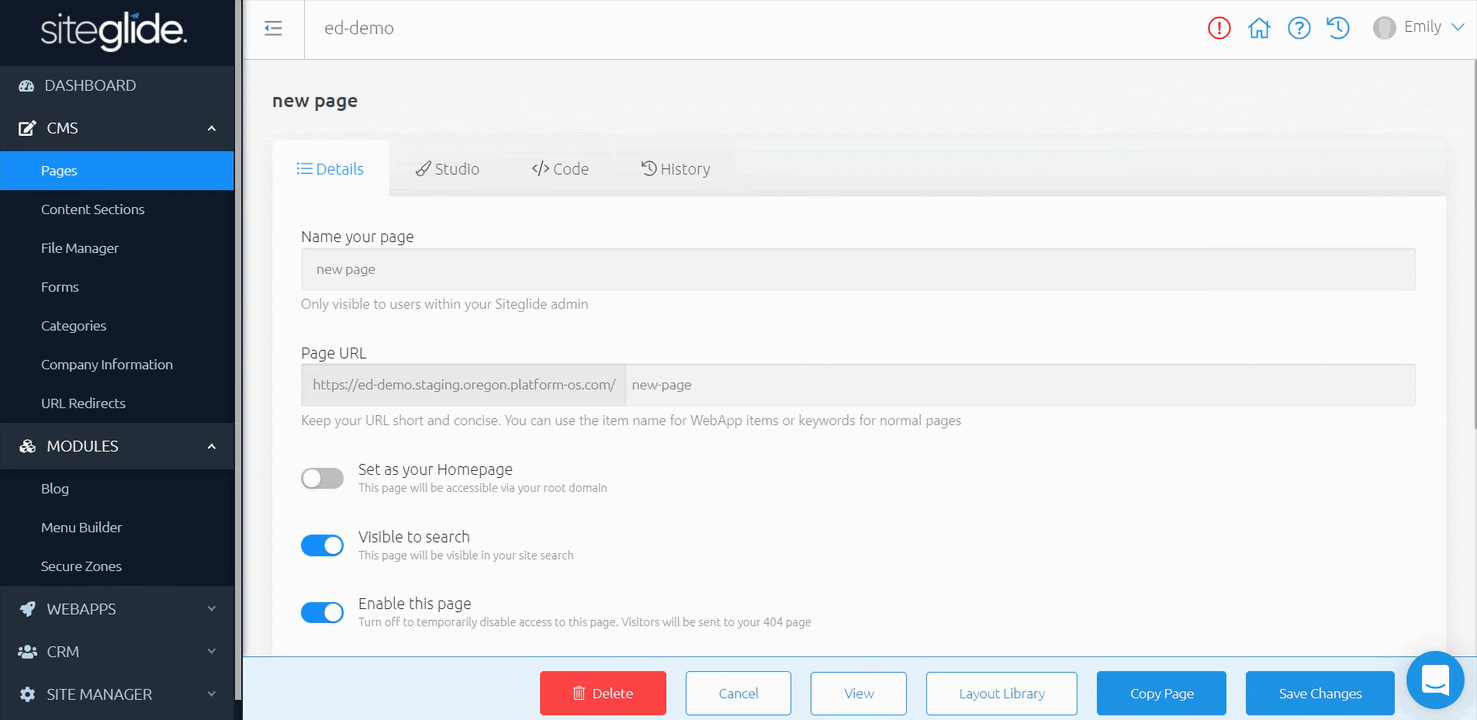
Details
When you first click to create or edit a Page, you’ll begin within the ‘Details’ tab.
Using the 'Details' tab you can manage and edit key details about the current Page, such as:
- Name your page - Name of the Page displayed in Admin and front-end
- Page URL - URL of the page displayed in a browser
- Set as your Homepage - Make the current page display on load of your root domain
- Visible to site search - Enable or disable this to be searched from within your site
- Visible to search engines - Make the page discoverable to search engines such as Google
- Enable this page - Enable or disable the page. When disabled the page cannot be found front-end
- Page Template - See Templates - Getting Started for more information
- SEO and Open Graph Settings - Add data to the page that will display in search engines and when sharing links. If sharing on Twitter, you'll need to select a Twitter Card Type along with the other fields provided for this to work as expected. For more information on Twitter Card Types, see here
- Secure Zones - Move the page into one or more Secure Zone to lock the content behind a wall
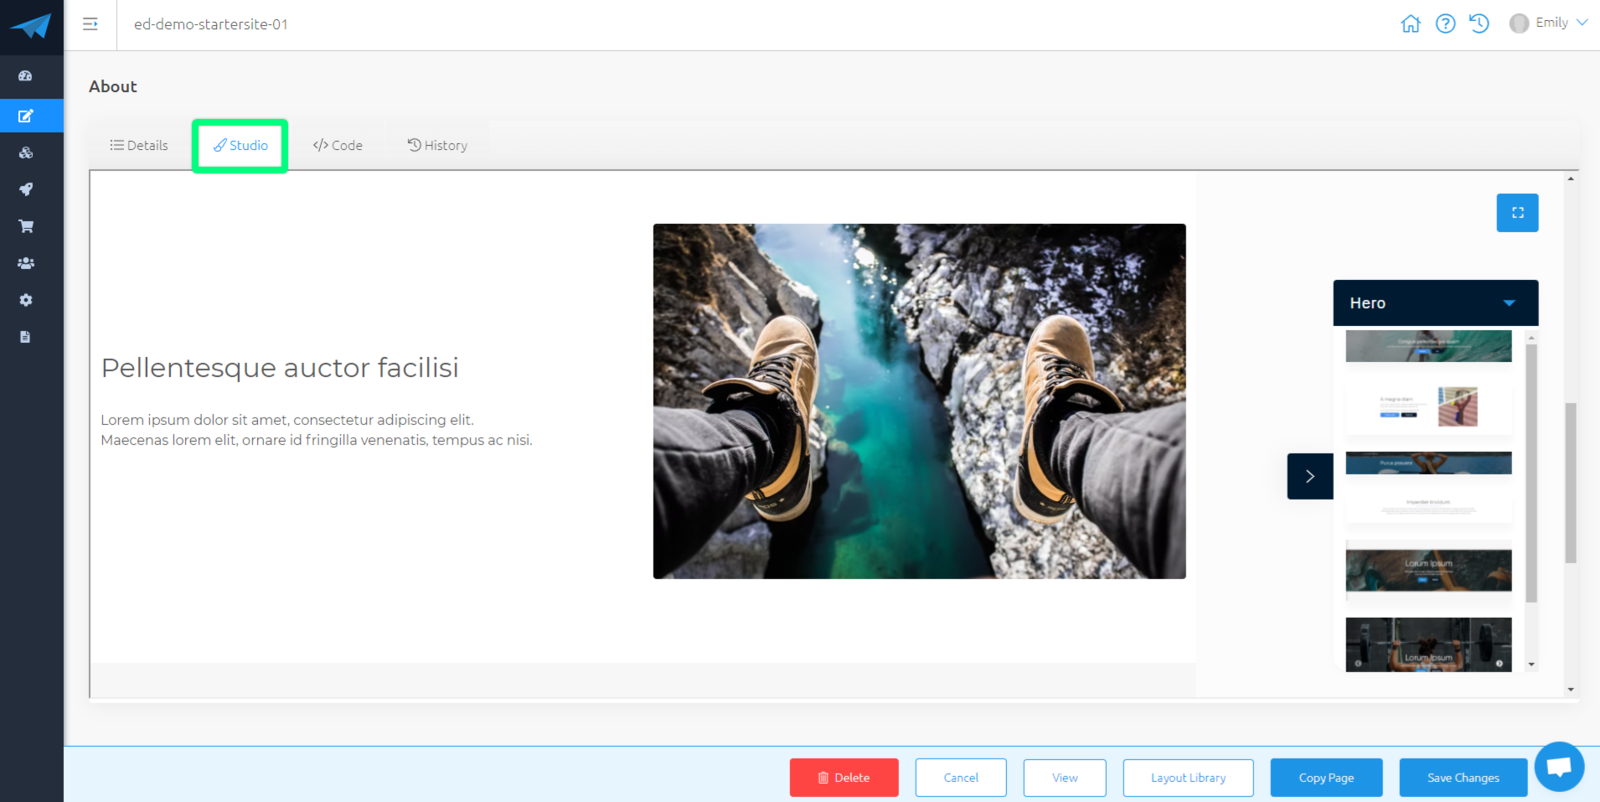
Studio / Editor
From your ‘Details’ tab, navigate to the next tab along. The tab will be called ‘Studio’ if you have the Studio module installed, or ‘Editor’ if you don't.
Here, you can build out your Pages without writing a line of code with our drag and drop page builders.
Studio
‘Studio’ can be used to build entire Pages from scratch using only the drag and drop page builder.
You can choose layouts to add to your Page from the right-hand side menu, and customise these to suit your site’s designs and needs.
Replace images with your own, customising text and adding or removing sections to build out simply and quick Pages.
Editor
‘Editor’ is mainly used to edit existing content on Pages, although you can add sections from a limited toolbar to build out your Pages.
Click onto existing content to begin editing and customising text, colours and images.
Code
From your ‘Details’ tab, navigate to the third tab named 'Code'.
Here, you can write and edit code for your Pages, utilising the Toolbox on the right-hand side for quick shortcuts to insert the liquid needed to include various items from within your Site.
You can also head to our Layout Library using the button at the bottom of the Page to insert different Layouts that you can edit in ‘Code’, or within ‘Studio’.
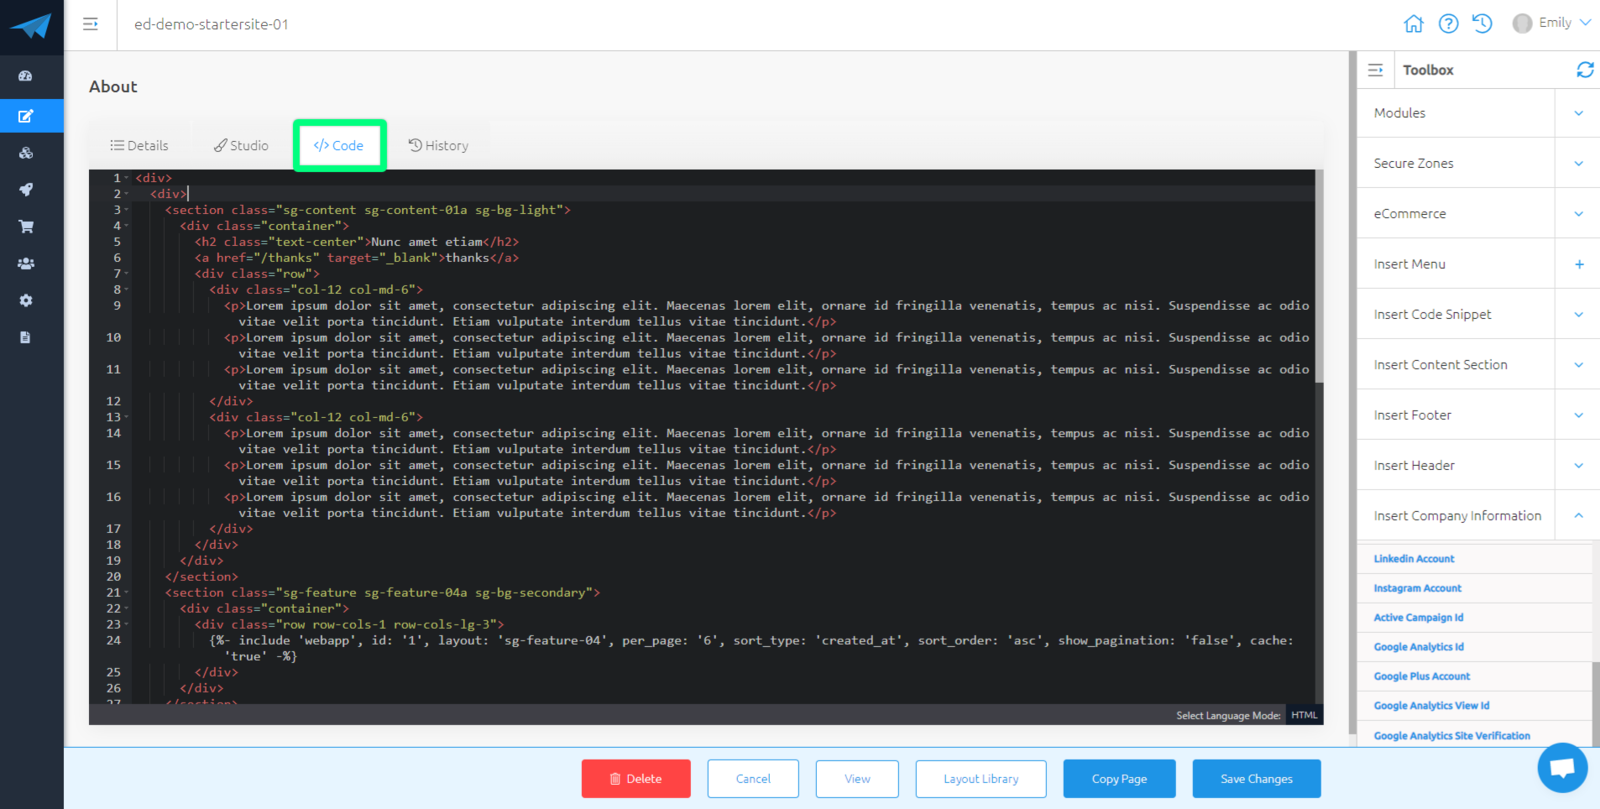
Toolbox
Toolbox can be found on the right-hand side of the 'Code' tab in any Page and contains quick shortcuts to insert relevant liquid tags relating to modules you have installed on the site.
- Site Search - 'Insert Search Form', 'Insert Search Results'
- Insert Form
- Insert Asset
- WebApps - 'List of WebApp items', 'WebApp input form'
- Modules - 'List of Module items', 'Module input form'
- Secure Zones - 'Insert Log Out Button', 'Insert Log In Form'
- eCommerce - 'Insert Cart', 'Insert Checkout Form', 'Insert Product List', 'Insert Quote Form'
- Insert Menu
- Insert Code Snippet
- Insert Content Section
- Insert Footer
- Insert Header
- Insert Company Information - 'Logo', 'Logo White', 'VAT Number', 'Company Name', 'Phone Number', 'Email Address', 'Address Line 1', 'Address Line 2', 'Twitter Account', 'Facebook Account', 'LinkedIn Account', 'Instagram Account', 'Active Campaign ID', 'Google Analytics ID', 'Google Plus Account', 'Google Analytics View ID', 'Google Analytics Site Verification'
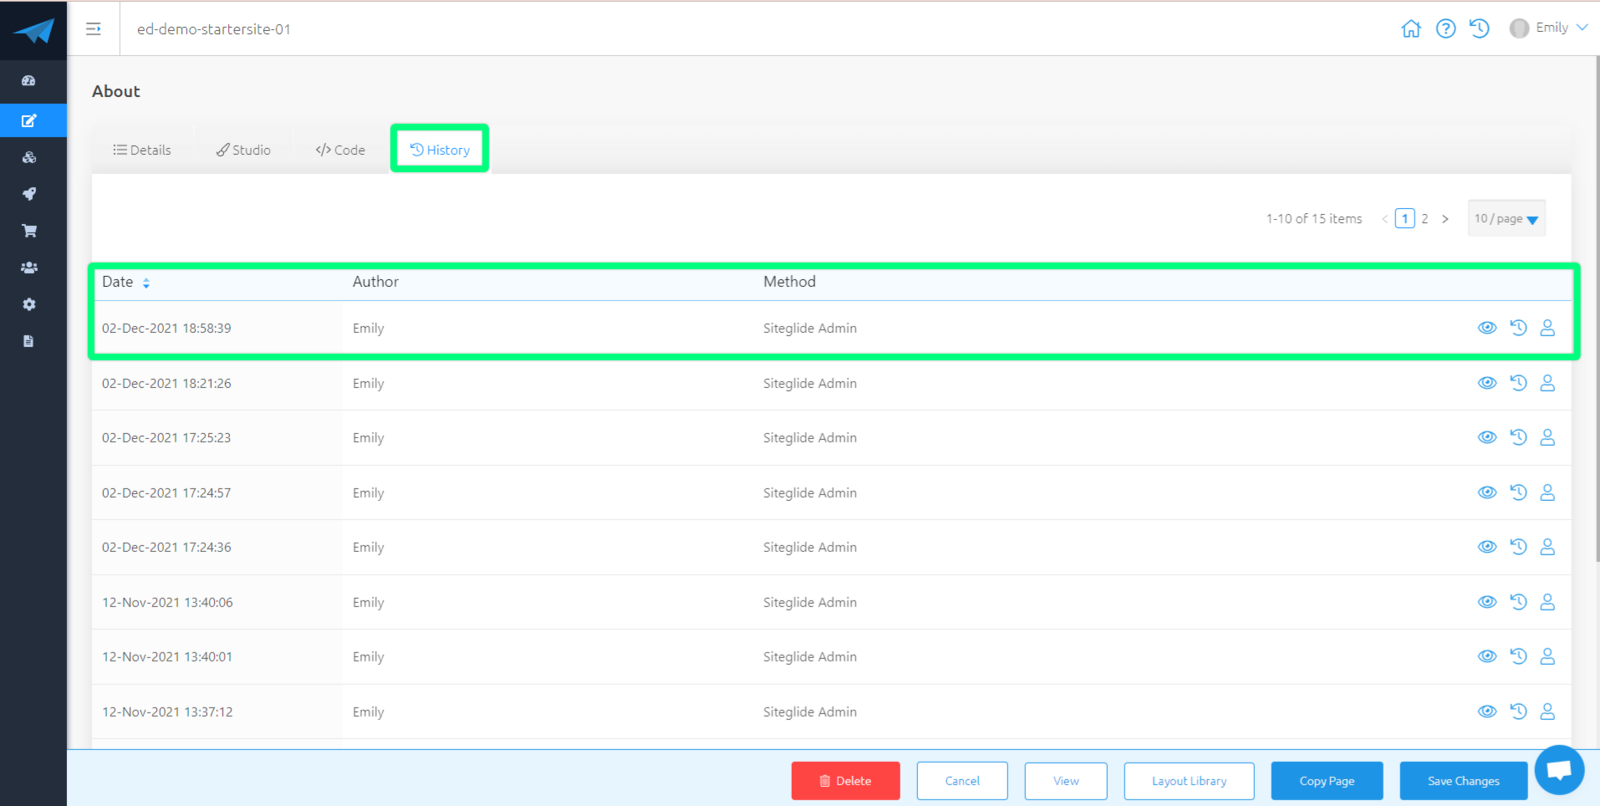
History
From your ‘Details’ tab, navigate to the fourth tab named 'History'.
Here, you can view and restore different versions of this Page. You can view when this version was created, by who, how this was created, and the code for this Page to decide if you’d like to restore this version.
View
You can preview this Page to see what this looks like on the front-end. You can do this within your list of Page by clicking the ‘eye’ icon on the right-hand side of a specific Page; or when editing, click to ‘View’ from the bottom of this Page.