

Included on all sites by default, Menu Builder enables you to point-and-click create and customise dynamic menus on your site to show links to other Pages on your Site.
Within this doc, you can find helpful information covering Menus, such as:
- Updating Menu Builder
- Finding Menus
- Creating And Editing A Menu
- Editing Items
- Adding a WebApp, Module, Category or external URL to a Menu
- Outputting With Toolbox
- Custom Layouts
Updating Menu Builder
As Menu Builder is automatically installed on new Sites, you do not need to install this.
Head over to the Site Settings page of any site: here, you can install new modules or update existing ones.
Read our Module Update Policy to find out how to update a Module.
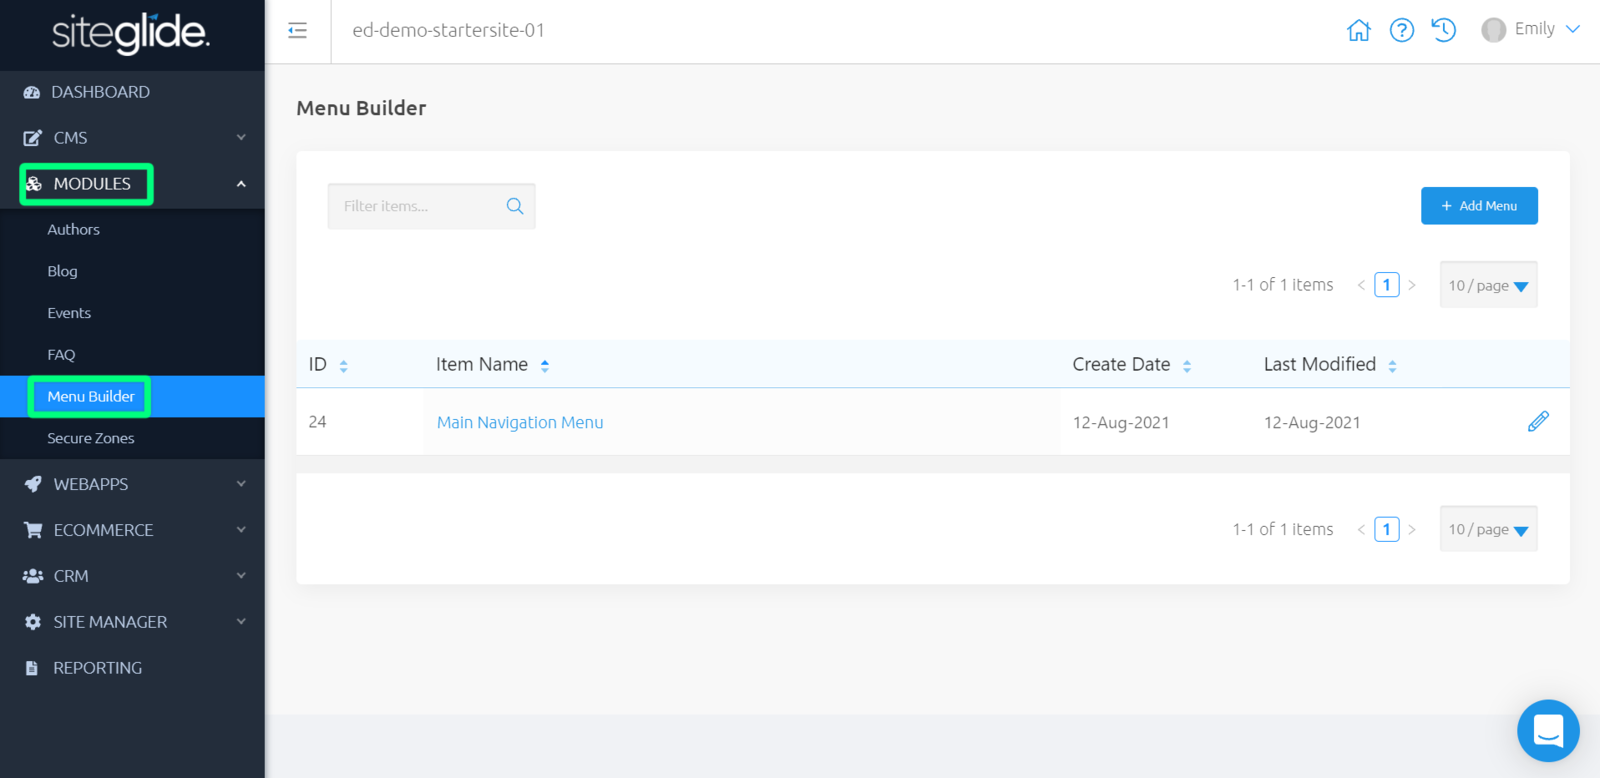
Finding Menus
While viewing your Site Admin, use the left-hand menu to click "Modules" and expand the sub-menu. Next click on "Menu Builder" to view a list of Menus on your site.
Creating And Editing A Menu
On the right-hand side above your list of Menus, click “Add Menu” to be re-directed to creating and editing your Menu.
Here, you can manage and edit key information about this Menu, such as:
- Menu Name - This name will only be visible within your 'Site Admin', call it something descriptive so that you can easily find it later on.
- Your Pages - Below is a list of all existing Pages on your Site which you can add to your Menu. Simply click on a Page to add this to your Menu.
To re-order Menu items, click and drag them above or below other Menu items until you have the order you would like. You can also drag and drop them onto other Menu items to create or add to the sub-menus.
If no Pages are displayed on the left-hand side, you will need to create a Page on your Website first. To find out more, click here.

You can come back to edit this Menu later by clicking the name of this Menu in your list, or clicking the pencil icon to the right-hand side.
Editing Items
Once you have added your Pages to your Menu, you can edit these by clicking the pencil icon to the right of each item.
When editing these items, you can manage key information about this item, such as:
- Link Text - The name of the Page
- URL - This is the slug for this item, e.g. "/about"
- Target - This can edited to make this Page open in a new tab or perform another action. An example of this would be: "_blank" - Opens the link in a new window or tab
- Custom Classes - You can add custom CSS classes to a your items to apply more specific styling

Adding a WebApp, Module, Category or external URL to a Menu
We have not yet added a button to the UI to enable you to view a list of WebApp/Module items and click on them to add to your Menu.
For now, click on an existing Page from the left-hand side to add it to your Menu, and edit its Link Text and URL to match the WebApp, Module, Category or external URL that you would like.
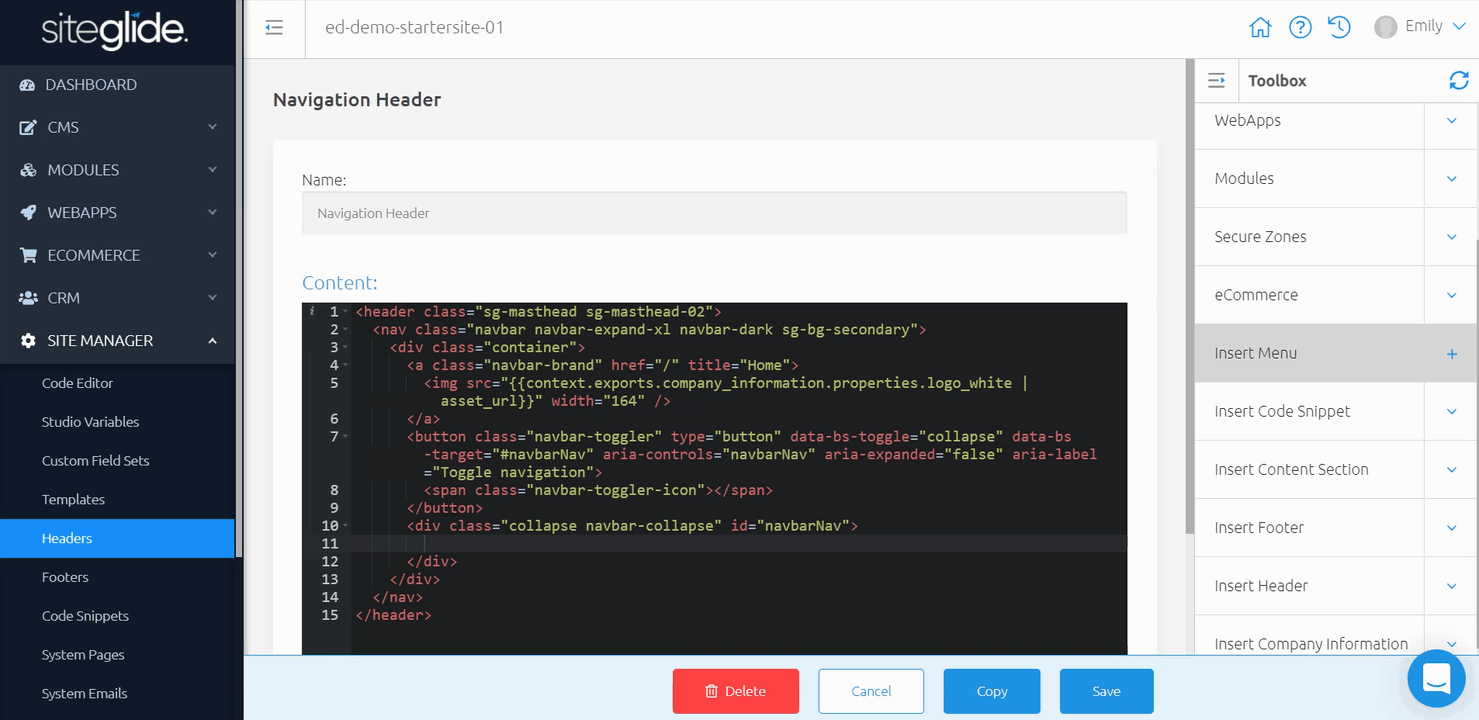
Outputting With Toolbox
Within any Page Code view, Header, Footer, Template, Content Section, and Code Snippet, is a Toolbox on the right-hand side.
For best practice, it is recommended to output your Menu within your Header within your Template.
Simply "Insert Menu" from your Toolbox and select your Menu and layout of choice. Here we'll use "Demo" Menu and the "Default layout".
Custom Layouts
The Menu Builder will include a Default layout. If you have Studio installed on your site, it will include any available Studio layouts for the module.
If you'd like to create a custom layout or tweak a Studio layout to better fit your branding, you will need to create a fresh layouts folder.
You can find these layouts within your Code Editor at layouts > modules > module_2 (Menu).