

There are five simple steps to putting a site live with Siteglide. We’ve outlined each of these below with examples.
Step 1: Beginning Go Live Process
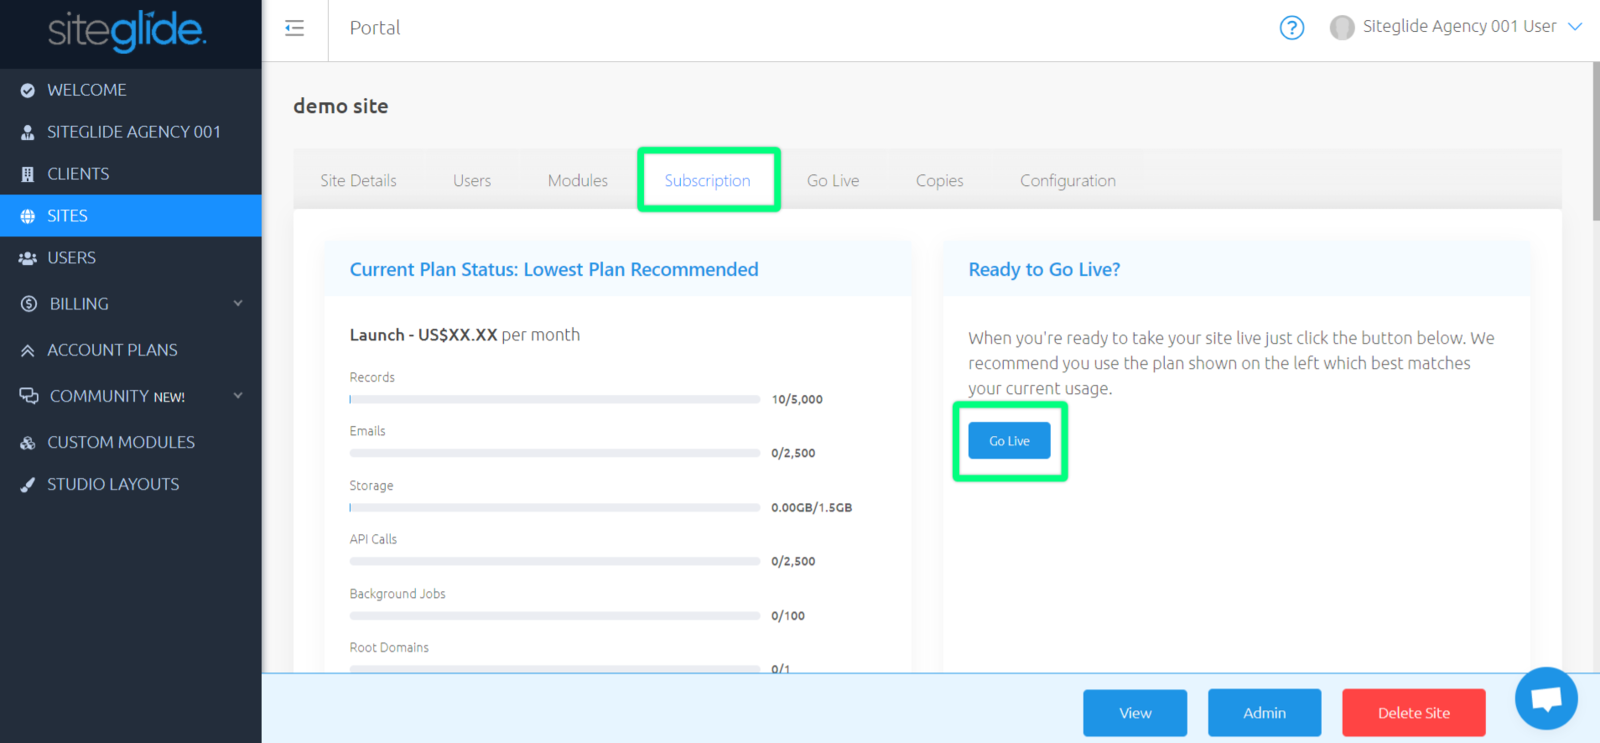
Begin in your Subscription tab for this Site, to the right hand side of the Current Plan usage, click the "Go Live" button to begin your Go Live process.
This will redirect you to billing for this Site, where you can select a plan and datacenter; and complete the Go Live process.
Note: If you have created the site less than 24 hours ago, you will not see this Go Live button. Instead, go directly to the "Billing" tab next to it and continue to Step 2 below.
Step 2: Select A Plan For The Site
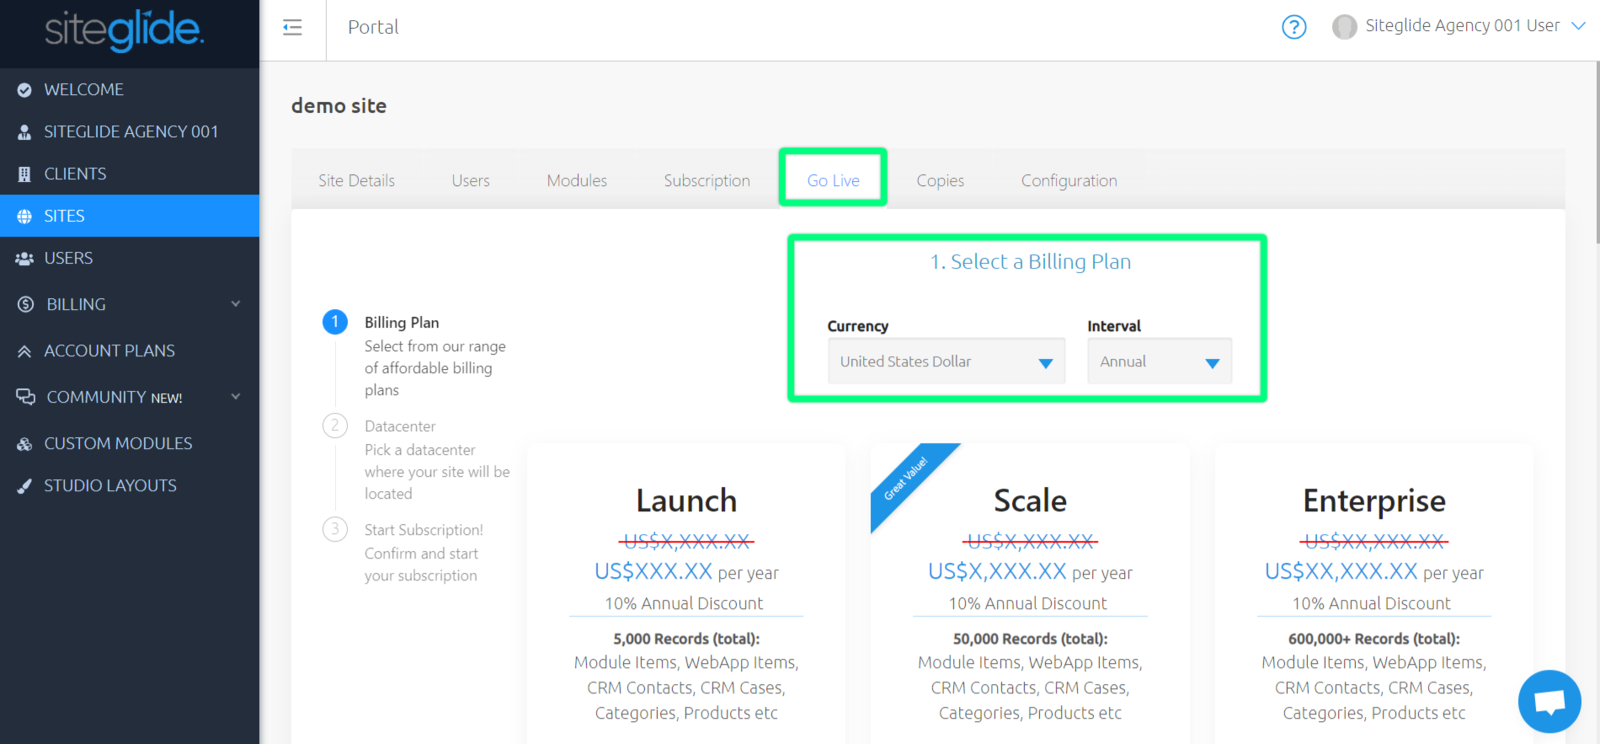
After clicking the "Go Live" button, you'll be redirected to "Go Live" tab for this Site, where you can click setup "Billing".
Choose the plan you'd like this Site to be on by clicking "Select Plan" at the bottom of the plan.
Step 3: Choose A Datacenter For This Site
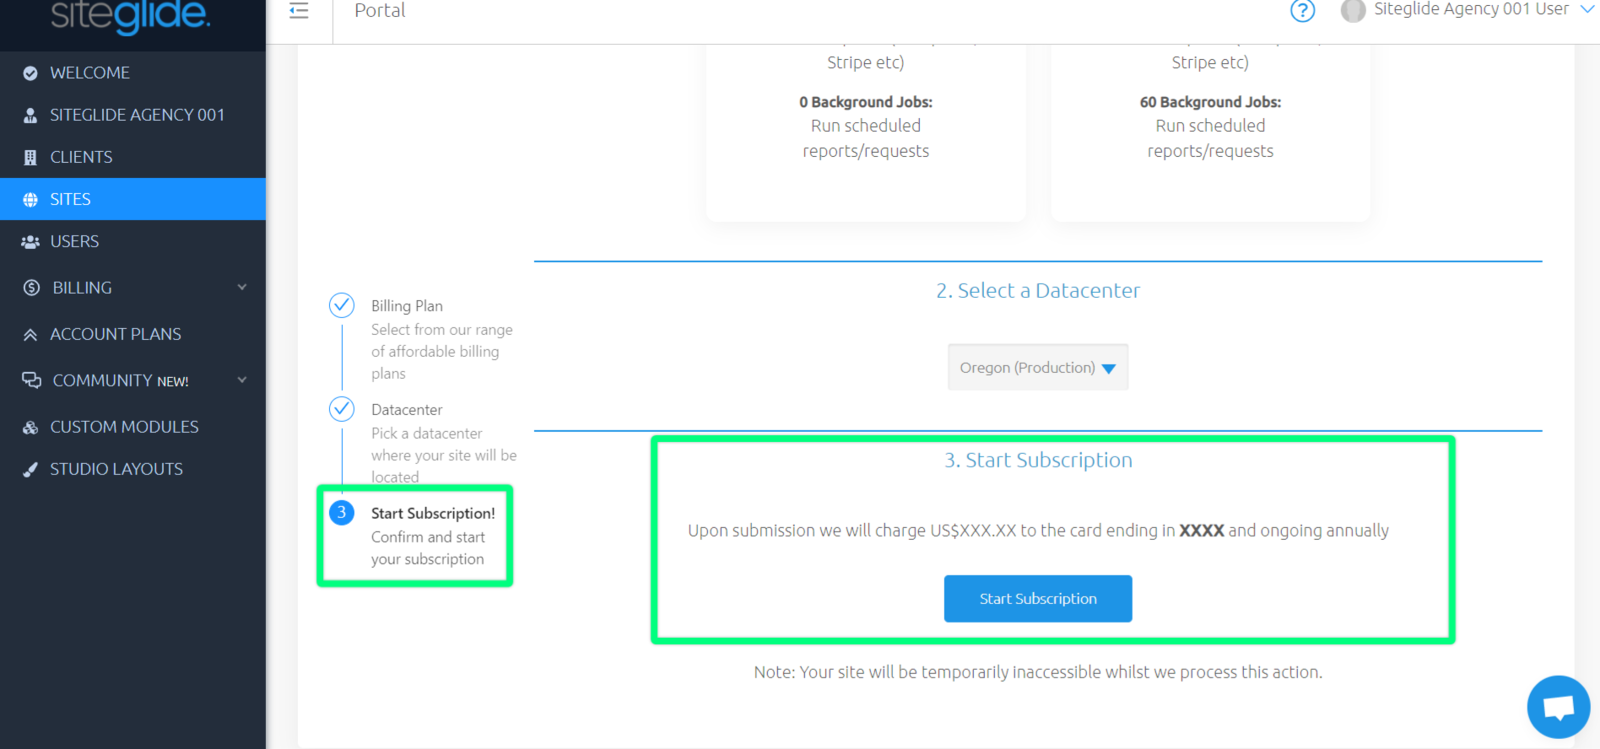
Once you have selected a plan, scroll down to the bottom of this page to see a dropdown where you can select which datacenter to have this Site on.
The Datacenters available for you to choose from when taking a Site live are:
- Oregon
- London
- Sydney
Note: It is recommended to have the Site on the datacenter closest to where most of your visitors will be accessing from, or near to where to your Agency is based. Sites cannot move between datacenters once this action has been taken, so choose carefully.

Step 4: Click "Start Subscription"
After having selected a plan, and a datacenter for this Site. Click "Start Subscription" at the bottom of this page.
Note: Your Site will be temporarily inaccessible whilst we process this action.
Final Step: Add your Domain
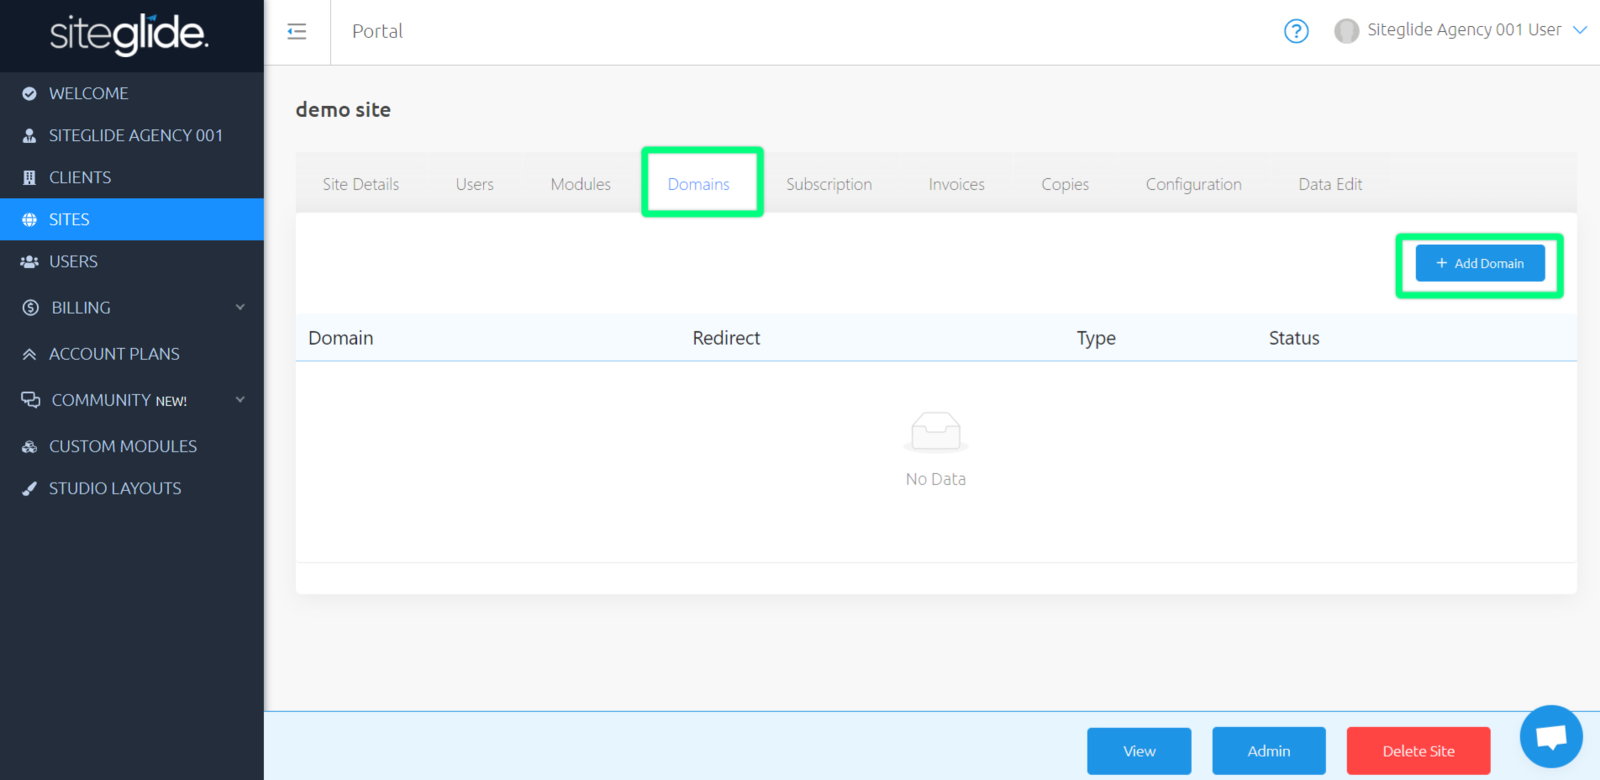
Once this action has been processed, make sure to refresh, and you will now be able to see a "Domains" tab for you to add your Domain to.
See Domains - Introduction for more information on adding Domains.
Related Documents:
- Portal - Billing - Subscription & Usage
- Portal - Billing Setup
- Sites - Domains - Introduction
- Sites - Domains - What is DNS?
- Sites - Domains - Adding A Fully Delegated Domain
- Sites - Domains - Adding An External Domain
- Sites - Domains - Adding DNS records to a Domain on Siteglide
- Sites - Domains - What is a Domain Name?
- Sites - Domains - What is a Domain Name Registrar?
- Sites - Domains - How do I find out which registrar my domain is with?
- Sites - Domains - How does SSL work with my site?
- Sites - Domains - DNS Record Types and Explanations
- Sites - Domains - How To Delete A Domain