

Adding An External Domain
If you have a domain that is managed in GoDaddy or another registrar and would like to point it to a Siteglide website you can use our External Domain feature. This means that you can continue to manage your DNS through GoDaddy.
Step 1: Select External
You can get here by Portal - All Sites - A Site you want to add DNS for - 'Add Domain'.
Whilst adding a new domain, click to add externally.
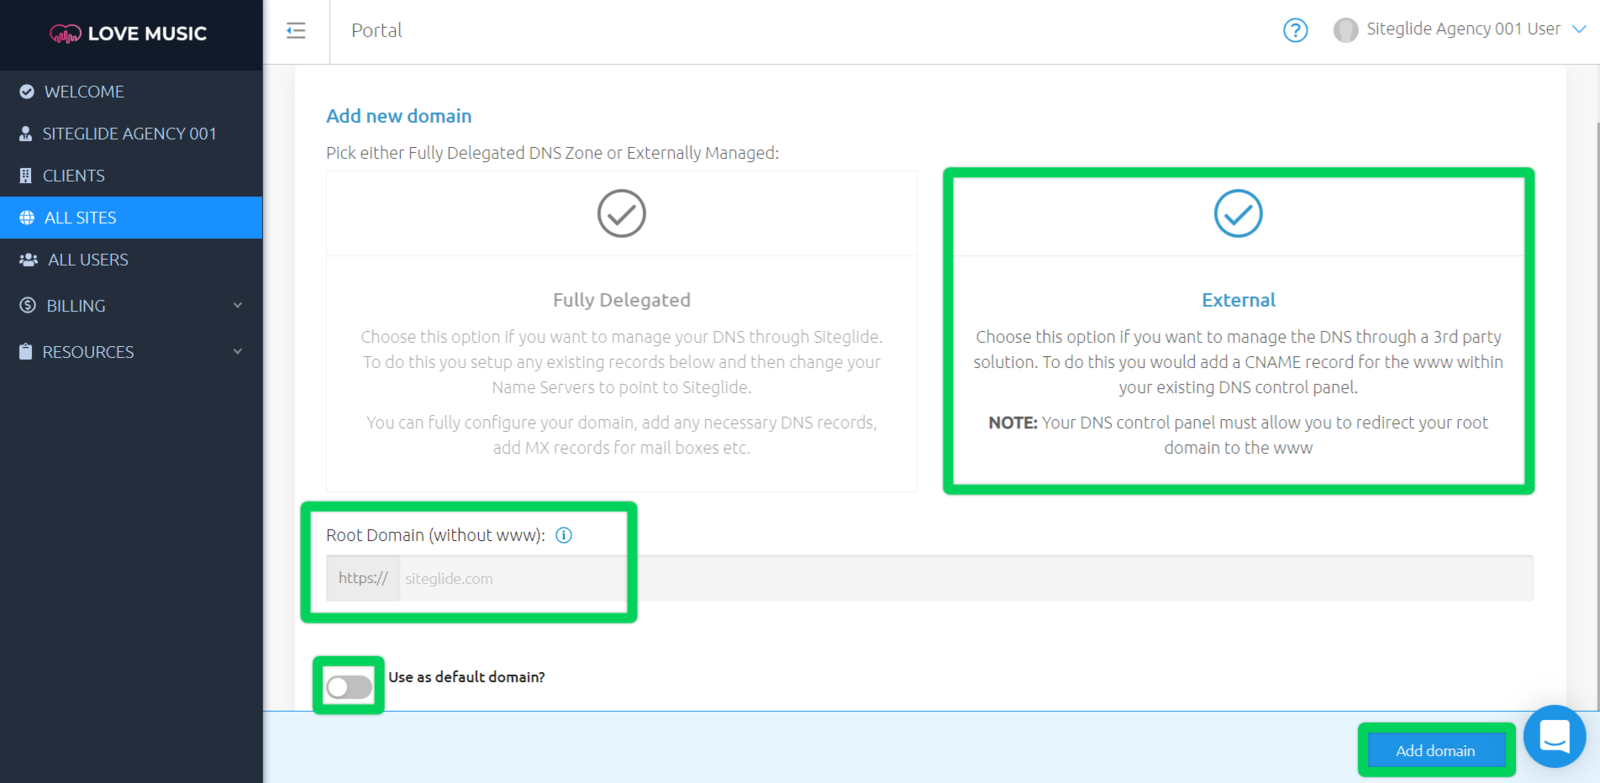
Step 2: Add Your Domain
Next, you will be presented with two fields:
- Root Domain (without www) - Enter your domain name here without any www's or preceding protocols. For example, entering "mydomain.com" is correct. "https://www.mydomain.com" is incorrect.
- Use as default domain? - Enable this if you want this to be the default domain for this site.
When you are ready, click "Add domain" to submit the new domain.
Important Note:Your domain can take up to a few minutes to be fully added to the system. Please check back and refresh the page shortly.
Step 3: Add SSL CNAME in GoDaddy
Once your domain has finished creating in the system, it's status will change to "Ownership Verification Pending" which means it is now ready.
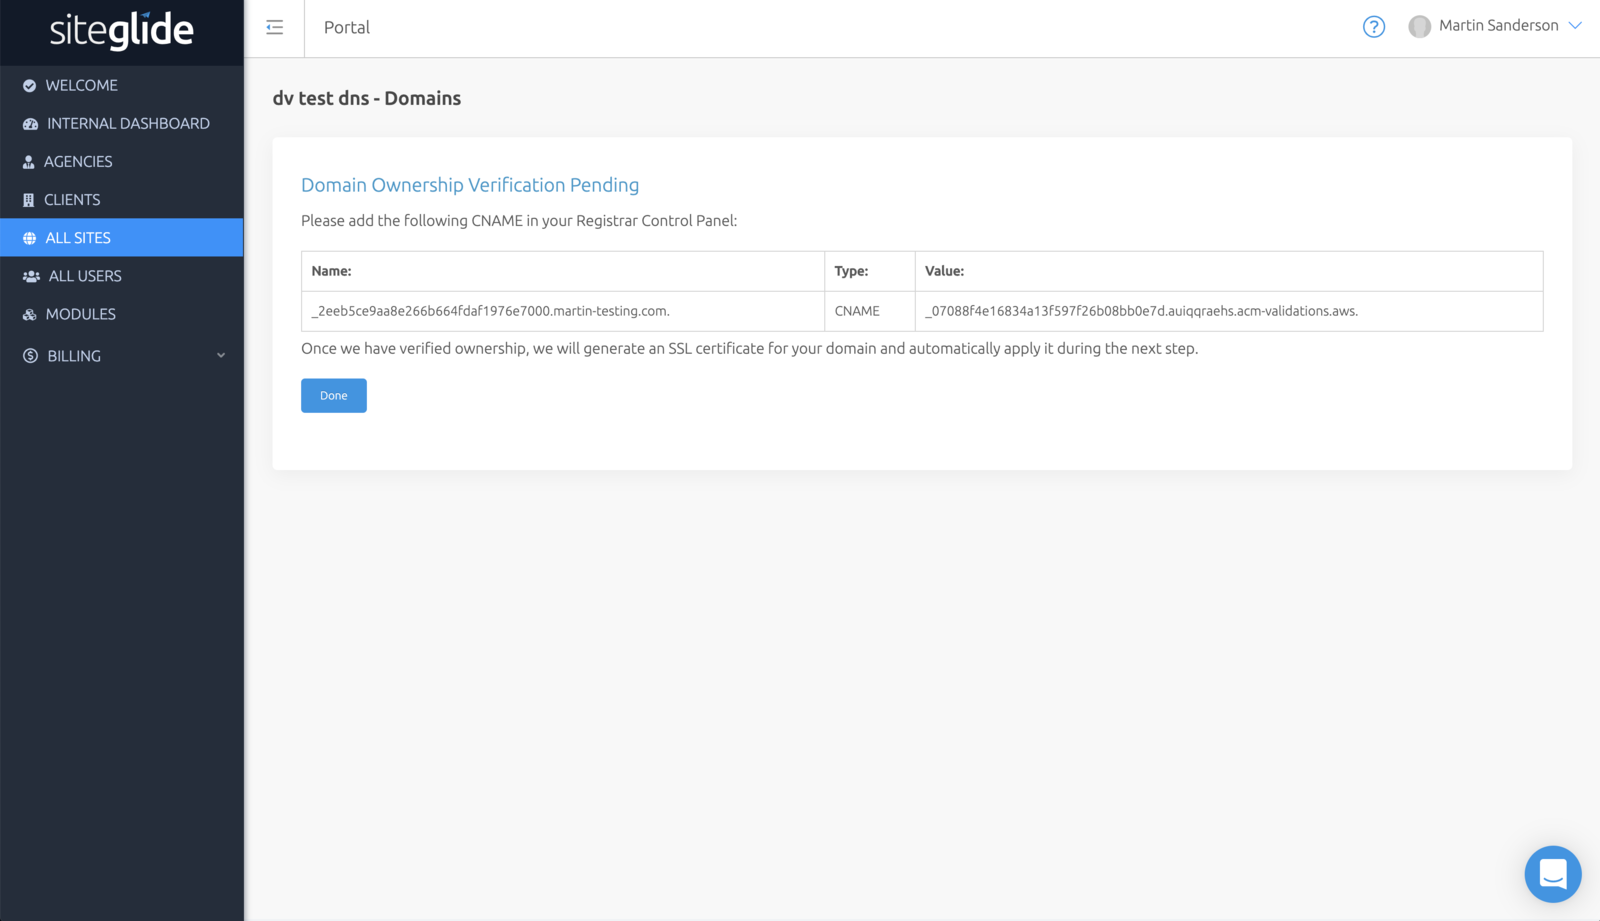
Next, click the name of the newly added domain from within the "domains" tab where you will be provided with a CNAME record unique to your site.
Example CNAME record:
Name: _Xxxx0xx0xx0x00000000xxxx0000x0000.martin-testing.com.Type: CNAMEValue: _00000x0x00000x000000x00x00xx0x0x.auiqqraehs.acm-validations.aws.
Add the generated CNAME record to GoDaddy to verify ownership, generate an SSL certificate and automatically apply it to your site during the next step.
Once you have saved the record in your registrar, allow some time for propagation, check back and refresh the page.
Important Note: The CNAME verification record must continue to exist in the registrar for the SSL certificate to continue working.
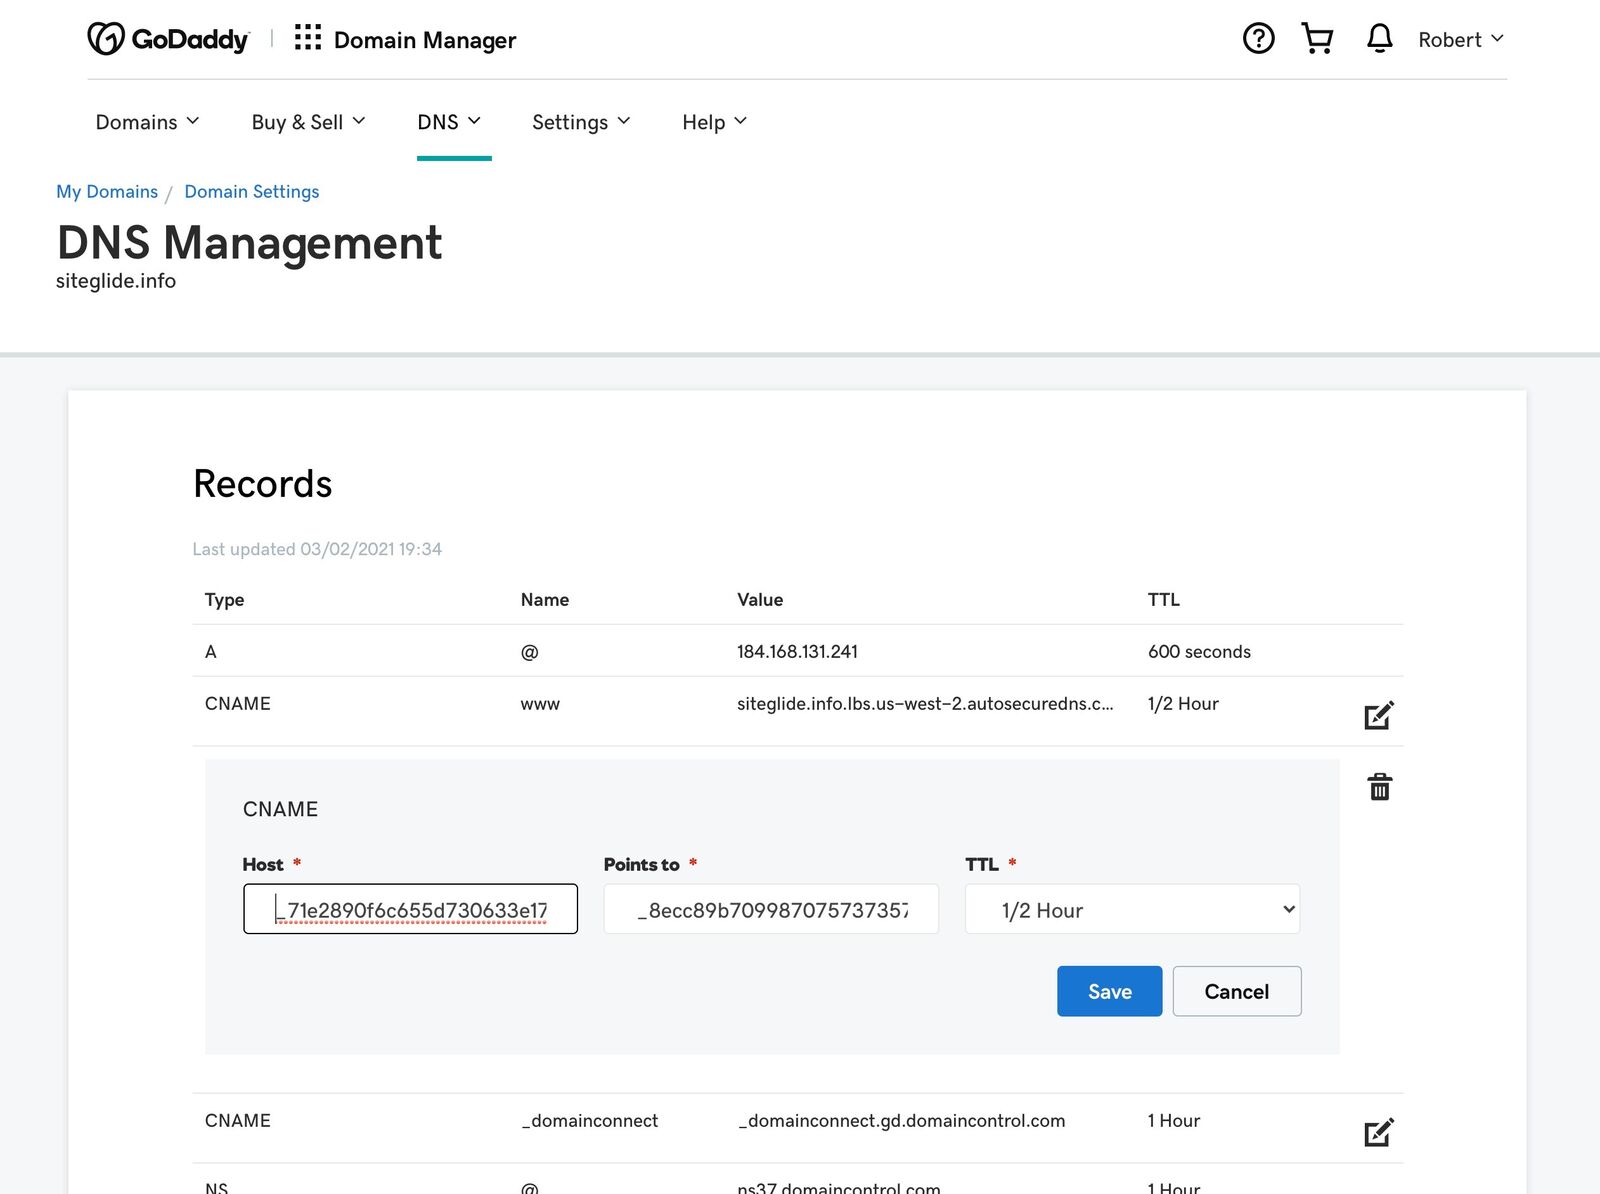
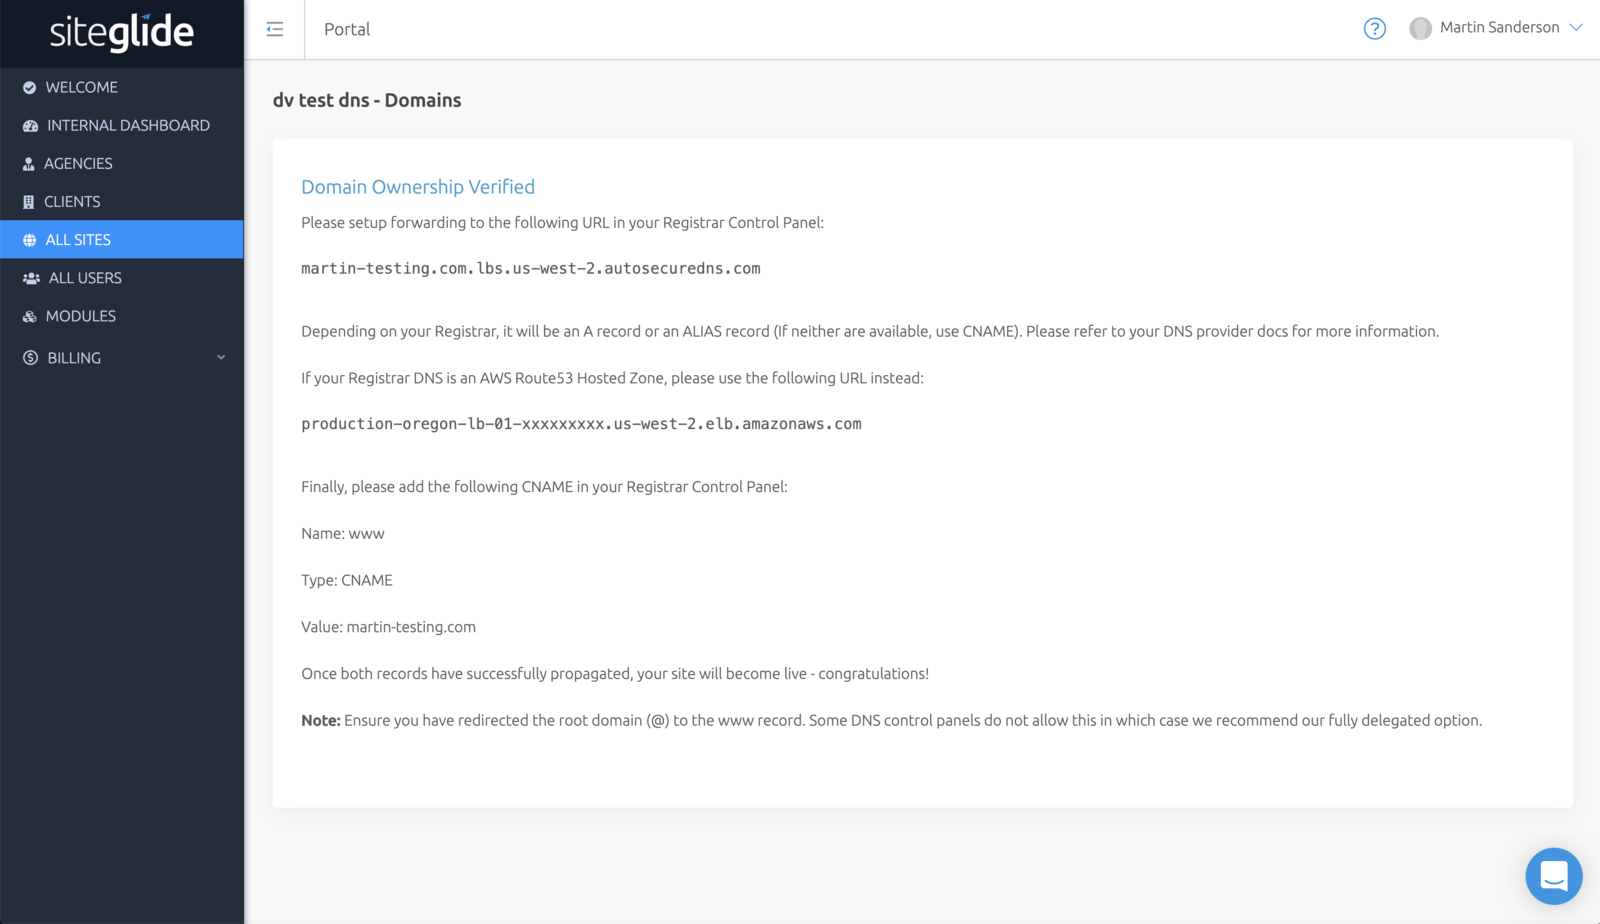
Step 4: Add Final Records in GoDaddy
Once the verification CNAME record has propagated and been found, you will be presented with two final records to add to your registrar.
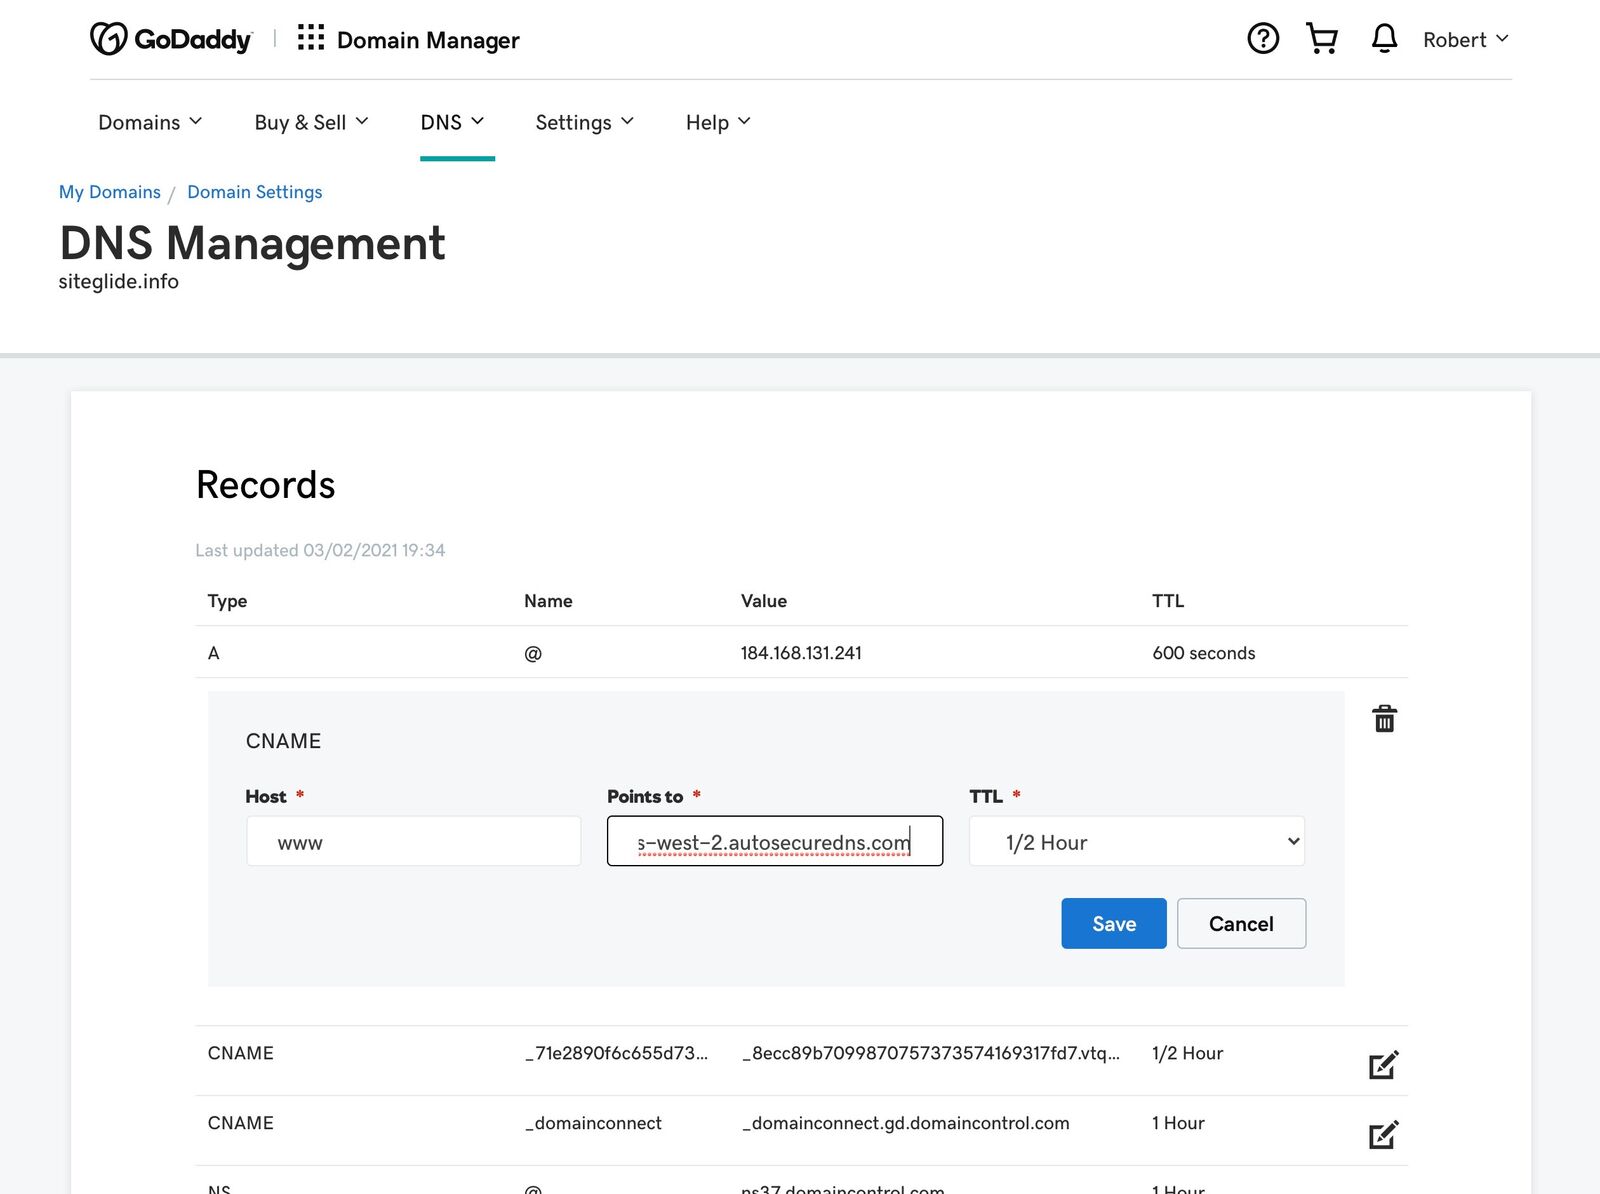
Step 4a: Add www Redirect Record
Simply create a CNAME with the Host as www and the value as the Load Balancer record shown in Siteglide:
Name/Host: www Type: CNAME Value: martin-testing.com.lbs.us-west-2.autosecuredns.com
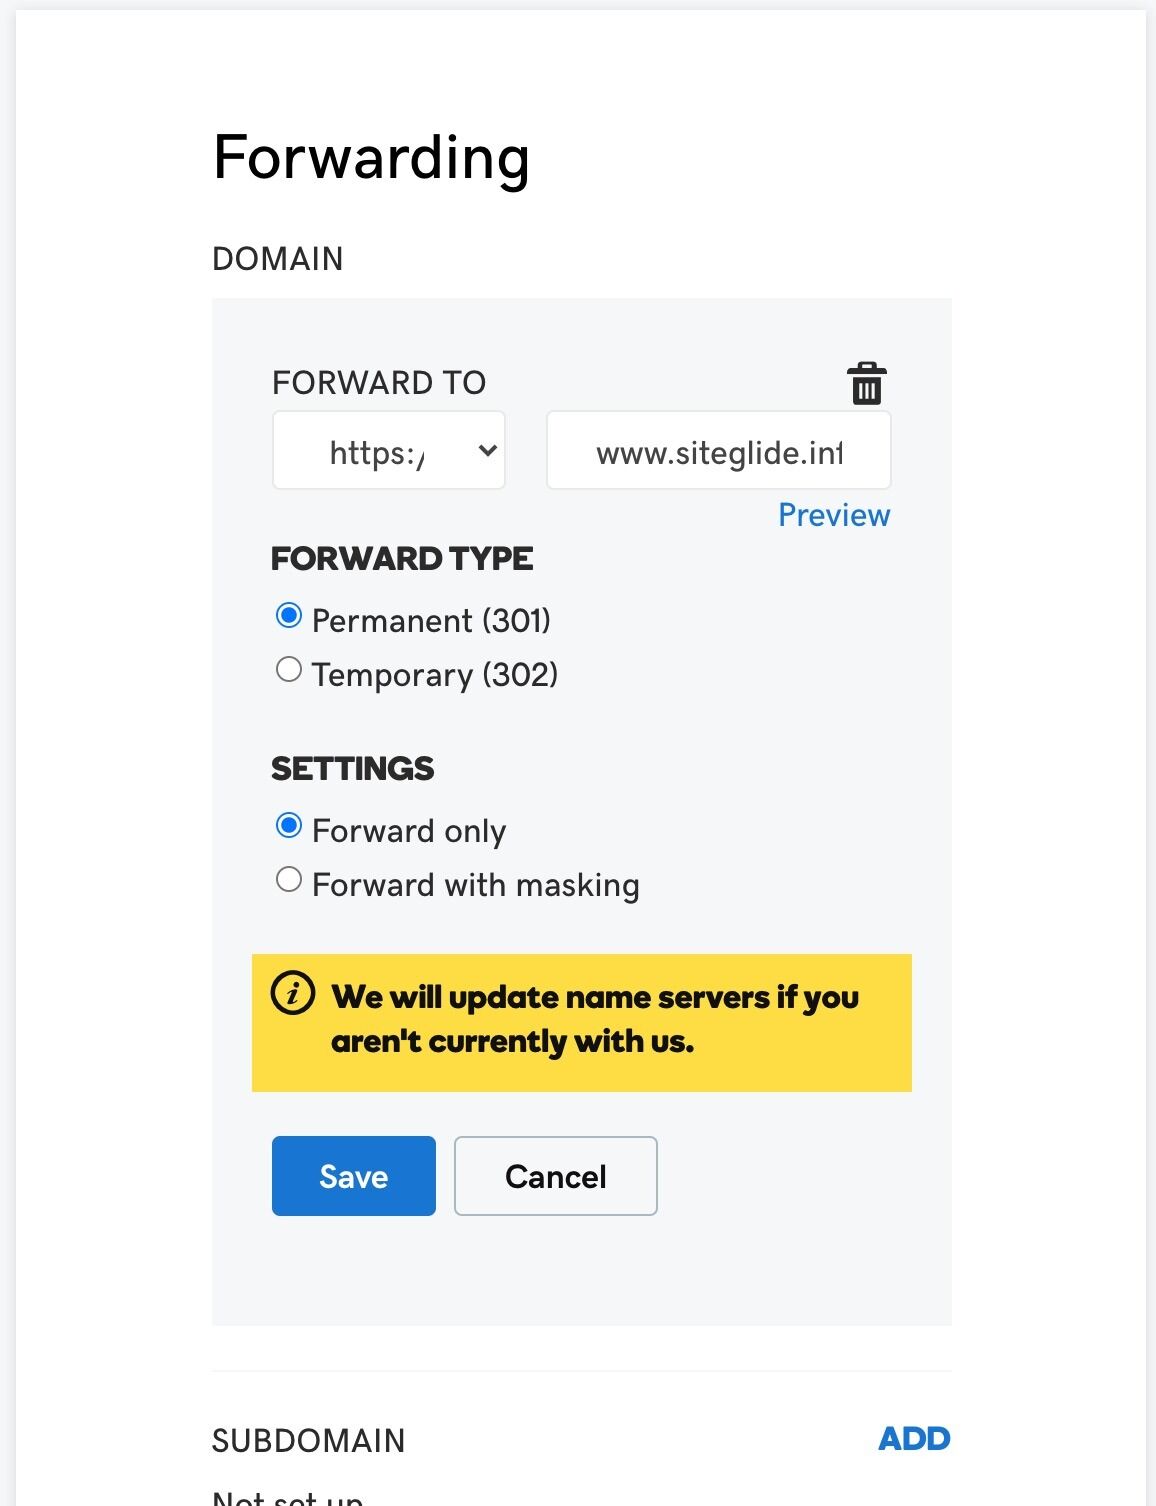
Step 4b: Forward the Root/@ to the www
Finally scroll down in GoDaddy to the Forwarding section and click Add against Domain. Here you simply type in your domain with www and set the forwarding to https://. This will redirect all root traffic to your www.
The records will begin to propagate and your site will automatically go live. Congratulations!
GoDaddy: Forwarding with HTTPS support
Recommended next steps for sites using GoDaddy registrar
If you have just added a GoDaddy domain to Siteglide we recommend you implement these steps to prevent possible redirects issues.
We have found GoDaddy doesn't handle the SSL properly when it comes to HTTPS redirects, even after the redirect steps are followed in GoDaddy.
To prevent this from happening you can use free services such as Redirect Pizza with a free entry-level package that will allow you to manage the HTTPS redirect functionality GoDaddy lacks.
Please take note: Ignore the 2nd part of Step 5 about the 'www' record, you MUST NOT do this as this must continue to be pointed to the AWS load balancer or the domain will not point to Siteglide.
Green = Complete this step Red = Do NOT complete this step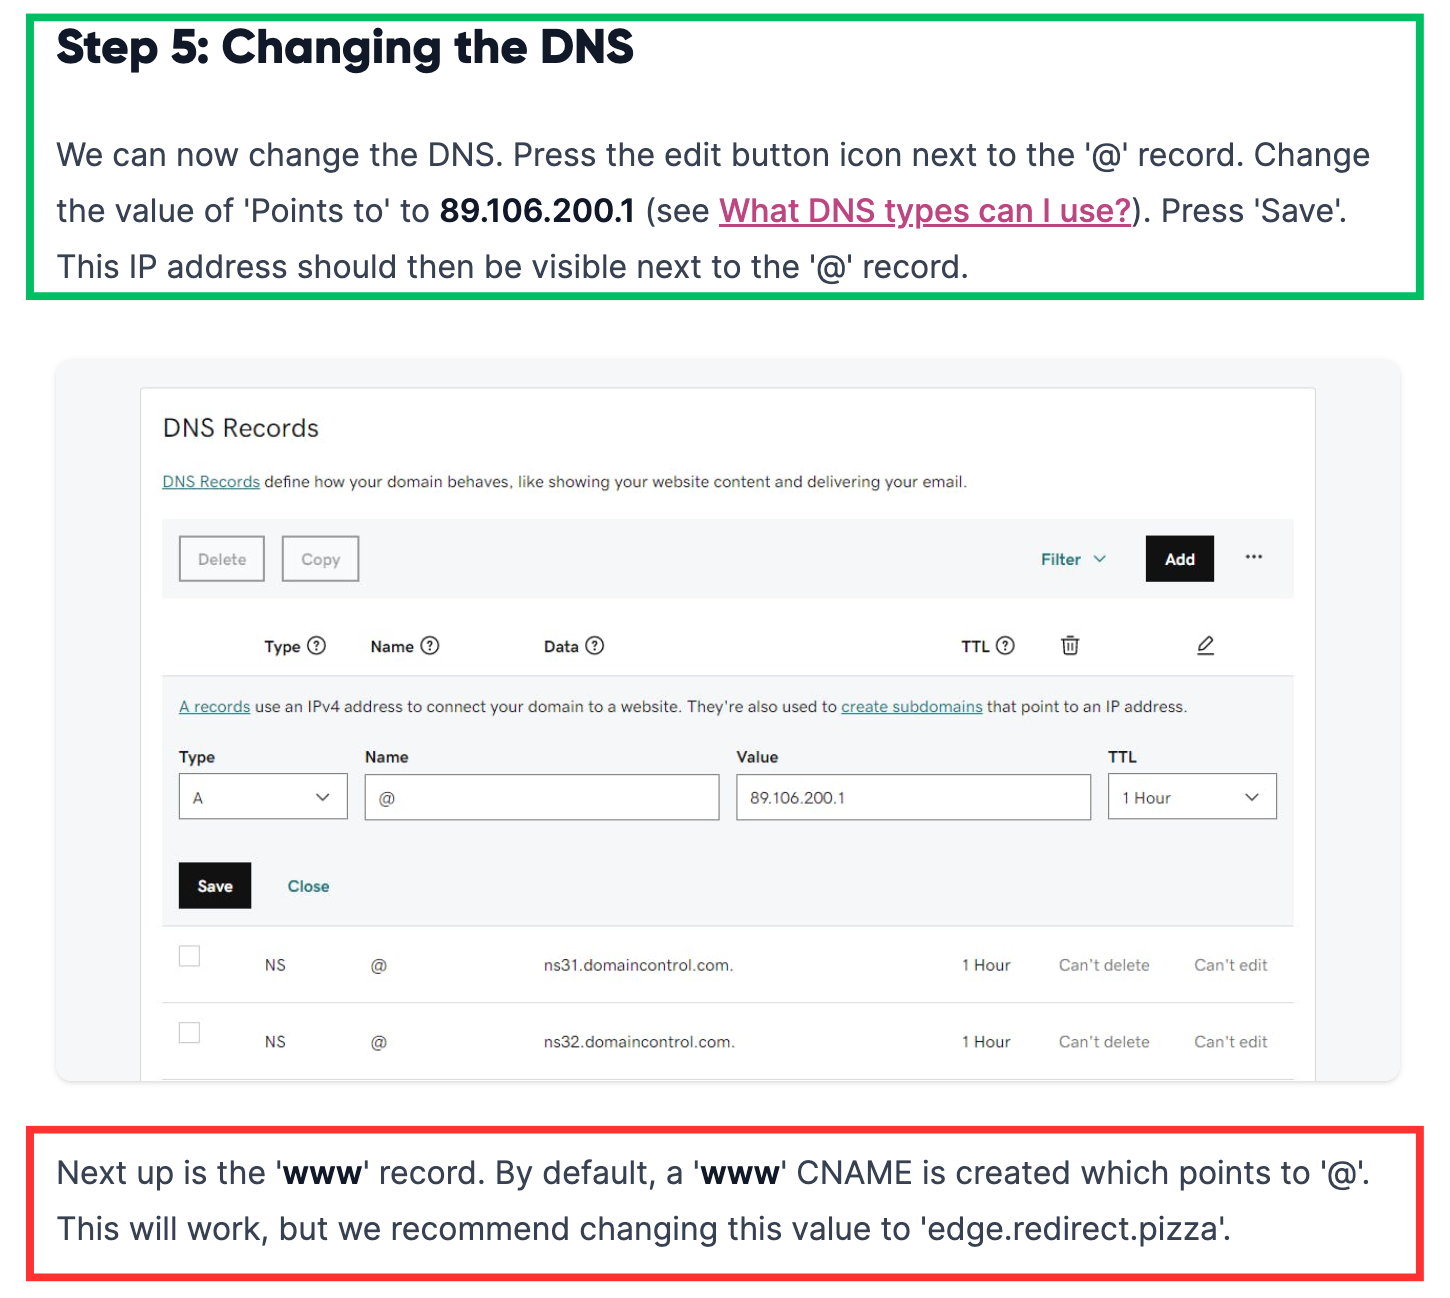
Click here to access the Redirect Pizza setup steps or watch the video below.
Related Pizza Redirect Documents
Related Documents:
- Billing - Overview
- Sites - Domains - Introduction
- Sites - Domains - What is DNS?
- Sites - Domains - DNS Record Types and Explanations
- Sites - Domains - Adding A Fully Delegated Domain
- Sites - Domains - Adding An External Domain
- Sites - Domains - Adding DNS records to a Domain on Siteglide
- Sites - Domains - What is a Domain Name?
- Sites - Domains - What is a Domain Name Registrar?
- Sites - Domains - How do I find out which registrar my domain is with?
- Sites - Domains - How does SSL work with my site?
- Sites - Domains - How To Delete A Domain