

Clients is where you can create and edit Client companies. Having Clients enables you to keep Sites for specific Clients in one area, with them being able to access these Sites from their end as well.
Any Users set up in a specific Client can only see any Users or Sites within this Client.
They cannot see any Users or Sites under your Agency or other Clients.
Within this doc, you can find helpful information covering Clients, such as:
- Finding Clients
- Creating and Editing Clients
- Client Details
- Users
- Inviting Client Users
- Changing Client User Access
- Sites
- Create Client Sites
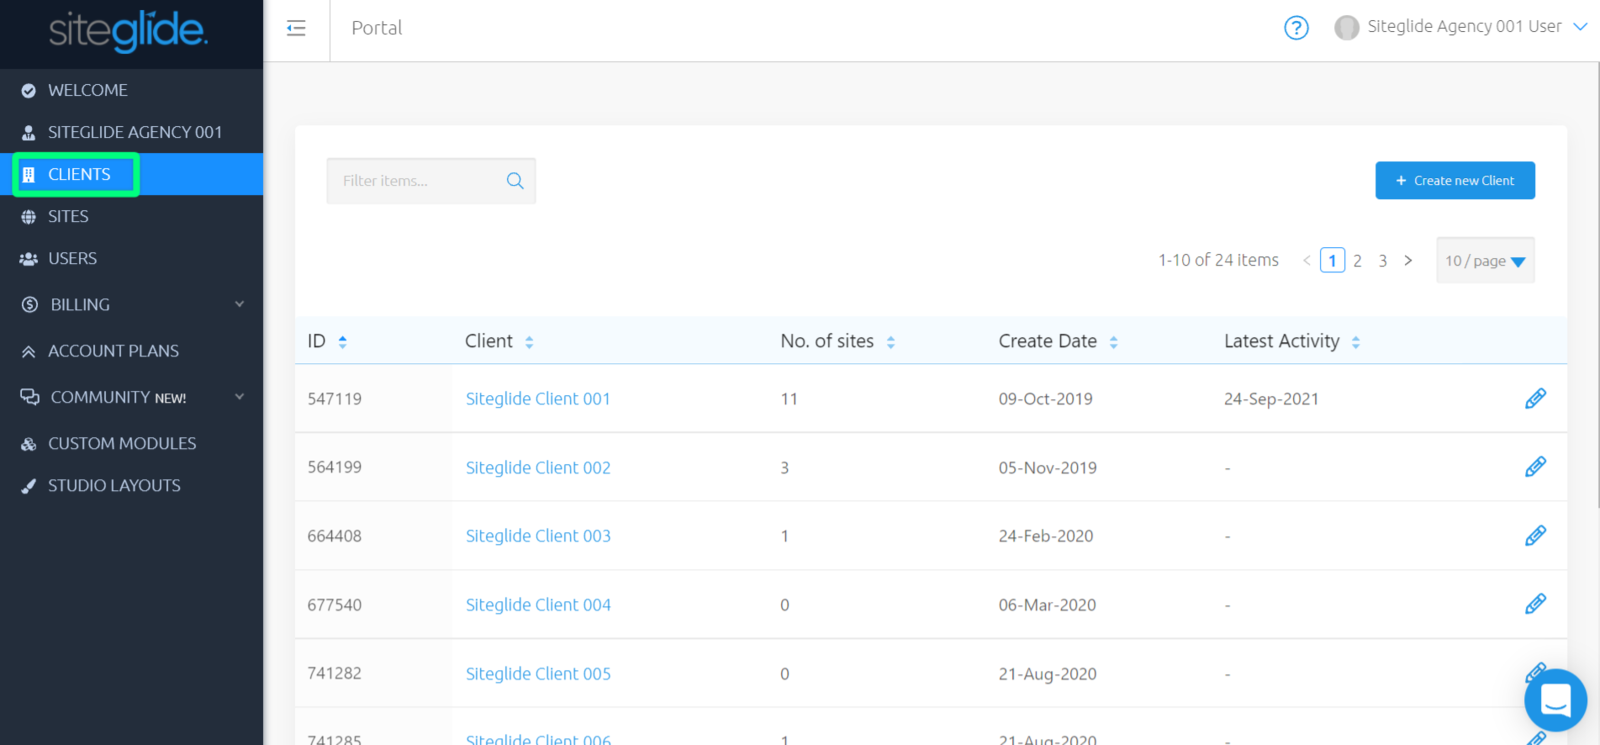
Finding Clients
While viewing your Portal, use the left-hand menu to click "Clients" to view a list of all existing Clients under your Agency.
Creating and Editing Clients
Creating Clients enables you to provide access to Client Sites to their Users, without them also having access to your other Sites.
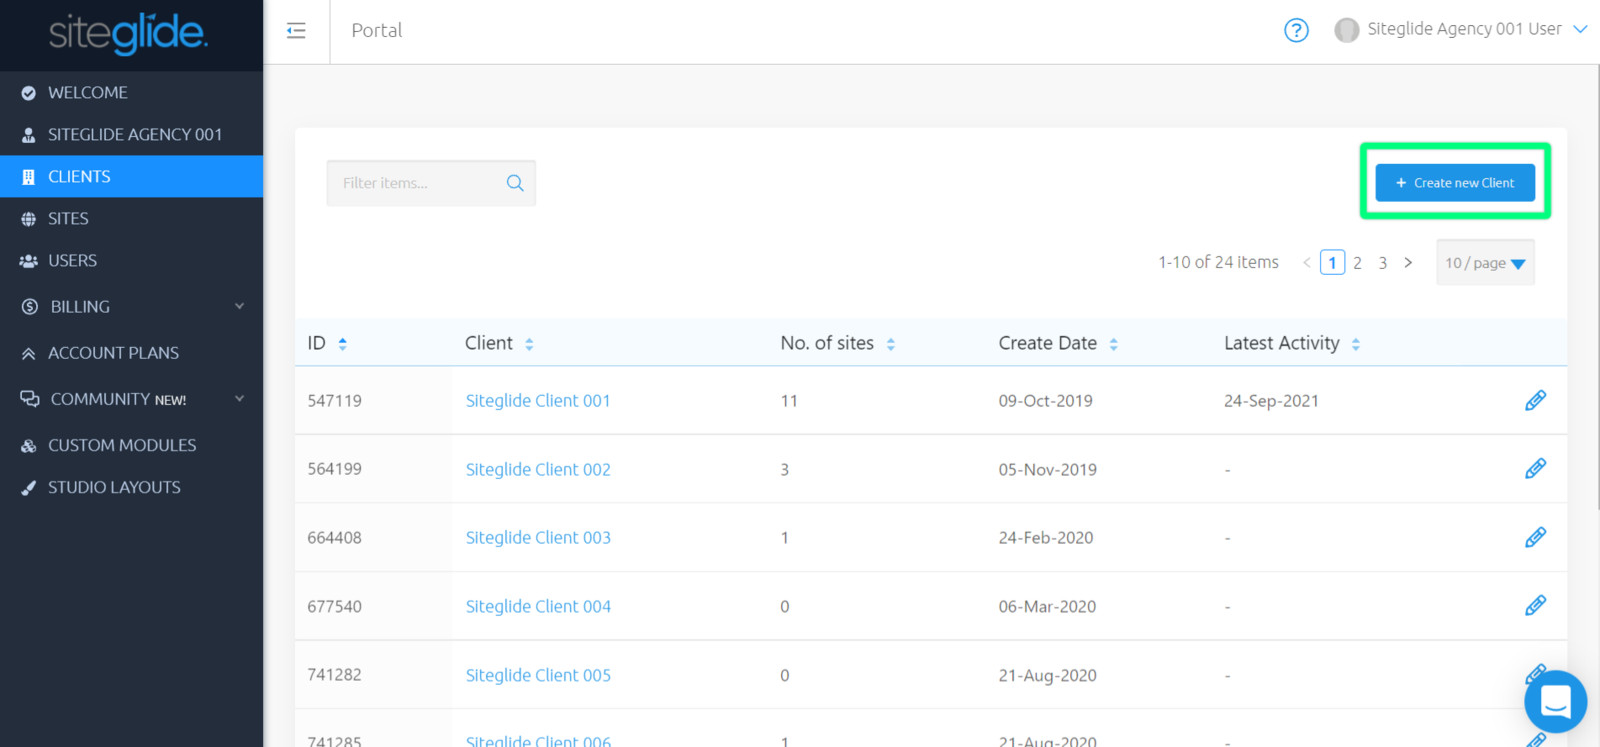
On the right-hand side above your list of Clients, click “Create new Client” to be re-directed to 'Details’. Checkout the Details section below for more information.
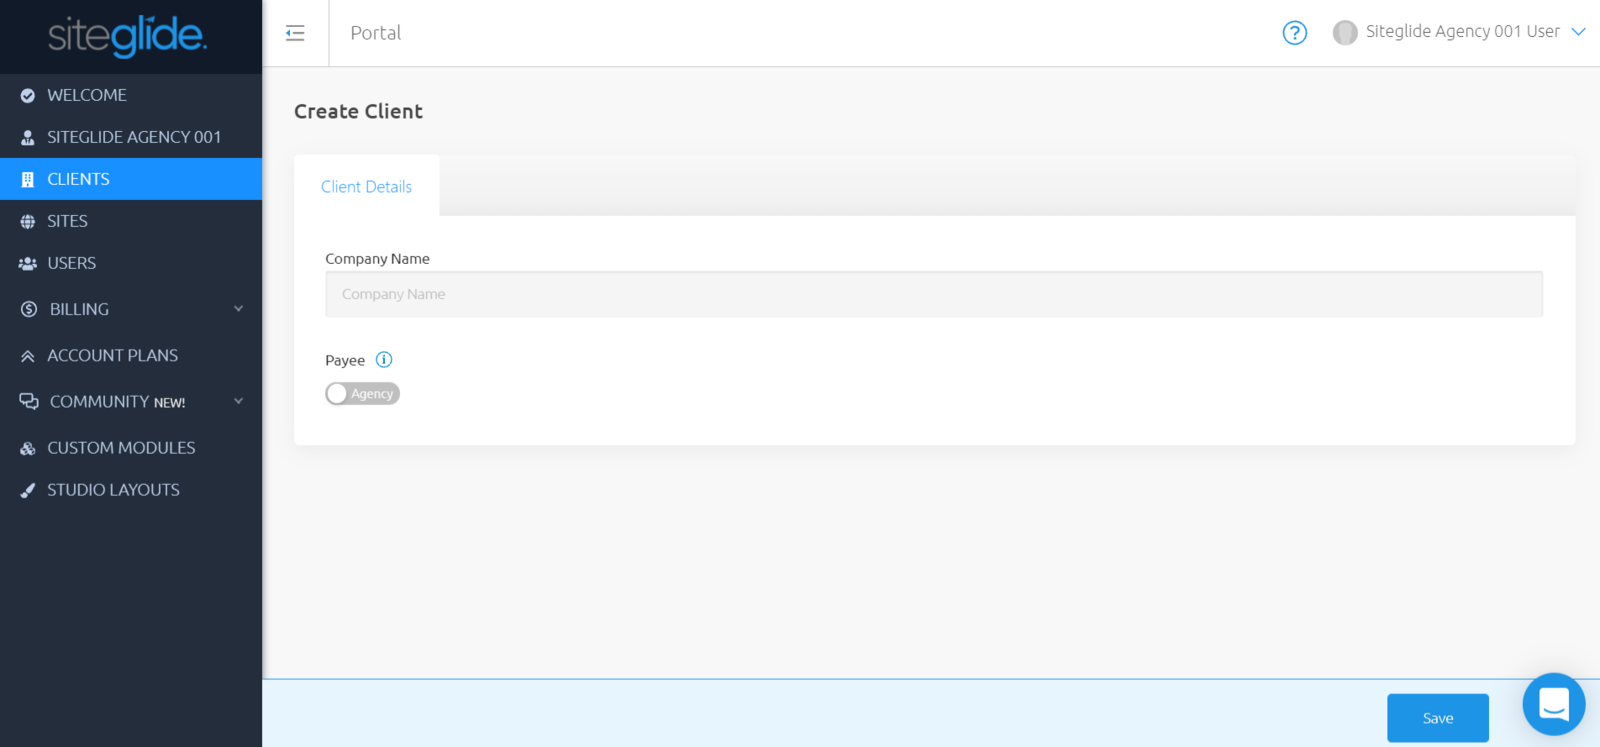
Here, you can enter a Company name and select the Payee for any Sites put live underneath this Site (Agency, or Client).
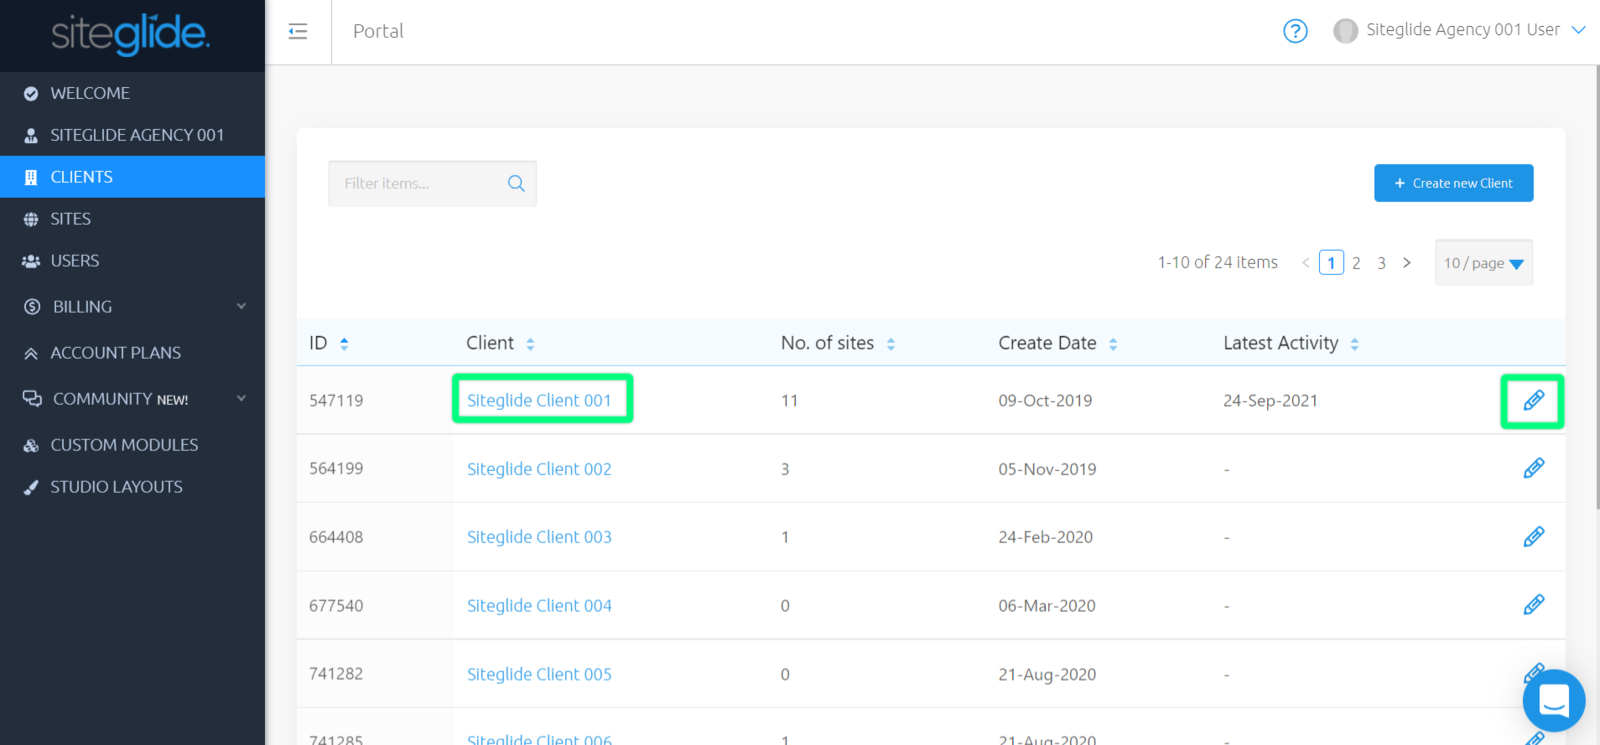
You have now created your first Client. You can edit this Client later on by clicking on the Client name or the edit icon on the right-hand side in your list.
Client Details
When you first click to create or edit a Client, you’ll begin within the ‘Client Details’ tab.
Using the 'Client Details' tab you can manage and edit key details about the current Client, such as:
- ID - Unique identifier of the Client, the support team may ask you for this.
- Latest Activity - Last date and time this Client was created and edited
- Company Name - Name of the client company within your Siteglide Portal, which can be edited.
- Agency - The name of the owning Agency of this client.
- Payee - Choose between Agency or Client to pay for any Sites within this Client.

Users
Client users can only see Sites inside their company and cannot see your other Clients, or your own Partner Sites.
From 'Client Details', navigate to the second tab along named 'Users', to view a list of all Users within this Client.

You can find out more information about a User by clicking on the name of the User or by clicking the magnifying glass icon on the right hand side of the list of Users.
This brings up two tabs:
* Sites
Inviting Client Users
Once the Client has its first user, your Client can add others themselves.These users will have access to only the sites created within this Client.
Once clicked, enter in their name and email address and confirm by clicking the blue button in the modal.
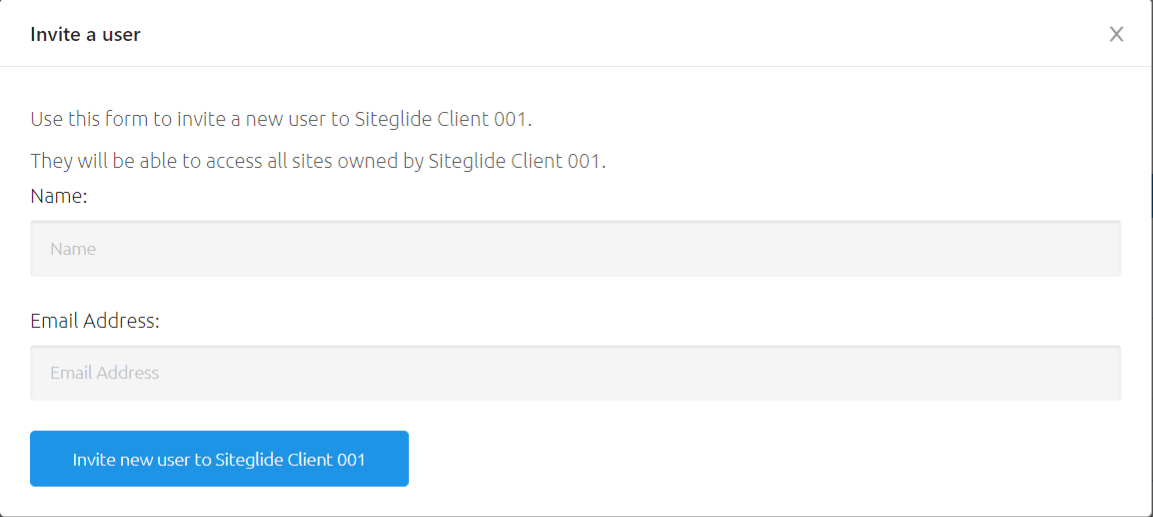
You have now invited a user to your Client!
Changing Client User Access
You can change the user level of any of your Clients by clicking the name of any User and choosing between 'Client Standard' or 'Client Restricted'.
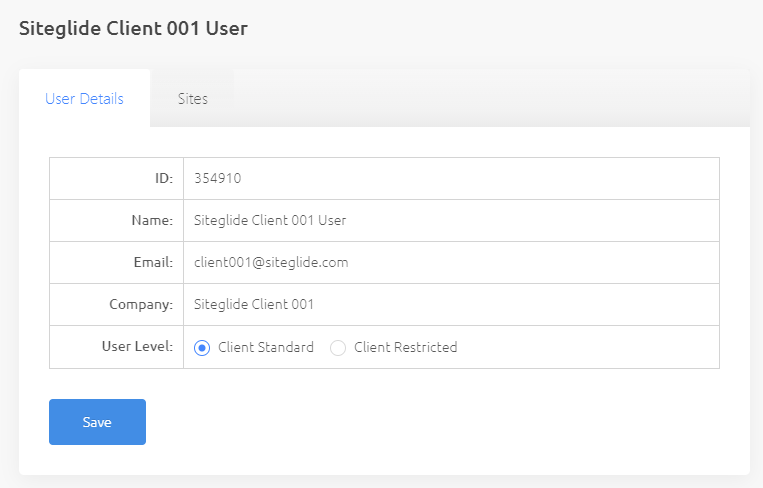
There are difference between these two access levels, which are:
Client Standard - When it comes to editing a site, this level has no limitations. They have access to the same features and capabilities as you do
Client Restricted - This level comes with the following restrictions:- Cannot delete anything- Cannot edit structures (Form, Module, WebApp, eCommerce, CFS)- Cannot see 'Site Manager'- Cannot use File History tab on Page Edit- Cannot see Marketplace (or install Modules via Site Details view)
- Can view Domains - Cannot edit/add/delete
Sites
From 'Client Details', navigate to the third tab along named 'Sites', to view a list of all Sites within this Client.
If you create a new site or move an existing site to a Client, all Users of that Client will automatically gain access.
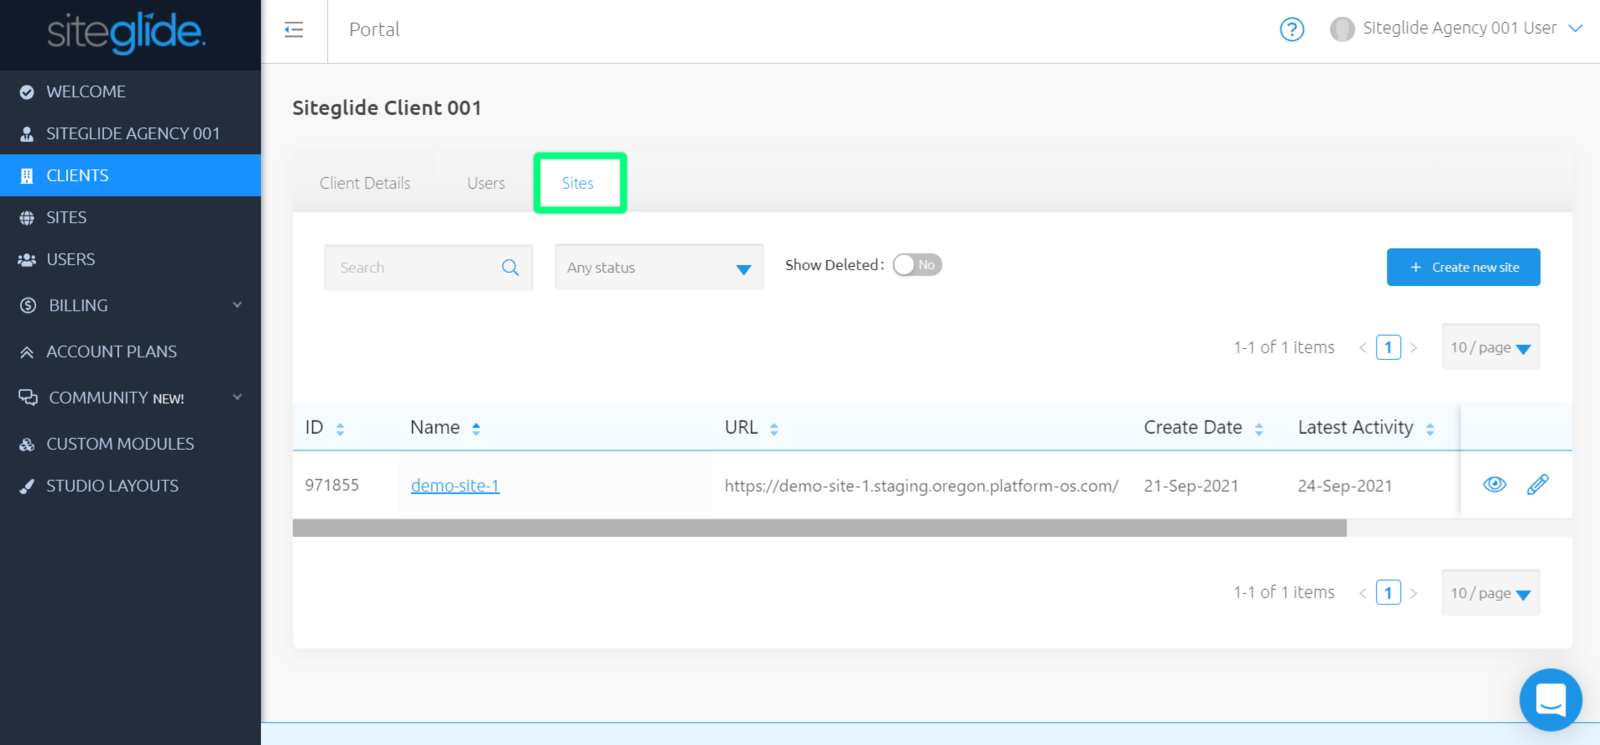
You can find out more about Sites here.
Creating Client Sites
To the right-hand side, above your list of Sites, you can 'Create new site'.
Creating a Site here means it is a Site specifically for only this Client and your Agency to access.
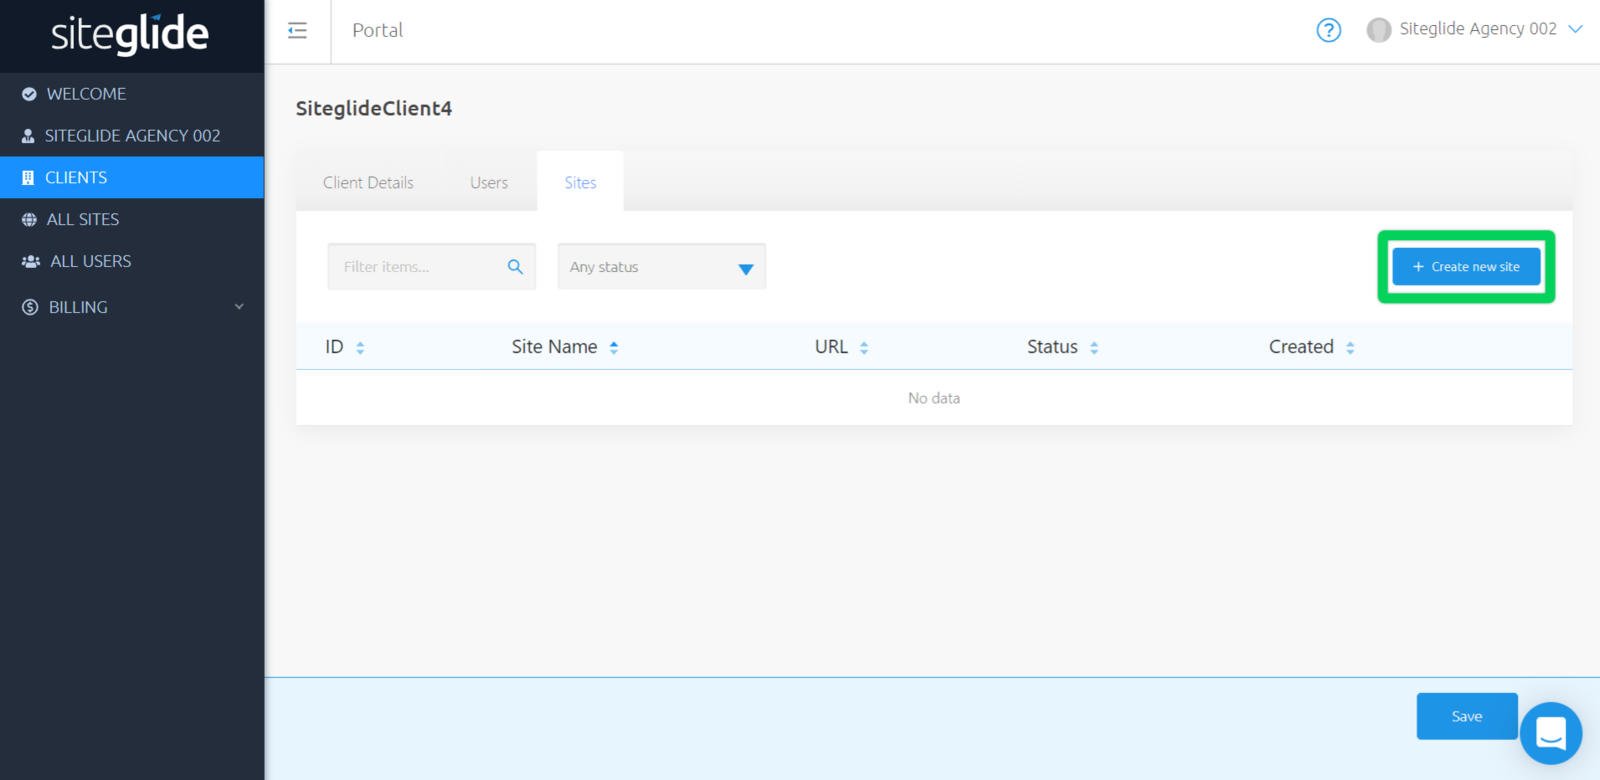
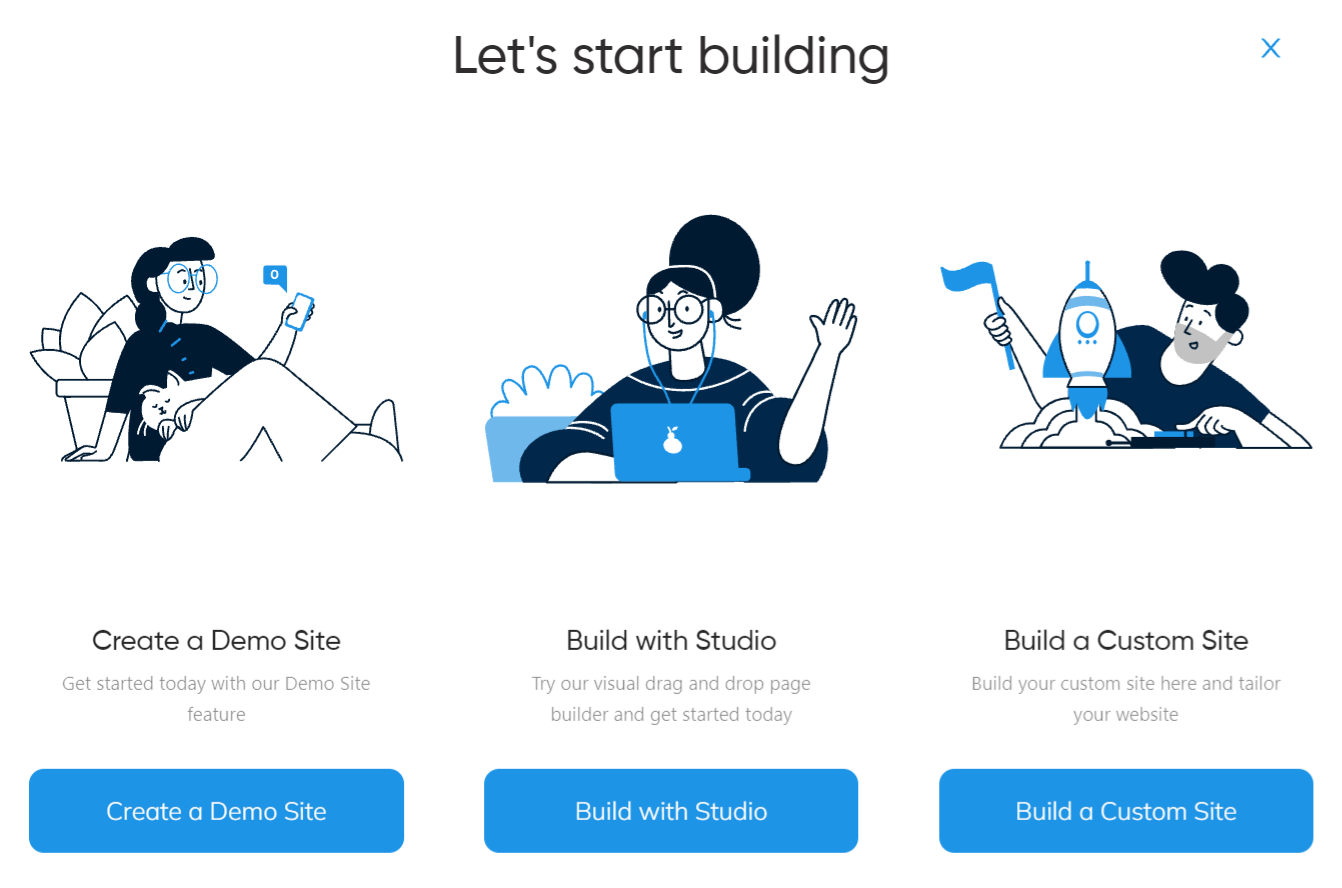
This opens up a modal to choose whether you'd like to create a new Demo Site, build with Studio, or build custom.
Once you have chosen which method you'd like to use, you can now enter information about your new Site.
- Site Name - Enter in a name for this new Site
- Site URL - Enter in the Staging URL you'd like this Site to have (you change your Site Name, and Site URL at any point)
- Choose to toggle on or off for Install Studio, and Install Demo Site.
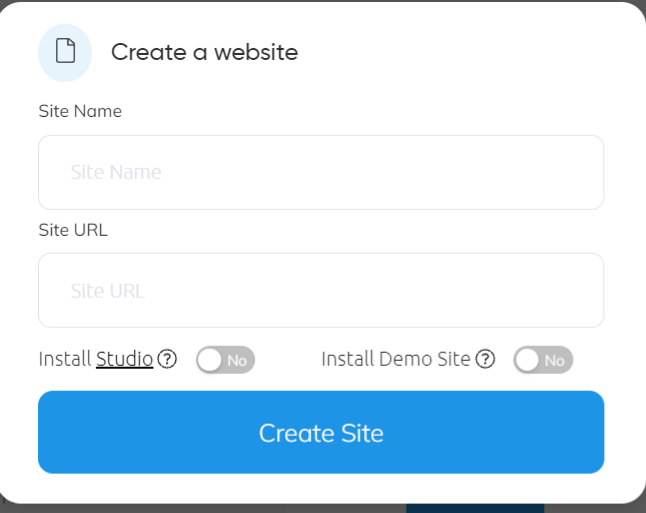
Once you have done this, click 'Create Site', and this will begin to create. An email will sent out when this Site has been created and is ready for you to begin working on.
For more information on Studio, see here: Studio By Siteglide - Introduction
For more information on Demo Site, see here: Demo Site - Full Feature List