

Categories are an excellent method for sorting and grouping content on your Site in an intuitive way.Categories can be useful in a number of situations from segmenting blogs and services to displaying related services on a page due to those items being in the same category.Categories are also used in eCommerce to form product catalogues and groups.
Within this doc, you can find helpful information covering Categories, such as:
- Finding Categories
- Edit Category Settings
- Creating And Editing Categories
- Standard Fields
- SEO Fields
- Items
- Importing And Exporting
- Adding Items To Pages
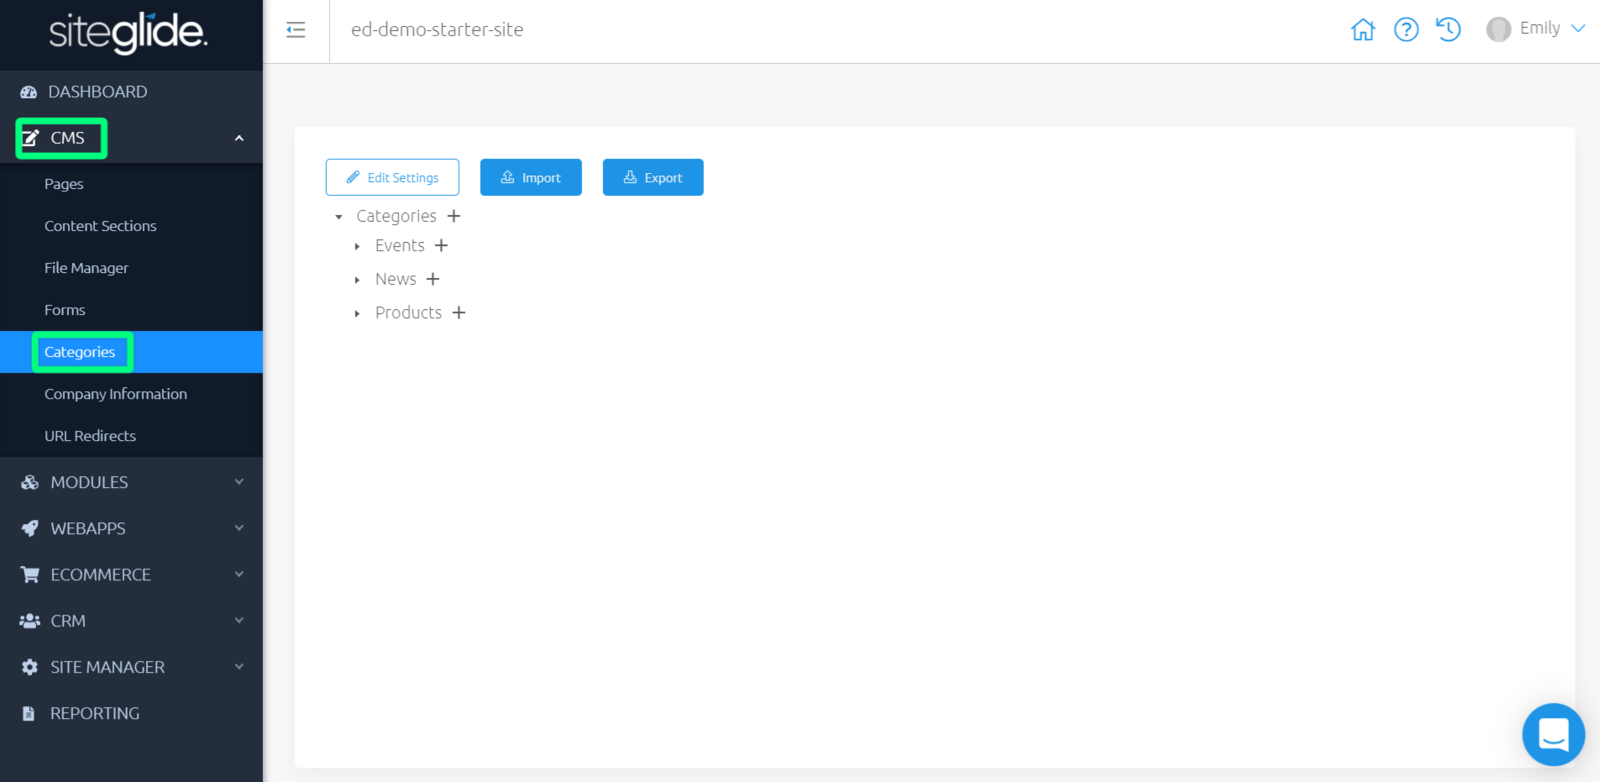
Finding Categories
While viewing your Site Admin, use the left-hand menu to click "CMS" and expand the sub-menu. Next click on "Categories" to view a list of existing Categories on your Site.
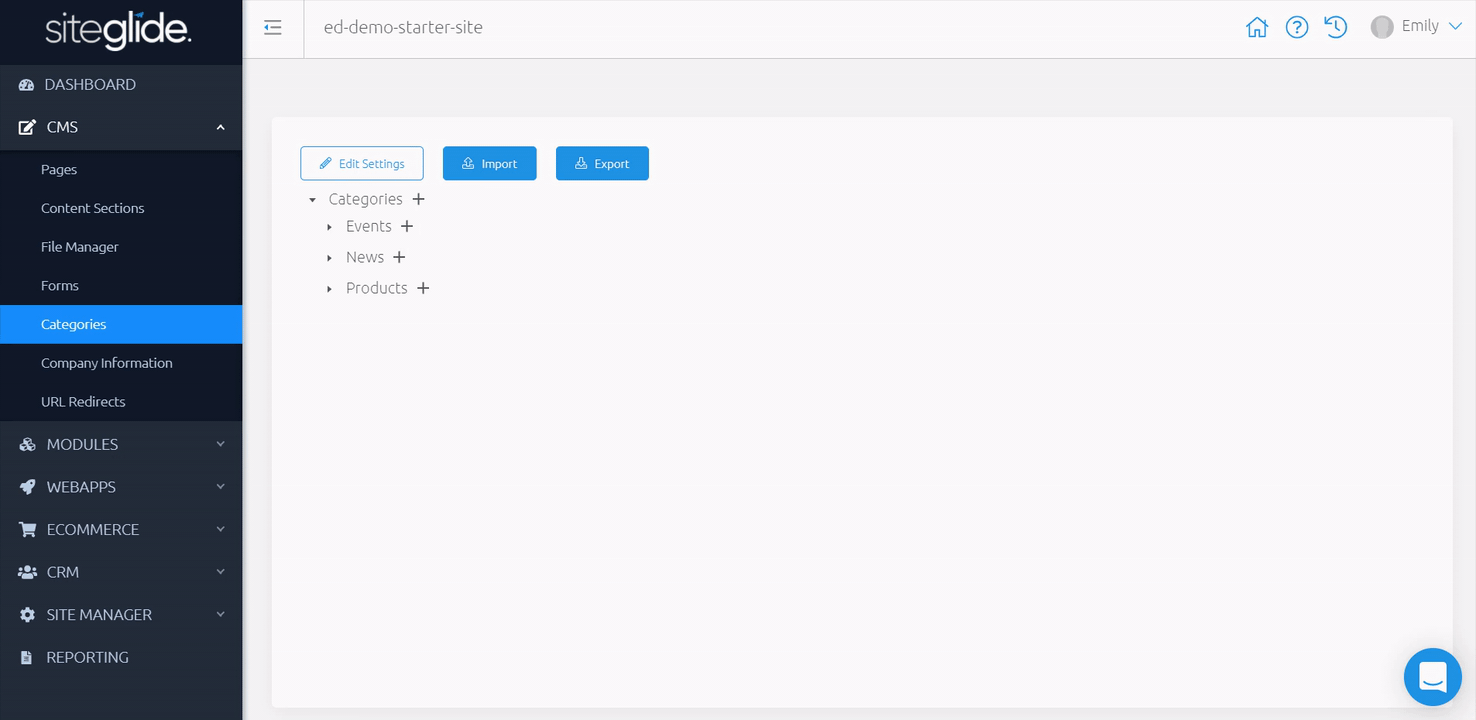
Edit Category Settings
Above your list of existing Categories, "Edit Settings" to manage and edit global settings for your Categories, such as:
- Detail Page Template - See Templates - Getting Started for more information
- Detail Layout - Select a layout to use when in detail view

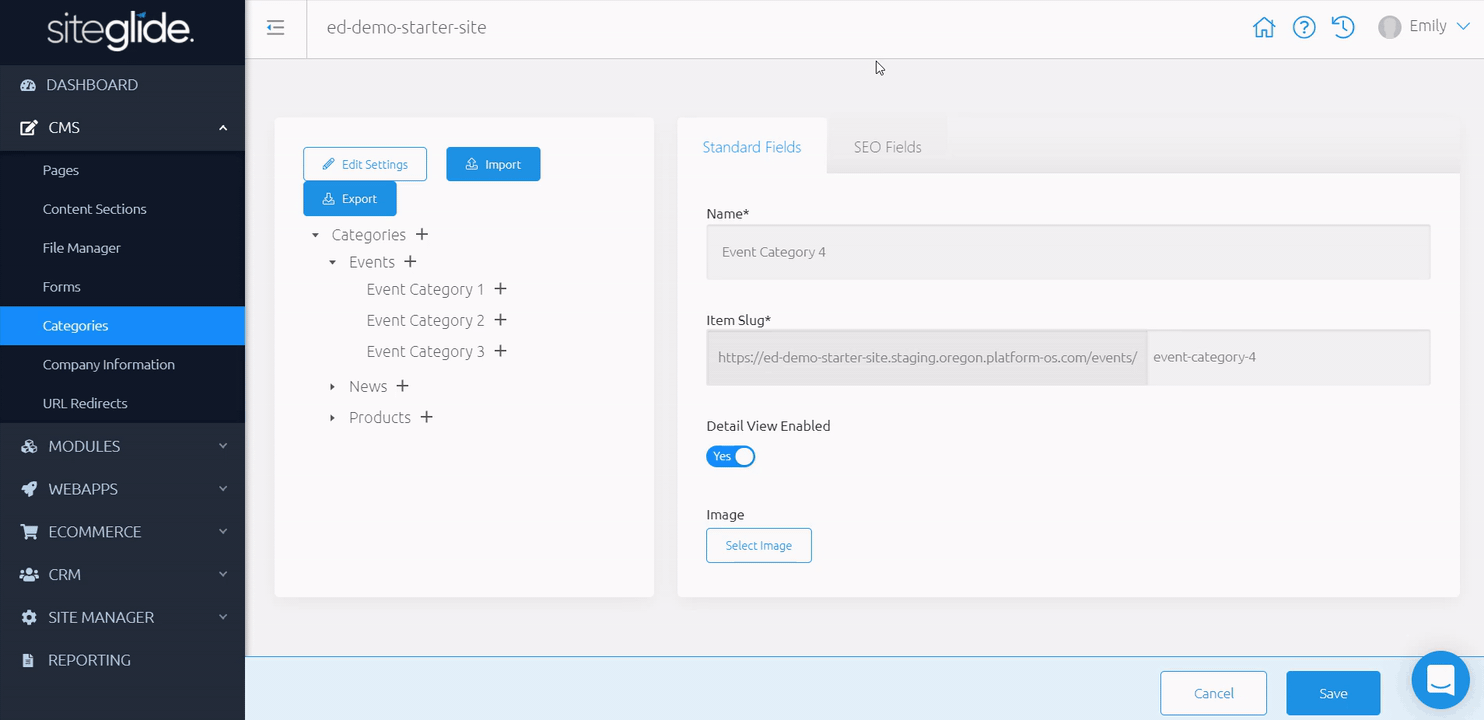
Creating And Editing Categories
Get started with "+" next to Categories, or next to the parent Category you wish to create a child under. You can edit later by clicking a Category name, or the pencil icon next to this.
‘Standard Fields’ will show on the right-hand side, where we can fill in required fields and navigate tab by tab filling in any additional information we’d like to include.
Standard Fields
These fields are the same across all Categories and include the following:
- ID / External ID - Unique identifiers for each item, these appear when you have created and saved a new item and they cannot be edited.
- Name - Name of the Category displayed in Admin and front-end
- Item Slug - (if you’ve enabled detail view below) - URL for this Category
- Detail View Enabled - Enable or disable the detail view for this Category
- Image - Choose an image for this Category
SEO Fields
Navigate to the next tab along, this is called "SEO".
SEO and Open Graph fields are the same across all Categories and help to enhance your Categories and your website, achieving higher rankings.
These fields include:
- Page Title - Choose a title for this Category
- Meta Description - (with an advised character length between 50-160) - Write a relevant meta description for this Category
- OG Title - Choose an Open Graph title for this Category
- OG URL - Choose an Open Graph URL for this Category
- OG Image - Choose an Open Graph image for this Category
- OG Description - Write a relevant Open Graph description for this Category
- OG Type - Choose a type - article, book, profile, or website
- Twitter Card Type - Choose a type - app, player, summary, or summarylargeimage
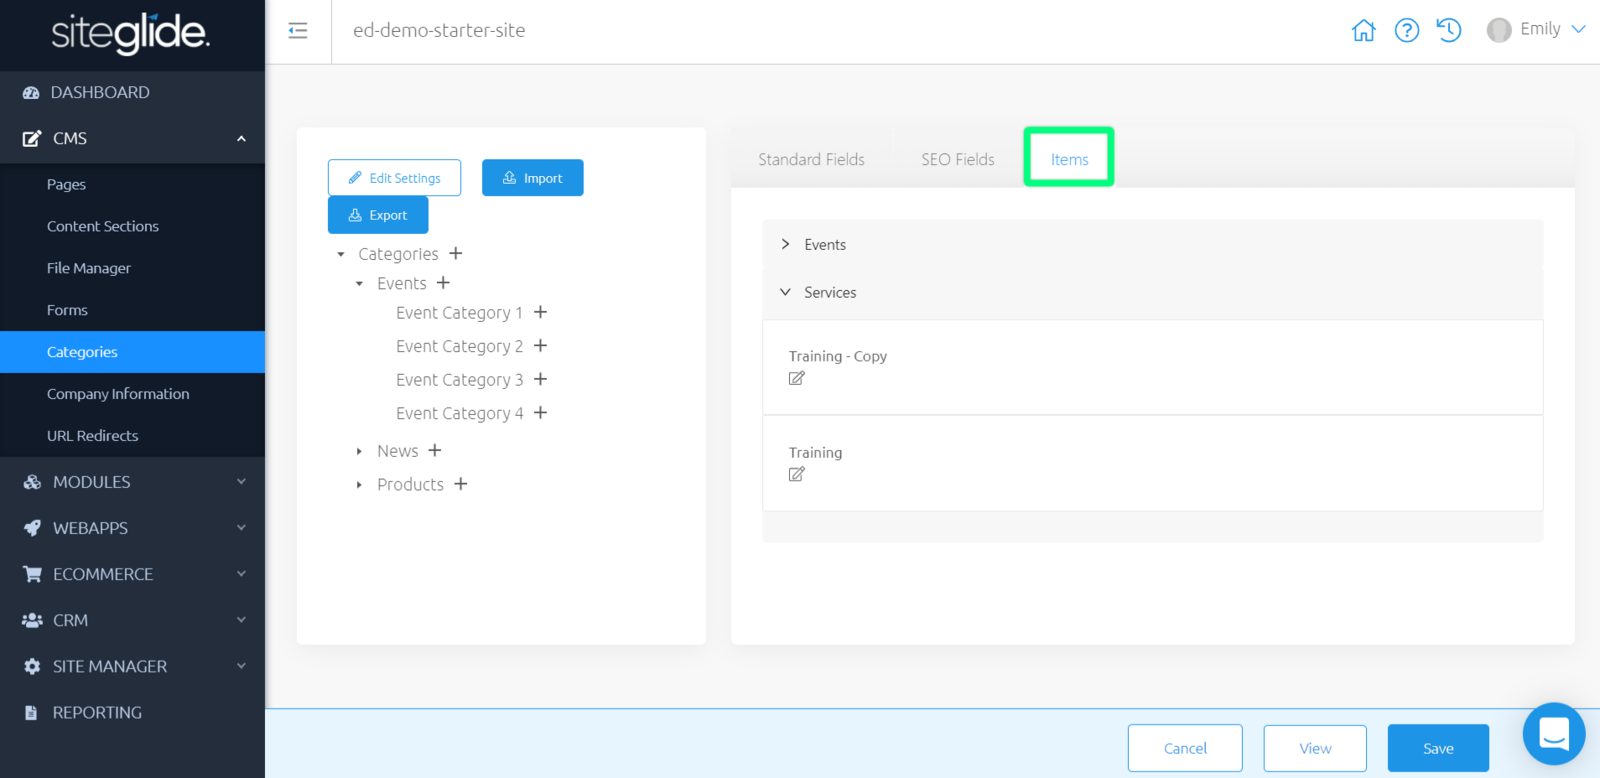
Items
After saving, navigate to the third tab along, this is called "Items".
Here, you can manage all items added to this Category.
If no items show, you can add some.Find out more: Adding Module Items To Categories
Importing and Exporting
Import
Importing CSVs is great for migrating Categories over from other sites to Siteglide; creating new Categories or editing existing Categories in bulk.
Above your list of Categories, you can “Import” to “Download Import Template” , which contains essential columns for you to begin populating with data; alternatively, looking at this template preview in admin will show you which columns are required, and more information about each column to help you populate correctly.
“Start Import” to “Select CSV” and begin importing your items.
A success or error message will appear in the top-right hand corner, and you will receive an email of the success or failure of each import.
If an import fails, you can head to Site Manager > Import Logs to learn more about this failure.
https://image.siteglide.com/RBuE1rmE
Export
Exporting CSVs enables you to manage and edit all existing Categories (leaving the ID column as it is); or export an example Category to help you import Categories correctly.
Above your list of Categories, you can “Export” to download a CSV of all of your existing Categories. This will be processed in the background and you will receive an email of the success or failure of this export.
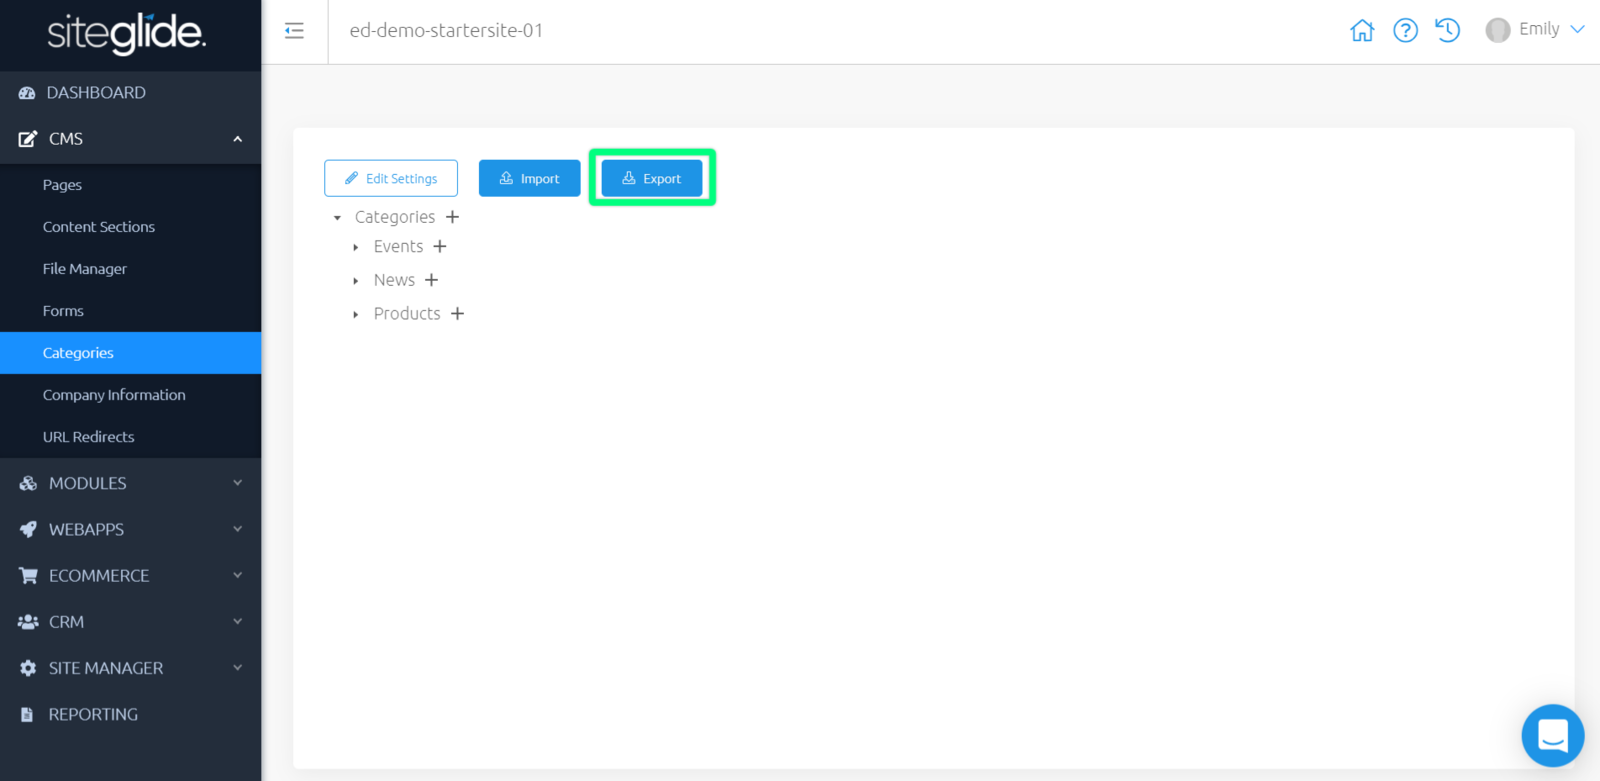
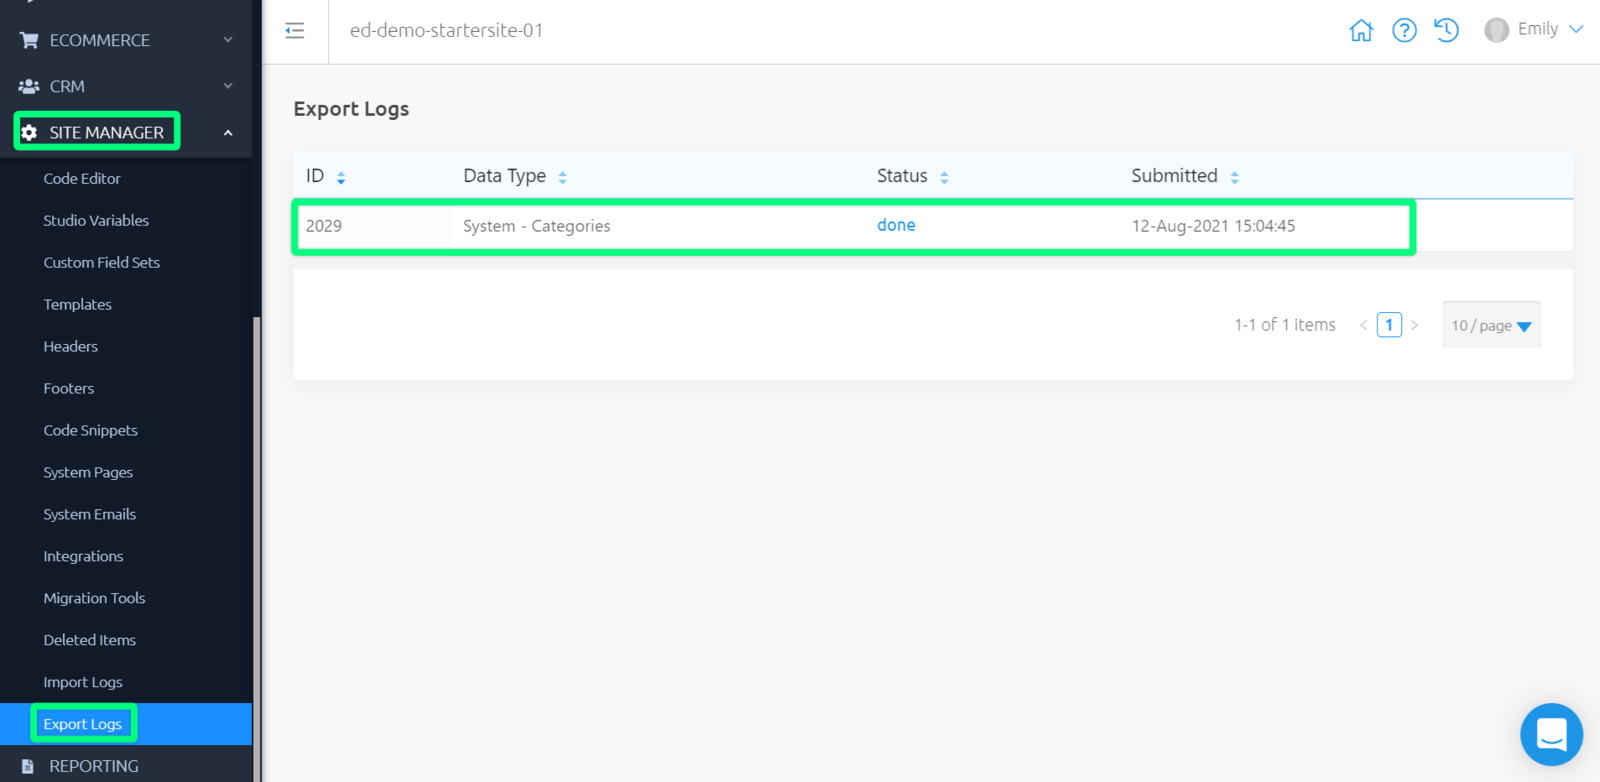
Success or fail, you can head to Site Manager > Export Logs to download this CSV or learn more about this failure.
Adding Items To Pages
Once we have completed creating our Categories, we can start enhancing our site by filtering our WebApp and Module items.
Outputting With Toolbox
Within any Page Code view, Header, Footer, Template, Content Section, and Code Snippet, is a Toolbox on the right-hand side.
The process for filtering WebApp items, Module items and Products with Categories with Toolbox is very similar.
Simply click on what you'd like to output from Toolbox.
Here you can customise what you’d like to output. There are common fields across all items that you can manage, such as:
- Details - Here, you can manage and select what you'd like to output
- Layout - Select a layout to use
- Items Per Page - Default is 20 items, use the provided arrows or type to choose how many items you'd like to output
- Show Pagination - Show or hide pagination
- Sort Type - Select a preferred sort type - Name, Create Date, Last Edited Date, Release Date or Weighting
- Sort Order - Sort your items by Ascending or DescendingOnce you have managed what you'd like to output and how, navigate to the "Categories" tab within this modal.
-
Categories - Select which specific Categories (one or multiple) that you'd like to output from
Click “Insert” to add this liquid include to your Pages, outputting your chosen items.
https://image.siteglide.com/geupJEyv
Would you like to add additional functionality making this more bespoke for your needs?