Prerequisites
- You have followed our Payment Gateway documentation (listed at bottom of this document).
Introduction
With Secure Zones you can grant users access to content that you might want to hide from your average website visitor. This allows partners to store paid content on a site safely and securely. In this tutorial we'll be looking at how you could sell access to a Secure Zone through a Payment Form.
Create a Secure Zone:
Firstly you'll want to create a Secure Zone for the paying users on your site. Make sure you have the Secure Zones Module installed on your site- to do this login to your admin portal, go to "All Sites" then click on the sites name to view its settings, from here locate "Modules" and scroll down to install Secure Zones.
Next you'll need to create a Secure Zone, go back to "Site Details" and click the blue "Admin" button. The menu on the left will contain a "Modules" tab, select this and go to "Secure Zones". Name your Secure Zone accordingly and note its ID somewhere.
Setup a Basic Payment Form:
Before we setup a Basic Payment Form you must have setup and account with one of our supported Payment Gateways.
Read more about Payment Gateways.
Now we need to setup a Basic Payment Form to allow users to pay for Secure Zone access. Go to CMS/ Forms/ "Add New Form". Give your Form a name and add any relevant fields (you may need a password if users will be revisiting this Secure Zone).
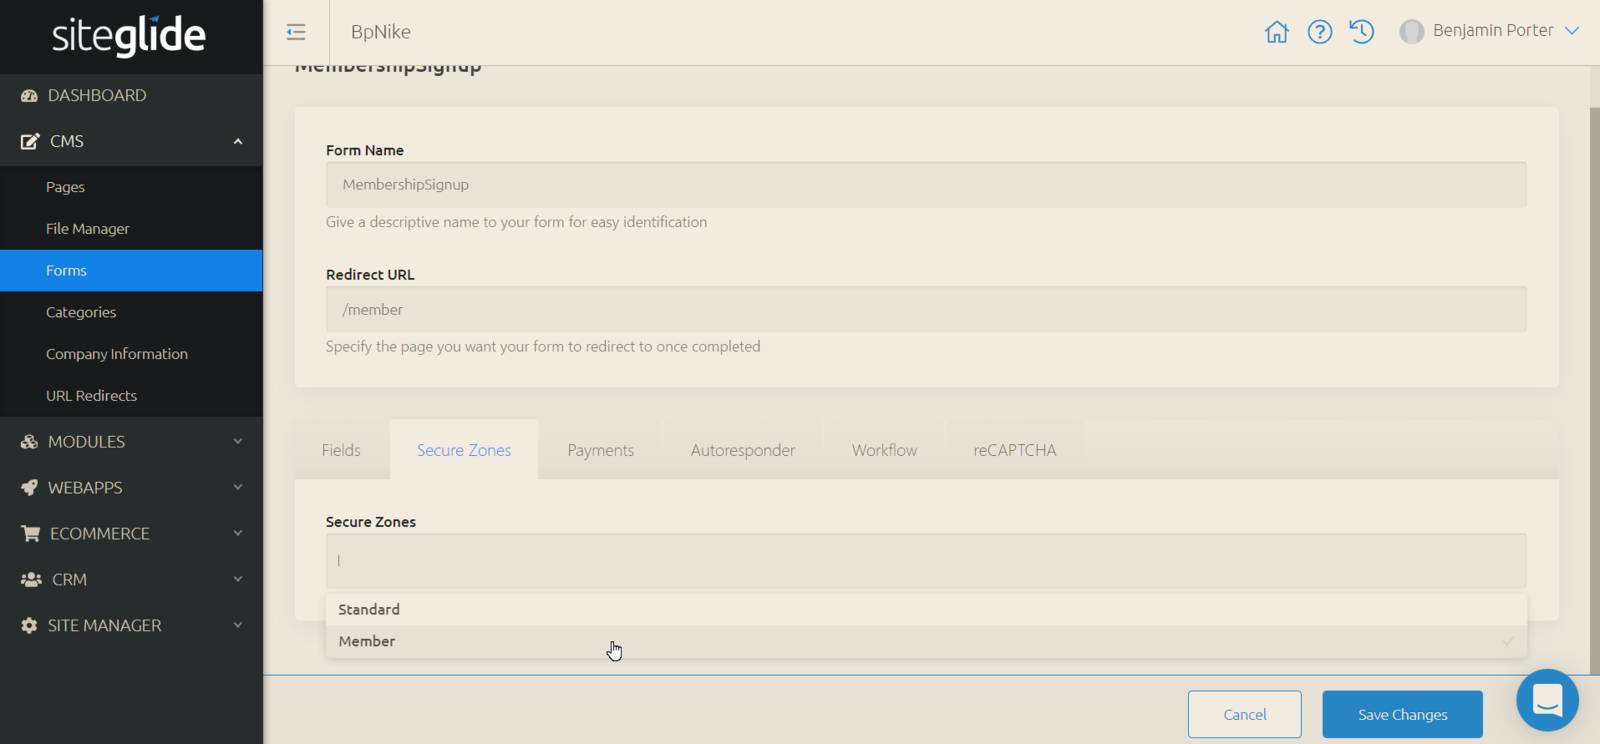
Next we apply the Secure Zone to this Form- so when its submitted users are added to the Secure Zone. Head to "Secure Zones", click the drop-down and select your Secure Zone.
Apply the Secure Zone:
Once a Basic Payment Form has been setup with a Payment Gateway you will need to apply a Secure Zone to that Form. To do this go to:
CMS/ Forms/ "Basic Payment Form"/ Secure Zones.
Locate "Select a Secure Zone" and add the Secure Zone you'd like members to have access too:

Once this Form is successfully submitted the user will be added to that Secure Zone.


