

Introduction
In this tutorial, we'll offer an introduction to creating a GitHub repository and storing a backup of your Siteglide Site within it.
Git itself is a very expansive and powerful tool- we'll only cover a small part of its functionality where it allows you to carry out these use-cases with your Siteglide Site.
If you have any further questions about GitHub or Git, you can find their original documentation here:
- GitHub - https://docs.github.com/en
- Git - https://git-scm.com/doc
Prerequisites:
- You have created a GitHub account
- You have a Site ready to backup
- You have setup Siteglide CLI
Glossary
GitHub themselves will rarely use the word "backup". Let's briefly look at some key terminology:
- Git - A version control langauge
- GitHub - A widely used platform for managing your projects using Git
- Organization - Your Agency's account on the GitHub website
- Repository or "Repo" - A place for storing files relating to a single project
- Local Repository - The version of the repository stored on your machine
- Remote Repository - Often called the "origin" - the version of the repository stored on the GitHub website. This might be ahead, or behind, your local copy of the repo.
- Default branch - Normally an ordinary branch called "master" or "main", this contains the main, up to date, codebase of your Site.
- Branch - Branches can be used to store work-in-progress changes to your Site and much more. They are alternative versions of the code-base.
- Checkout - Make a branch the active branch.
- Commit - Changes to the branch are permanently saved to a commit. Together, commits create a history of changes to the branch and allow you to track changes in the codebase. We'll use these to fulfil the role of "backups".
Creating a Backup using GitHub Commits
Step 1) Create a GitHub Repository
The first step in backing up your Site is to create a "repository" within GitHub, this will be used to store a backup of your Site. Please ensure you've created a GitHub account.
Let's also download GitHub Desktop, we'll use this to create a repository and track any changes within it. Download & install the application above, once it's finished you'll be prompted to log into your GitHub account.
Once logged in, you'll be greeted with this screen:
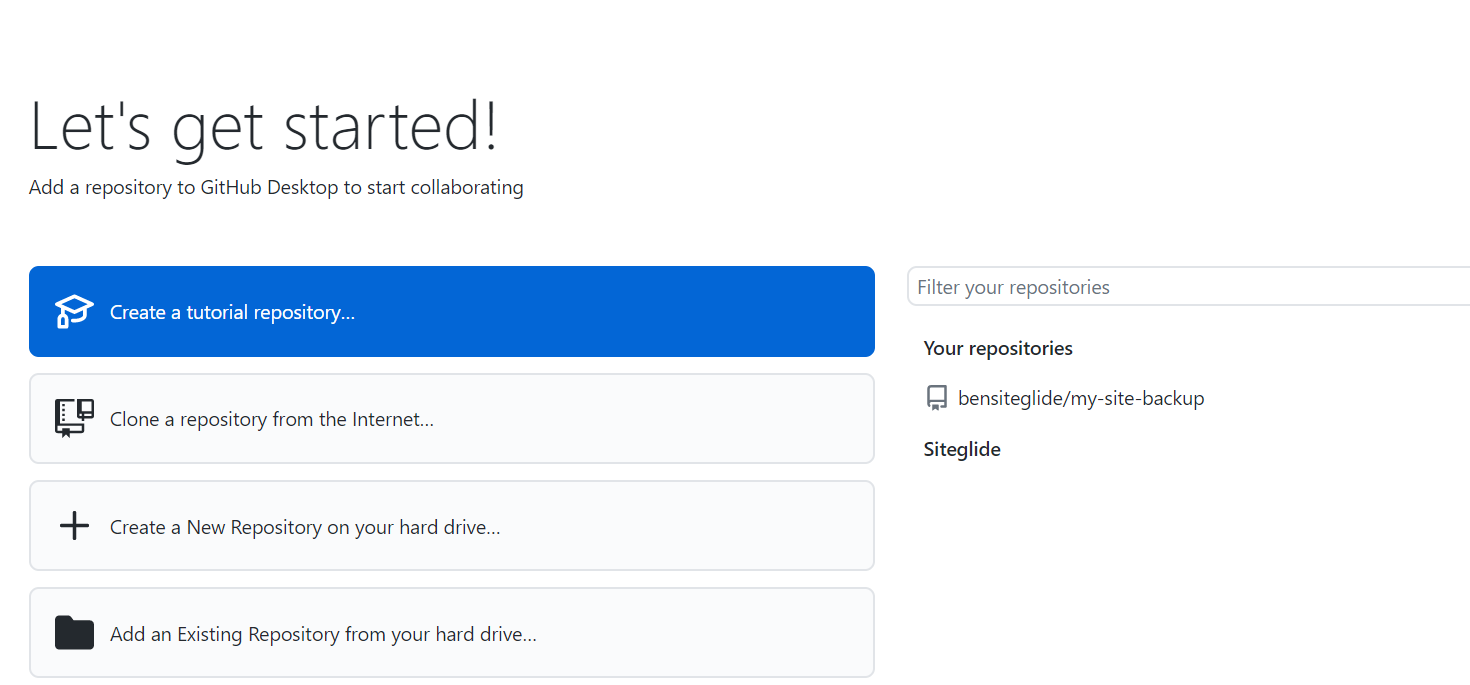
Note: You may wish to complete the "Create a tutorial repository" demonstration as this will explain some of what you can do on GitHub desktop.
Click "Create a New Repository on your hard drive", to open this form:
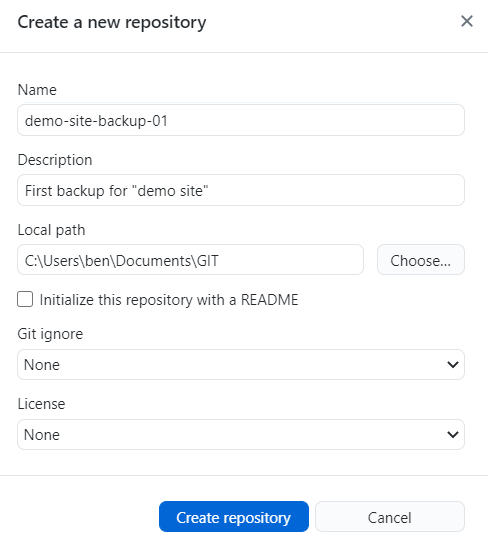
Please name your repository, the name should be similar to the name of your Site, this will save confusion if you have multiple Site backups! Optionally, you can also provide a description for your Repository.
The local path field indicates where the repository will be added to your hard drive. I've chosen to create a "Git" folder within my documents, which stores all my repositories.
Step 2) Edit your Repository using a Text Editor
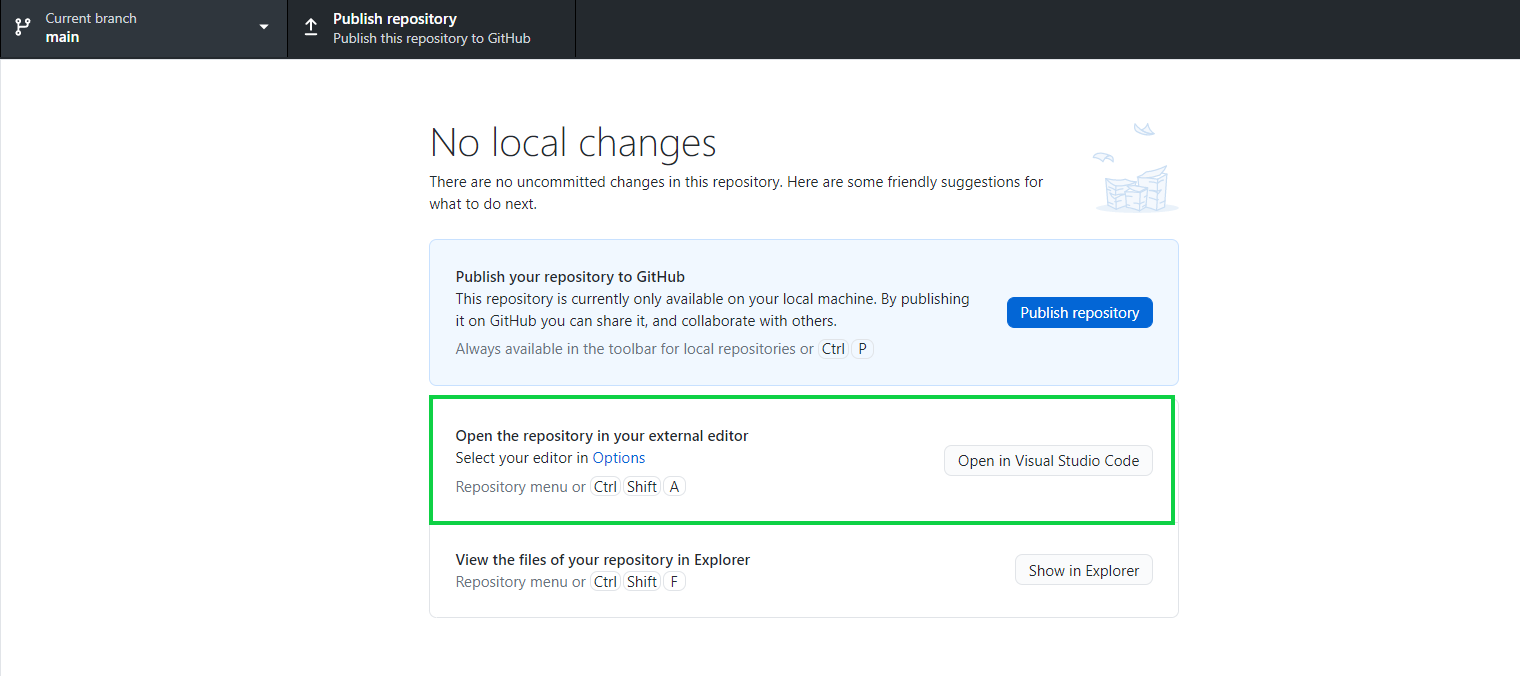
Now we'll need some sort of "source-control" editor, you can use any editor you want- but these examples will use Microsoft's VSCode.
Once you've downloaded & installed your text editor, go back to GitHub Desktop and click "Open the repository in your external editor", this will then open the repository in whichever text editor is specified:
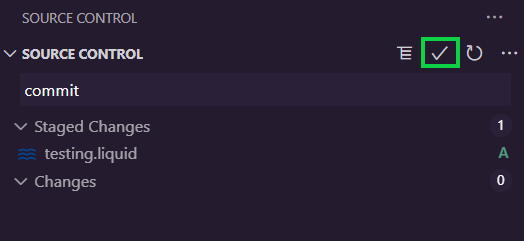
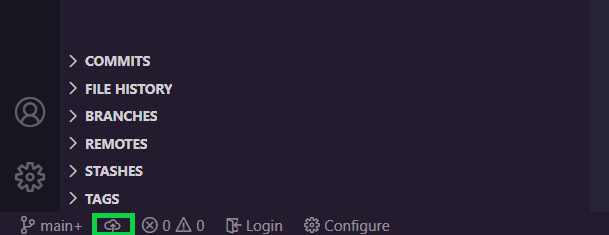
Next, try creating a new file in the repository- after saving you'll see a notification on the "Source Control" tab (highlighted in green):
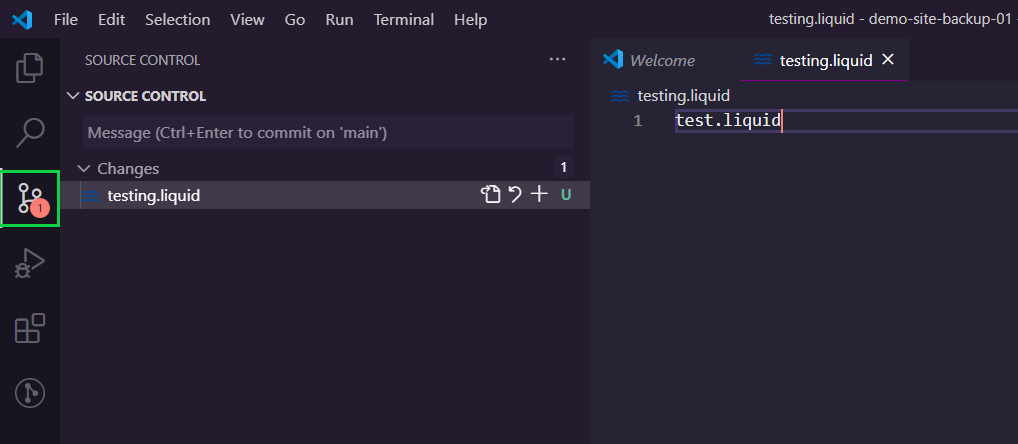
Click the plus symbol next to the change, this will stage the change. Once your change is staged, give your commit a name- something like "test commit".
Finally, use the "Commit" button (highlighted in green) to upload your changes:
Step 3) Pull your Site to the Repository and push changes to the "master" (or main) branch
Now we'll need to use Siteglide's CLI to pull your Site, this will require access to a terminal (luckily VSCode comes with this built-in, however, the windows command line would also work).
Let's open a terminal- this can be done in VSCode by navigating to "terminal" in the top-left menu and selecting "new terminal" from the dropdown, the terminal should appear at bottom of the screen:
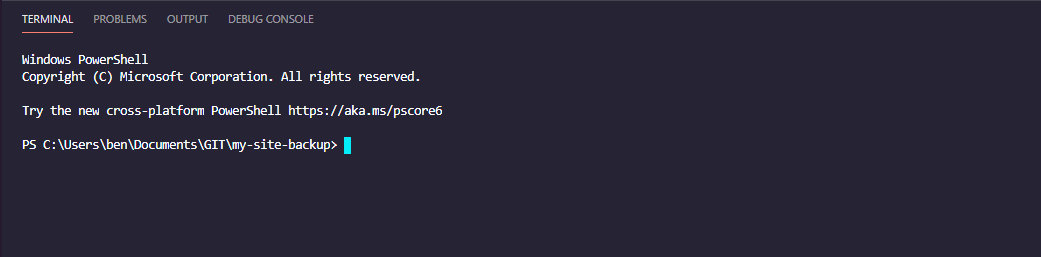
Now we'll need to ensure we're in the correct directory, which should be your GitHub repository folder. In the screenshot above you can see I'm already in the correct place.
If this isn't the case, simply type "cd " followed by the path to your repository, in my case, this would be: "cd C:\Users\ben\Documents\GIT\demo-site-backup-01"
Next, we'll use Siteglide's CLI to create an environment (which gives us access to the Site) and use this to pull the Site.
Please read our Introduction to Siteglide CLI and follow these steps if you haven't already:
Installing and Updating - Install or update Siteglide CLI Commands > Add - Used to add an environment linking to your SiteCommands > Pull - Pull your Site's files to whichever folder the terminal is opened in
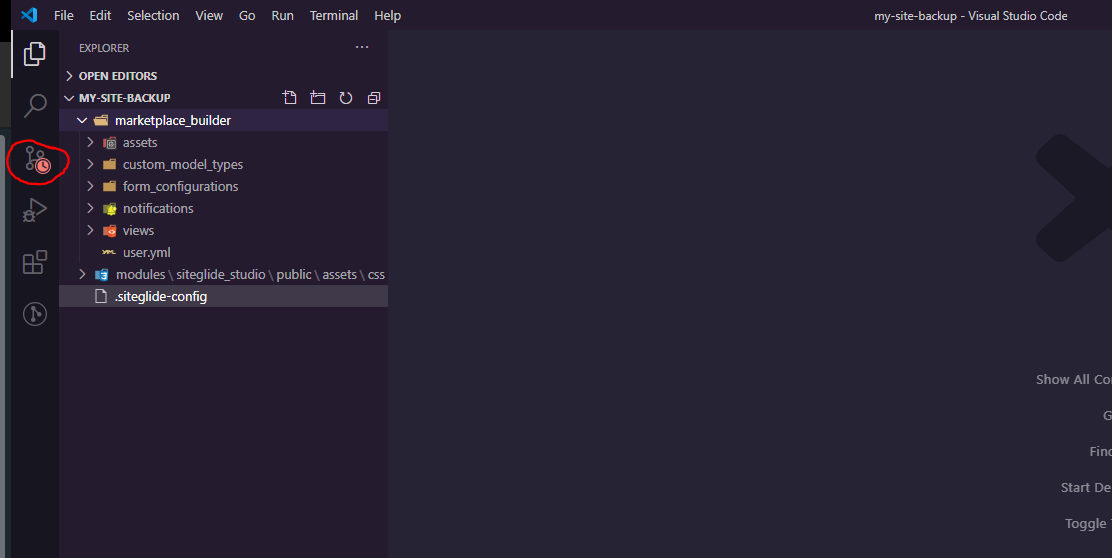
Step 4) Commit changes to the "main" or "master" GitHub branch
Now we'll need to commit our changes to the main branch for your GitHub repository, this can be done in the "Source Control" tab on the left-hand menu (circled in red):
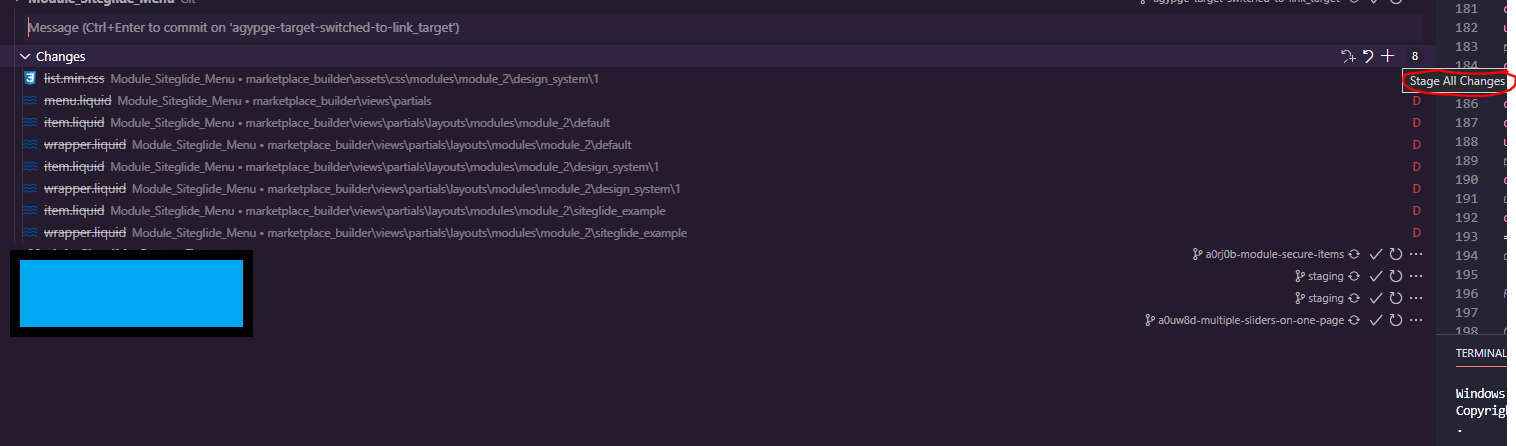
Add all the changed files to the "Staged Changes".
If this is the first time you've pulled the Site to your repository all the files from the pull of the Site will class as "changes"- staged and commit these first.
After this first commit only files changed after the initial "pull" of the Site will count as changes.
Note: All commits will be stored in the currently checked-out branch in the order they were created. Your local repository will display the most up to date code based on all the commits so far, but the commits themselves will exist as snapshots of the repository at the time they were made - should we ever need to look back. This makes them useful as "backups".
You can use the "Stage all Changes" button to stage all the changes quickly:
Lastly, type a message with the "commit" field, this could be something like "my first commit", once you've committed your changes, be sure to "upload" your branch (button highlighted in green):
If you want to edit the Site, create a new branch (make sure you are within the "main" branch when doing this- as we want the new branch to be based on that) and commit any changes to this.
Now we have a backup of the original pull of the Site within the "main" branch, and a new branch to track any other changes.
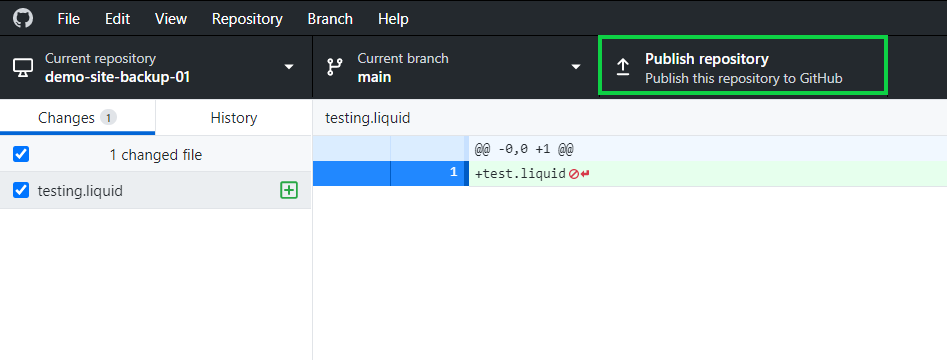
Step 5) Publish your Repository
As we've created our repository within our local files we'll need to upload it to GitHub, locate the "Publish repository" tab on your GitHub desktop:
Clicking this will open the form bellow, from here you can edit some of the repository's information before uploading it, such as "Name" and "Description":
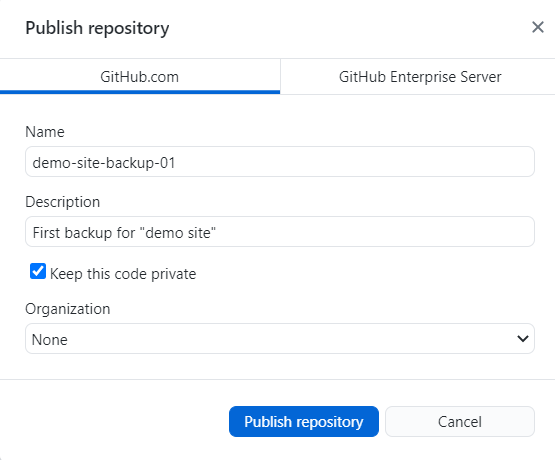
Publication Options
Private
There's also the option of making the repository public (by un-ticking the "Keep this code private" checkbox) however, we'd recommend you avoid this as everyone would have access to the Site!
Organization
We'd strongly recommend creating an Organization on GitHub for your Agency and publishing the backups there instead of on a private account.
The benefits of this are:
- Your repositories will be well organized
- You can control who has access
- When an employee leaves, they won't be the only one with access to the backups!
Backing-up multiple Sites
If you have multiple Sites to backup, you'll need a new Repository for each one.
Note: This is because having multiple of the same files within one Repository will cause GitHub's file tracking to get confused!
Please revisit step 1 "Create a GitHub Repository" to repeat this for your other instances. On step 3 "Pull your Site to the Repository" ensure you use the "cd" command within the terminal so the targeted directory is your newly cloned repository.
Accessing the Backups
So you've stored the backups in GitHub, what will you need to do in the future if you need to access them? We'll explain how in the next Article:FAQ - How to access previous versions of your Siteglide Site's code after commiting to GitHub