

Prerequisites
- You have installed the eCommerce Module
- You have installed the Events Module
Introduction
We've linked the Events Module with the eCommerce Module to give you full functionality and flexibility when selling Tickets (or other Products) related to Events.
In this Article we'll show you how to:
- Link together Products and Events in the database
- Output Product Layouts within your Events Layouts via datasource
- Control the Availability of Tickets
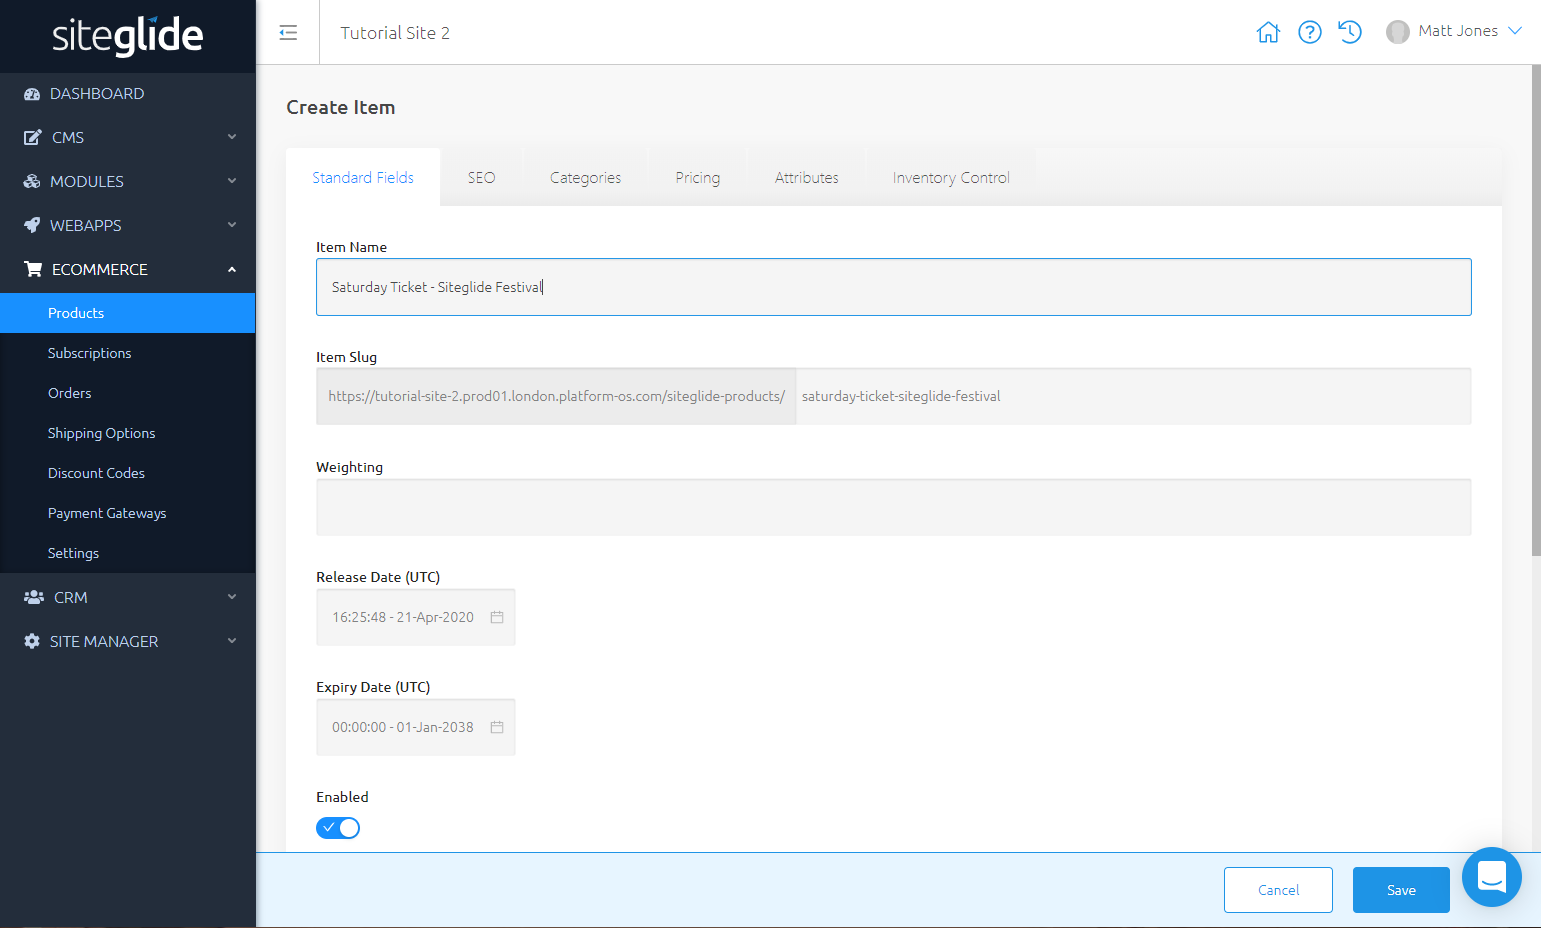
Creating the Products
You can create Tickets for Events in the same way you create any Product in the eCommerce Module. Learn more about adding Products here.
Assigning Products to Events
Once you've created Products, you can link them to Events.
Add or Edit an Event to open its details tab.
In the tickets field, start typing to search and select the Products you want to Link from the options that appear.
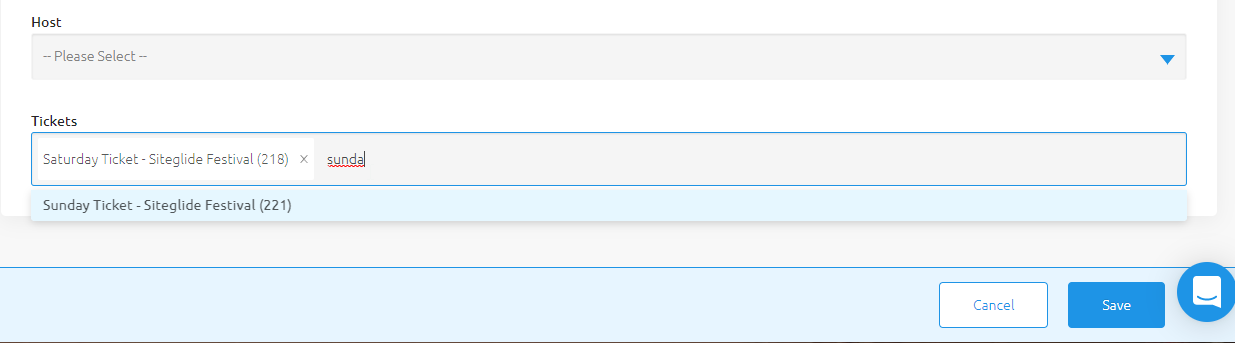
Save the Event to finalise.
Assigning to Categories - Optional
You might choose to keep Event-related Products separate from other kinds of Products on your Site, so they aren't displayed on general shopping Pages.
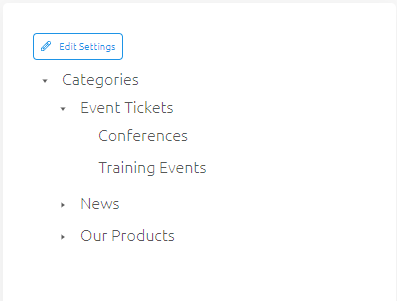
Firstly, head over to CMS > Categories to create the Category Structure you want. In this example, I'll create a root Category of "Event Tickets", separate from my "Our Products" root Category.
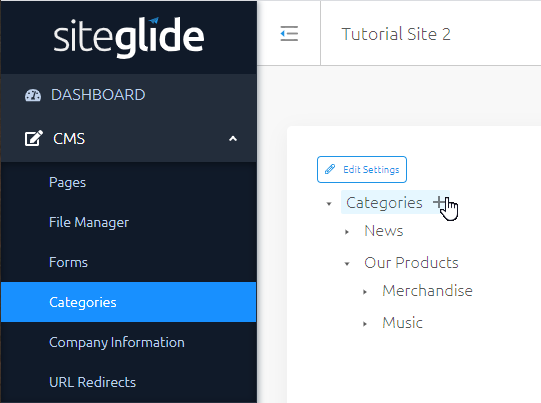
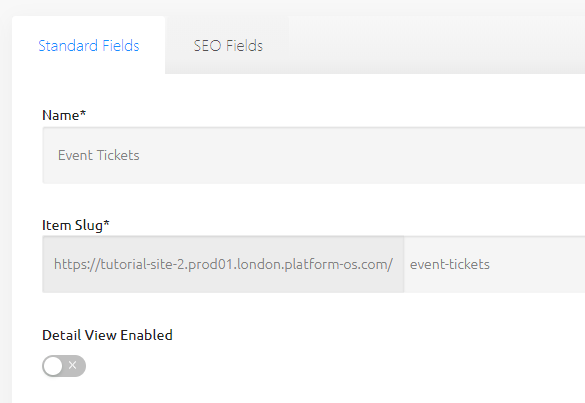
After saving your new root Category, you can add any other Categories you wish inside it.
You can return to edit your Products and assign them to Categories.
As my "Event Tickets" Category has an ID of "215":
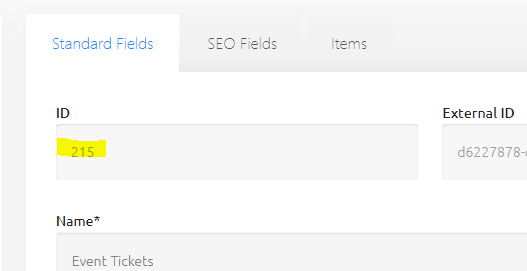
...and any Products assigned to any of its sub-categories will also belong to this Root Category, I can now filter Product List Views to only show Event Tickets. The category_ids parameter should be set to the ID of the Events Tickets Category:
{%- include 'ecommerce/products', layout: "products", category_ids: "215", type: 'list' -%}
In order to exclude Event Tickets from other Products Lists, you'd need to organise those other Products under other Categories, and add those Category IDs to the category_ids parameter instead.
Outputting data-sourced Products in the Layout
You can output Product List Views in your Events List or Detail Layouts.
First, you'll need to find the IDs of the data-sourced Products and convert them from an array to a comma-separated string.
{% assign ticket_ids = this['Tickets'] | join: "," %}
Add the following Liquid to output the Product List:
{%- include 'ecommerce/products', layout: "products", item_ids: tickets, type: 'list' -%}
You can also add an IF statement to only show the List for Events which have tickets. The full code looks like this:
{% if this['Tickets'] %} {% assign ticket_ids = this['Tickets'] | join: "," %} {%- include 'ecommerce/products', layout: 'siteglide_example', item_ids: ticket_ids, type: 'list', per_page: 20 -%}{% endif %}
Watch this space- we'll be upgrading Module Datasources in the future to make them load faster on your Page.
Controlling Quantity and Adding to Cart
You can learn more about developing Product List Layouts, including how to allow customers to add Products to their Cart, here.
Controlling the Timeline of Ticket Availability
As mentioned earlier, you can use the Tickets field under the Details tag to link to eCommerce Products you'd like to use as Tickets for the Event.
Let's say you have an Event with Tickets- but you want to carefully manage the timeline of the lead-up to the Event, showing first the Event, then hiding the tickets as the Event gets closer. We'll give a quick example of how this can be achieved using the fields available:
- You want visitors to be able to start reading about the Event a long time before it starts- use the Event's
Release Dateto control this. - You want to tell visitors when the Event begins- use the
Event Start Datefor this. - You want to define a window before the Event when tickets start being available to buy; to do this, edit the Product under eCommerce > Products and set the
Release DateandExpiry Datefor the Product to control this. - You only have a limited number of tickets- Use Product Inventory to limit the number available, as explained above.
Related Documents:
- Modules - Introduction
- Events Module - List View
- Events Module - Navigation - Introduction
- Events Module - Navigation - Browse by Category
- Events Module - Navigation - Browse by Host (Author)
- Events Module - Navigation - Browse by Event Dates
- Events Module - Navigation - Browse Events by Keyword
- Events Module - The Map List Layout
- Events Module - Tutorial - Selling Event Tickets