Overview
When you first set up your Site's automation emails, you may find there is a "Via SendGrid" warning for the email in the recipient's mailbox.

This warning means you haven't authorized SendGrid to deliver emails for you, so the mailbox provider considers that sent from SendGrid instead of your brand.
To authorize SendGrid to send emails you need to set up SPF and DKIM for SendGrid on your domain. This is a process also known as email domain authentication.
Setting up SPF and DKIM for SendGrid has 2 benefits:
- your automation emails are more likely to reach the inbox;
- the "Via SendGrid" warning is removed, and your emails are perceived as coming from your brand, instead of SendGrid. This boosts user engagement, as the user is more likely to open the email.
Terminology
Automatic Setup
This option allows SendGrid to authenticate and configure the DNS changes for you in your DNS without needing to add them manually. Currently, only GoDaddy is supported for this setup method.
See the list of DNS providers that are supported by SendGrid's automated setup.
Manual Setup
If Sendgrid cannot automatically finish the setup, you will be taken to the Manual Setup tab where you will be provided with records to add to your DNS manually. If you cannot modify your domain's DNS records, you can email the records to a colleague using the Send To A Coworker tab. The email includes a direct link to the records
Both automatic and manual setup begin the same way with the "Setup steps required for both automatic and manual setup" that follow.
Automatic Security
Automated security is different from automatic setup. Automated security allows SendGrid to handle the signing of your DKIM and the authentication of your SPF with CNAME records. This allows you to add a dedicated IP address or update your account without having to update your DNS records. Find a detailed explanation of how this works on the Sendgrid Documentation.
Automated security defaults to On. If your DNS provider does not accept underscores in CNAME records, you will have to turn automated security off and use MX and TXT records.
If you turn off automated security, you are responsible for managing and updating the MX and TXT records yourself.
Step 1 - Request your Site's Sendgrid Logins from Support
Your site's Sendgrid credentials need to be generated by Siteglide Support.
See below the different options to request the logins:
- Chat Bot: Create a new conversation by clicking on the Chat Bot icon at the bottom right of our website or in the Siteglide Portal.
- Portal Ticket: Submit a portal ticket
- Discord Agency Channel: Message on your agency channel for support
Info Required:
- Site name or ID
- Optional: Additional context to the issue you are facing or reason for requesting logins.
Step 2 - Authenticate Domain
Log in to the SendGrid dashboard using your credentials.
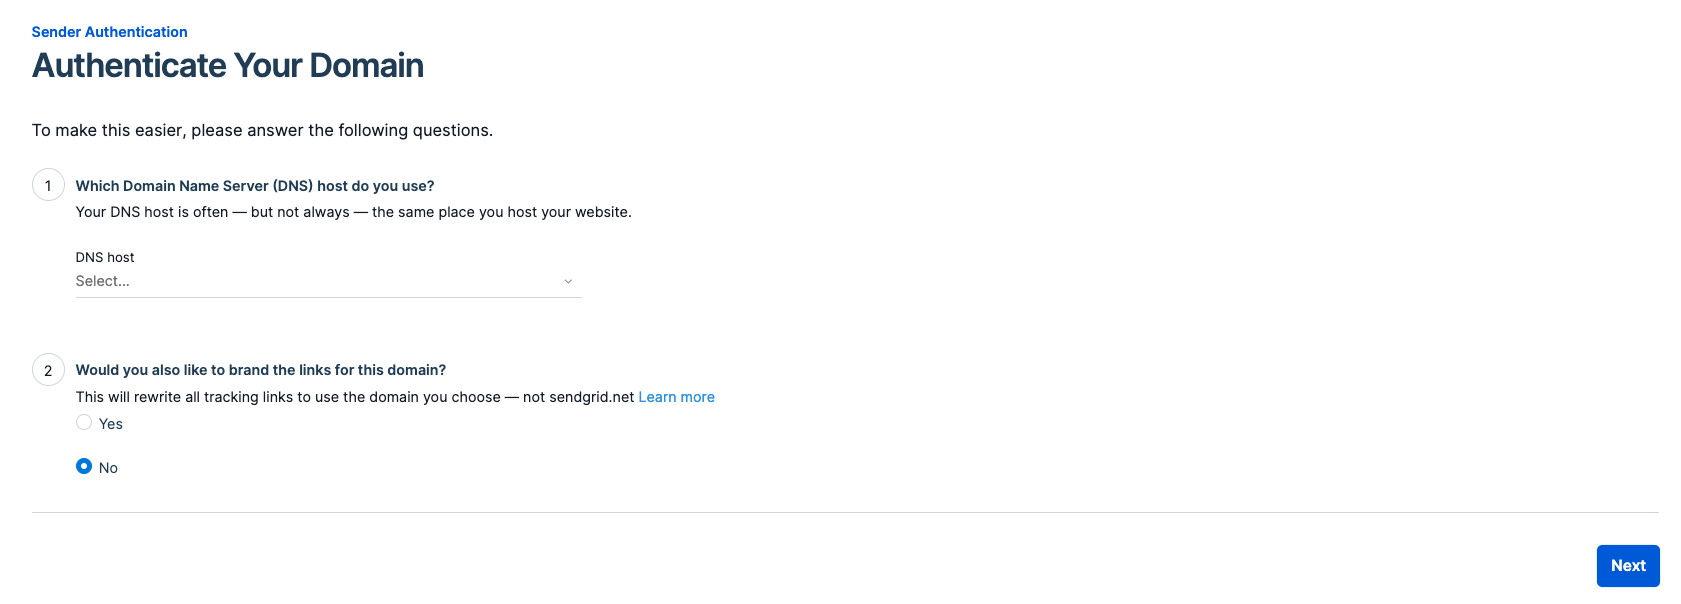
Go to Settings/Sender Authentication/Domain Authentication, and click Get Started.
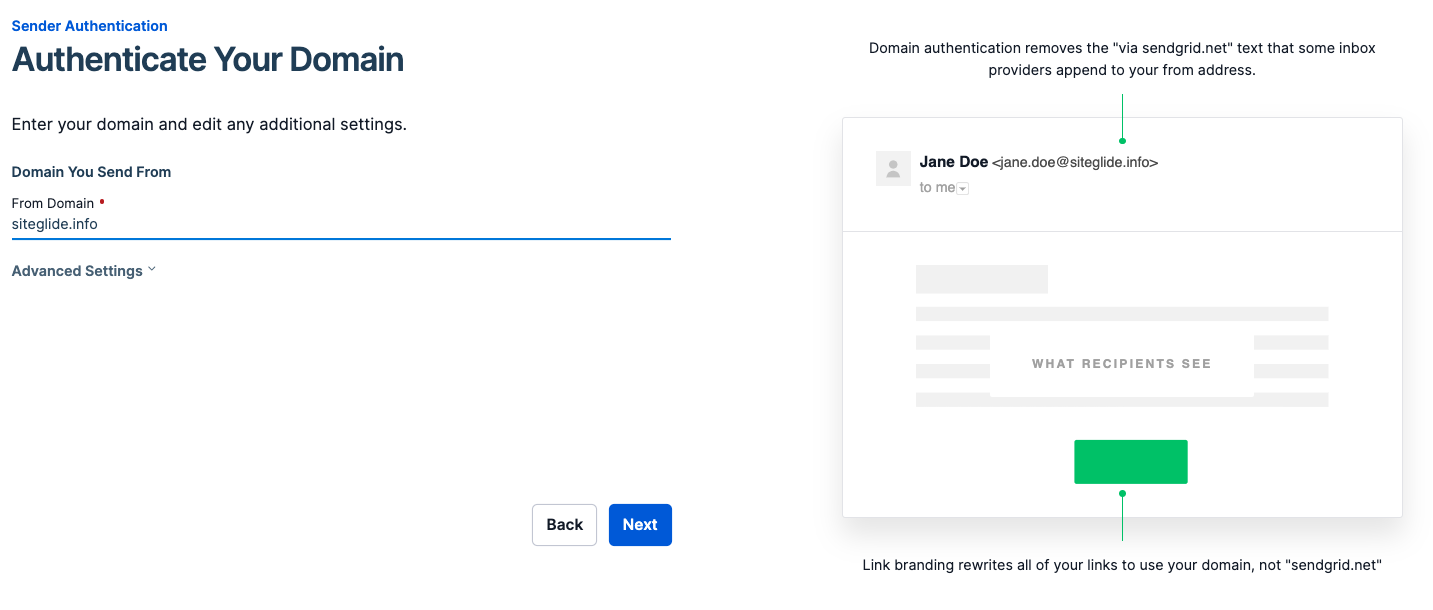
 Enter the domain you want to authenticate (e.g. siteglide.info) and click the Next button.
Step 3 - Add Records to DNS
SendGrid has now created a list of records to add to your DNS including the 2 DKIM records using selectors s1 and s2 respectively.
If you chose the Automatic setup option and your hosting partner is GoDaddy. SendGrid will automatically make the DNS changes for you.
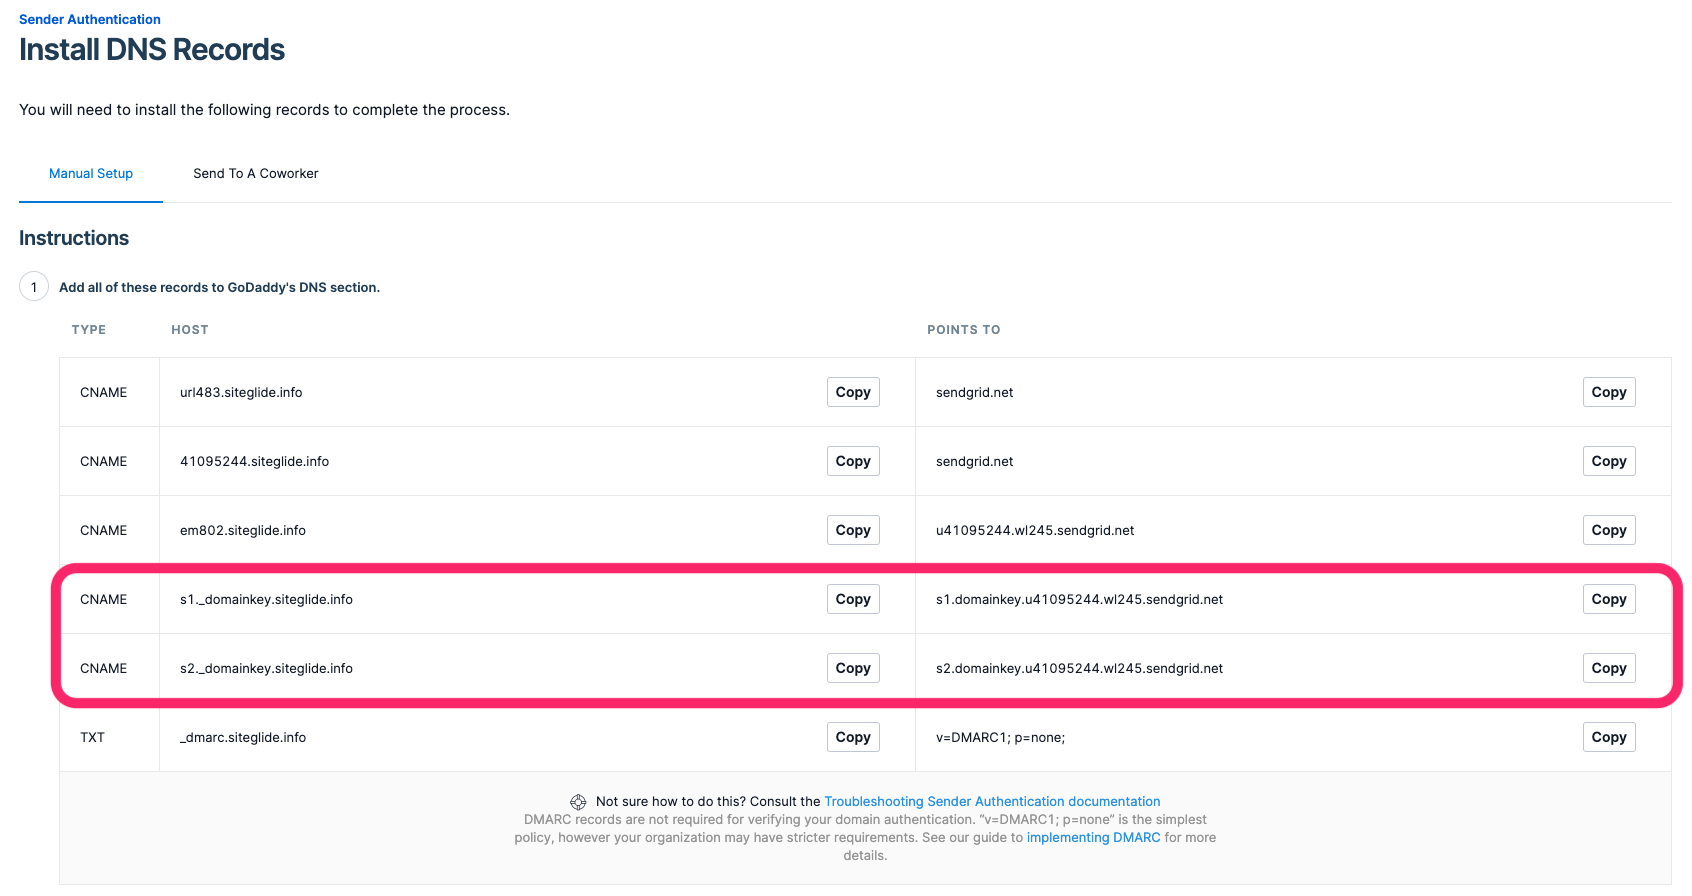
DMARC
Although a DMARC record is provided by Sendgrid, it's not required to verify your domain however is still important for Email Devliery as it tells a participating receiving email server what to do with a message that fails both SPF and DKIM validation.
Please note: "v-DMARC1;p=none" is the simplest policy and organisations may have stricter DMARC requirements. Therefore please confirm before adding or updating an existing DMARC record.
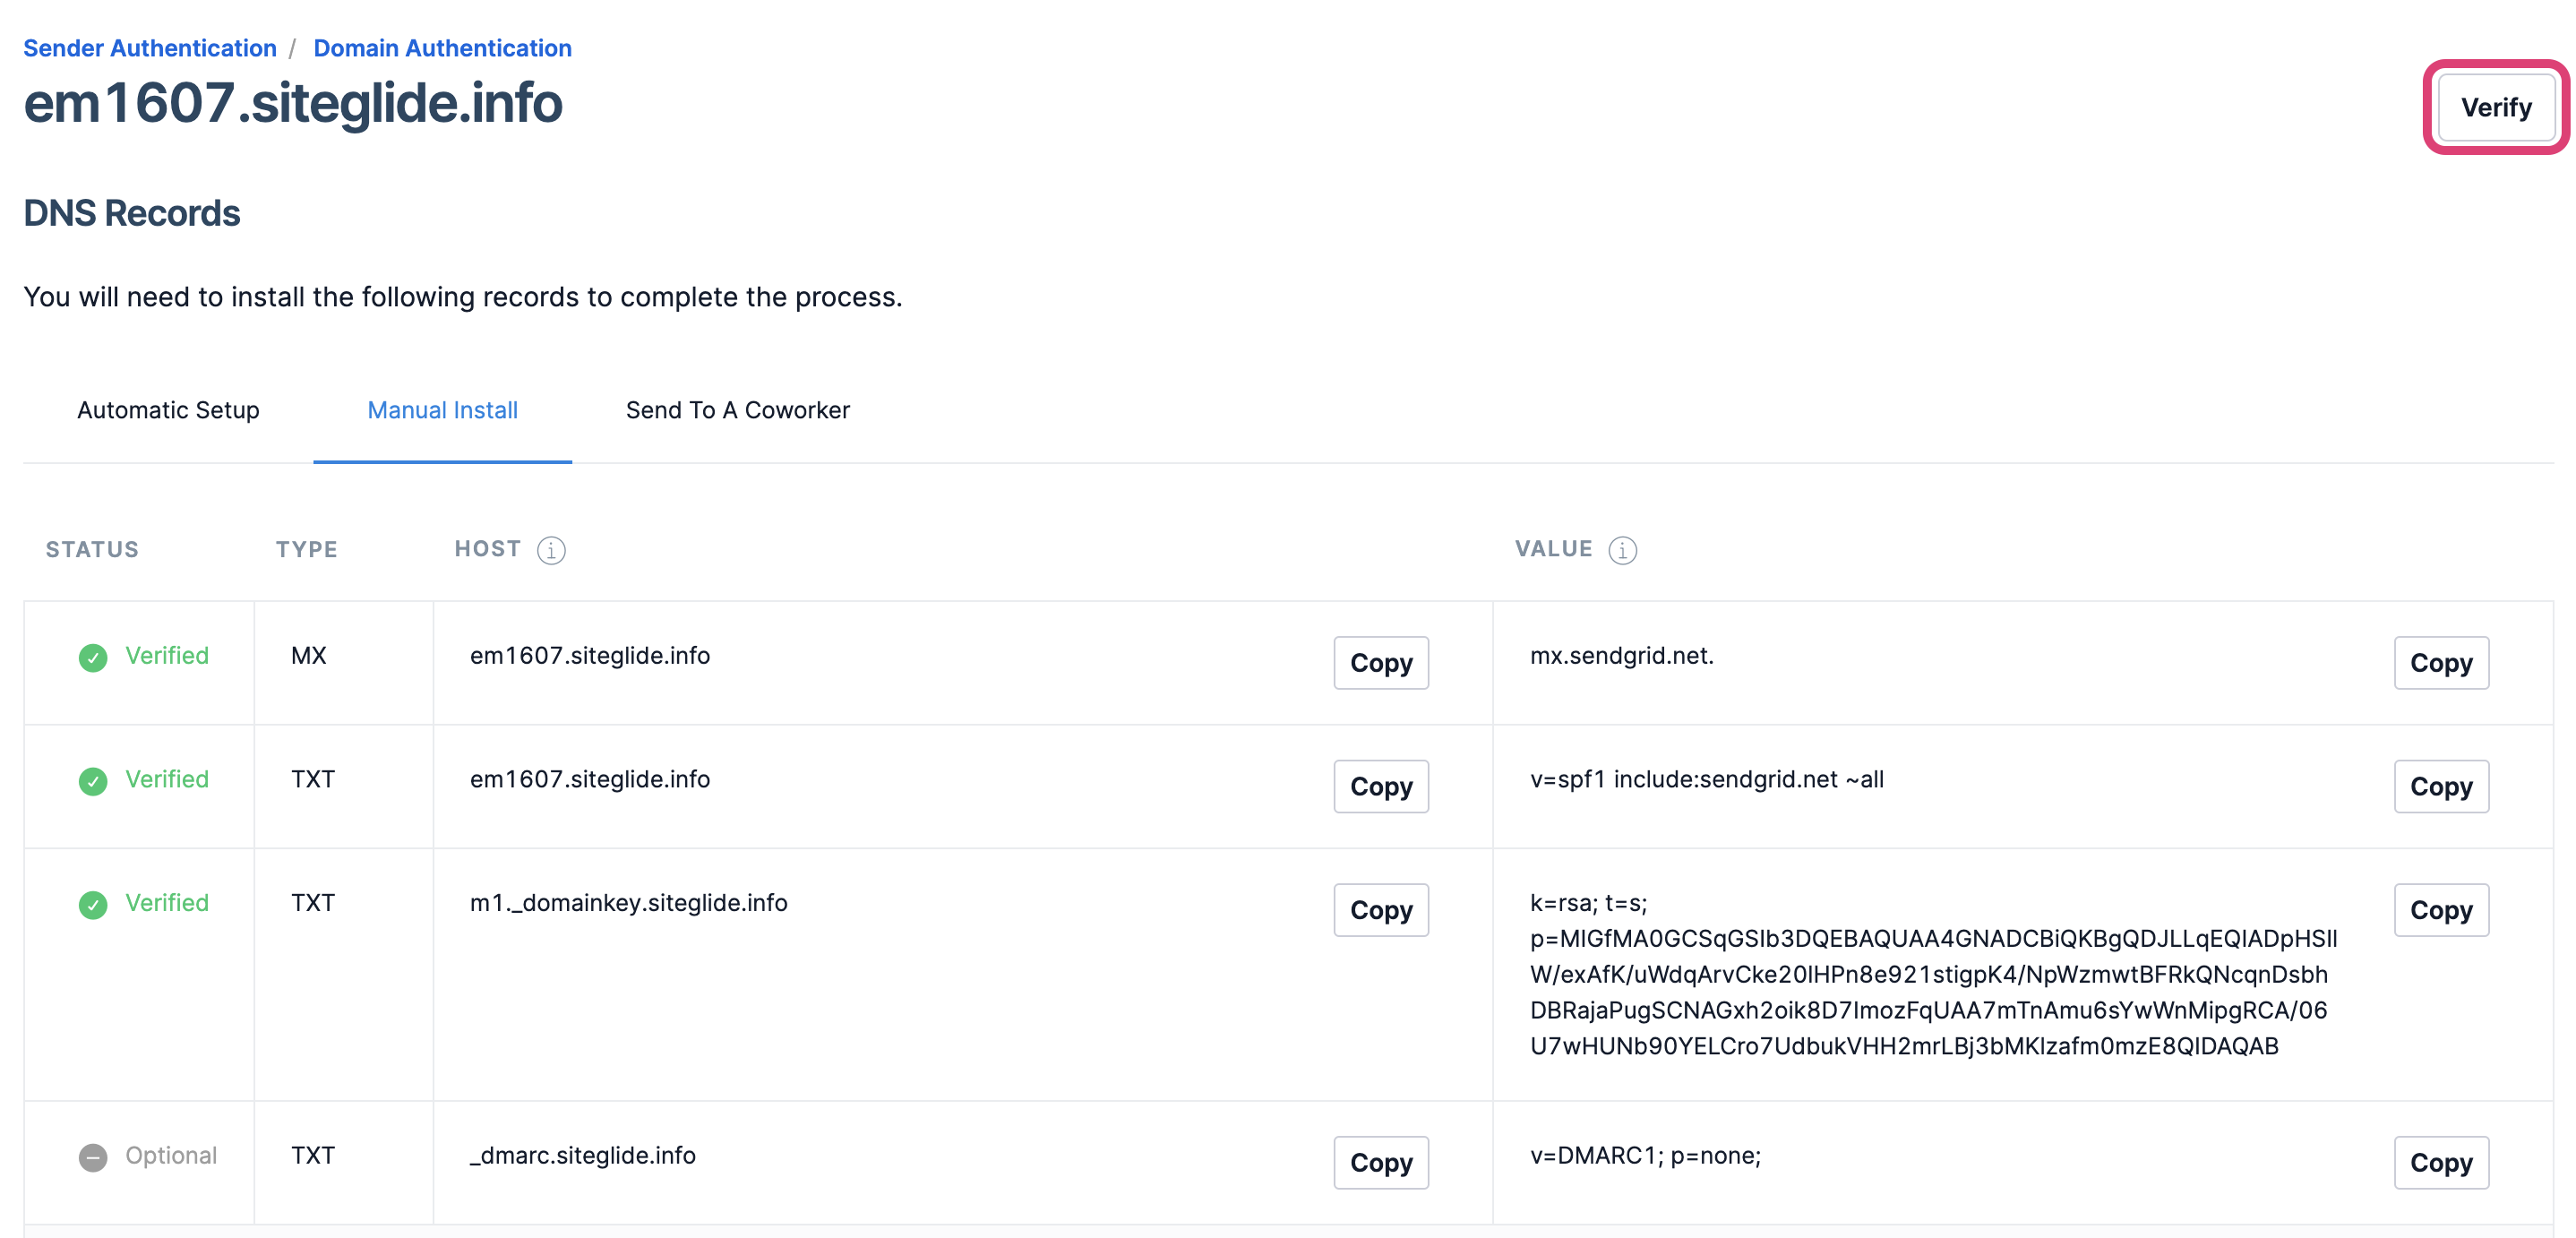
Step 4 - Verify Records in SendGrid
Once you add the DNS records to your domain, return to the SendGrid App UI and click Verify to finalise the setup.
Go to Settings/Sender Authentication/Select the Domain and then select Verify.